It’s that time of year again. Spring. When leggings from last Fall are too short, but it’s not warm enough to pair them with sandals and call them capris.
My daughter is a size 7/8 waist and a 9/10 inseam. It’s so annoying.
To the casual observer, it might seem I’m obsessed with waistbands. I’ve already written two tutorials on the subject: taking in the waist on jeans and adding adjustable elastic. But what about comfy pants and leggings? That, my friends, is super easy.
Materials
elastic
small, sharp pair of scissors
pin, needle and thread
Step 1
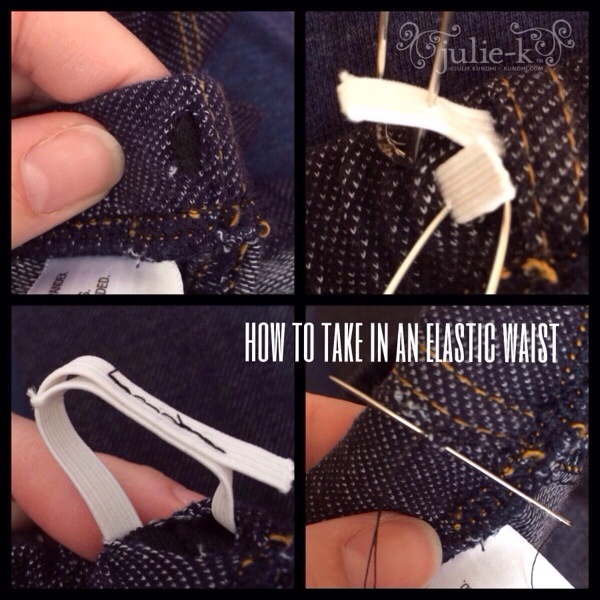
If you can find a seam, grab a seam ripper to open up the waist. So far I haven’t been able to do this. A lot of times the elastic is actually sewn to the fabric. Find an inconspicuous spot and snip a hole.
Step 2
Measure your/your child’s waist size and cut an elastic the same length. Thread it through the casing right along with the original elastic.
Step 3
Overlap the ends about an inch and stitch together—by machine if you’re too lazy to sew by hand, by hand if you’re too lazy to get out your machine.
Now would be a good time to try on and make sure all is good.
Step 4
Stitch up the little hole you made in Step 1. I used to just add a few drops of Fray Check on the raw ends, but my daughter says it’s too itchy.
I’ll be assembly lining a bunch of these tonight. Happy Spring!
