my creative space (a day late)

scarf, bunting and zipper bag

I can’t believe I missed the first Creative Space of 2010! I was so busy last night playing around with my “new yarn” that I totally forgot to write a blog post. Whoops!

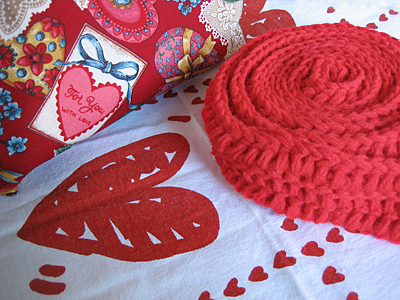
My creative space for today, and most of this weekend, is filled with the color red and lots of pretty hearts. I’m making good progress on my red scarf for Craft Hope. I have to take pictures of a sweetheart zipper bag that I finished up yesterday. And last, but not least, I plan on making a Valentine’s Day bunting out of this tea towel.

I’ve been missing Kirsty’s Creative Spaces and I’m so glad she’s hosting them again. You really should check out all of the wonderful blogs listed!

ripped and restarted

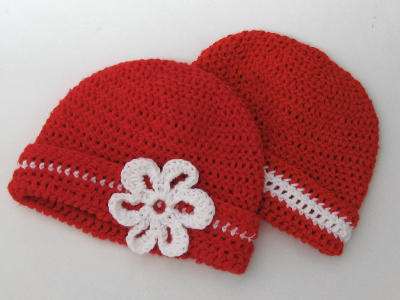
As I’ve mentioned, I have too much acrylic yarn. I decided to start knitting and crocheting my way through it instead of just giving it away. I made three hats for my friend’s students* and then I kind of got sidetracked by my flowers for Haiti.

*Here’s my first hat finished with a flower and my third hat. (Hat no.2 here.)

crochet hat

While on Craft Hope’s website, I saw that they had recently partnered with The Orphan Foundation of America’s Red Scarf Project. I’ve wanted to do this, but always seemed to miss the deadline for some reason or another. I was excited to hear Craft Hope has a special deadline: Valentine’s Day! I grabbed some red yarn (I have a lot!) and got started.

Things were going well until today. I took it to the library to work on while my daughter was in Story Time. I forgot my hook and using a different size was really noticeable. As I sat there with it in my lap, I realized I didn’t like the direction this scarf was taking. I had a dilemma: work through it anyway or rip and start over. I decided to rip.

I restarted it tonight at knitting group. I have nothing to show you except some re-wound yarn balls. I really like where the new scarf is headed, though, and I’m glad I ripped. Hopefully it will be ready for pictures next week.

donate: It feels like I’ve been making a lot of projects for others lately and I promised myself this year I’d make more things for me. It’s just so darn cold outside. I can’t get over the need to bundle everyone up!

a weekend of sweater unraveling

I’ve been thinking about white lately. Not bright white, but ivory, soft white and ecru. I’ve been keeping my eye out at the thrift stores, but all I could seem to find was that yellowish cream. Yuck. I even strolled down the yarn aisles at craft stores, which I haven’t done in a long time. I couldn’t bring myself to buy new. Not when I had so much at home.

Then one day while I was digging around in my stash closet I saw a beautiful, un-felted Gap sweater. It was the perfect color white and so soft: wool, nylon, angora rabbit and cashmere. And it had perfect seams for unraveling (those Gap sweaters always do!)

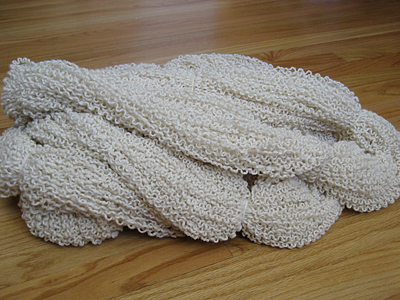
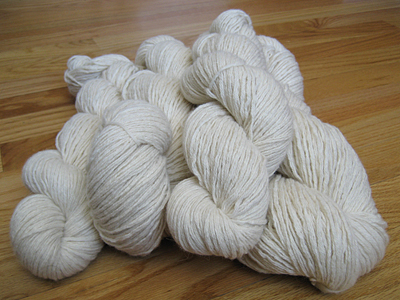
Friday evening I used a seam ripper to carefully take apart the front, back and sleeves. Saturday evening I unraveled it with the help of my swift and ball winder. This is what I had Sunday morning.

unraveled wool sweater

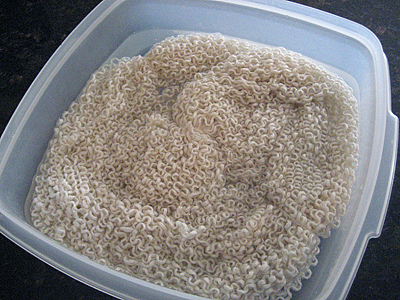
Don’t you just love how un-knit yarn looks like ramen noodles? Usually I will just work from noodle-y yarn, but I decided to try and get some of the kinks out. I soaked each bundle in cold water for 15-30 minutes.

unraveled wool sweater

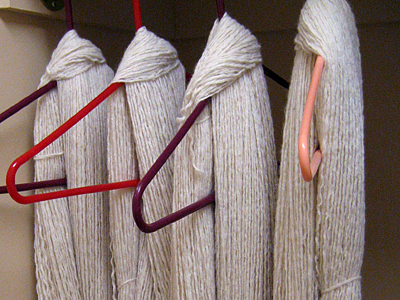
After soaking, I hung them up to dry. I put a few wooden blocks in plastic grocery bags to weight the yarn at the bottom.

unraveled wool sweater

Look at what I have now! Isn’t it beautiful? Goodwill is having their 99 cent sale this weekend. I might have to check out the sweater rack.

unraveled wool sweater

thrifty reuse: I bought this sweater at a garage sale for $1. Can you believe it? Here’s my favorite online tutorial for unraveling a sweater for yarn.

thank you!

crafting for haiti

Thank you for all of the flower pin purchases! There is one more left that I’ve donated to Craft Hope. Have you been to the Craft Hope for Haiti shop? Crafty folks from all over are donating amazing handmade items to help provide earthquake relief: purses, jewelry, patterns, accessories, hats, prints, quilts — there is something for everyone. Go now and spend some money!

attention crafters: You really need to check out the Craft Hope website. There are so many ways to do good!

tiny crochet heart pattern

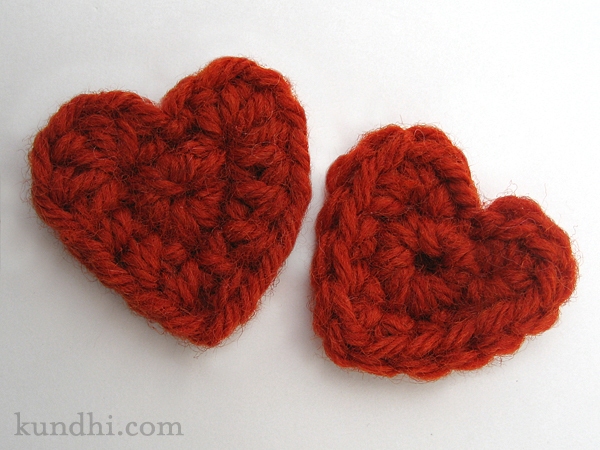
I wanted to make some really small hearts for Valentine’s Day crafts, but couldn’t find any patterns online that I liked. After a few tries, I came up with these little cuties.

tiny crochet hearts

Tiny Crochet Heart Pattern
worsted weight yarn
size F/5 (3.75mm) crochet hook
tapestry needle for weaving ends

hdc: half double crochet
sc: single crochet
sl st: slip stitch

gauge: not important, but mine are about 1 1/2 – 1 1/4 inches across

“Big” Tiny Heart (the one on the left)
Make a magic ring.
R1: chain 1, sc into loop 7 times, pull loop closed, join with sl st to chain 1
R2: sl st into 1st stitch, 5 hdc into second stitch, hdc in next two stitches, hdc then chain 1 and hdc again in the bottom stitch, hdc in next two stitches, 5 hdc into next stitch, sl st in original sl st.

Give the tail a little tug to help form the heart V at the top, tie knot, weave ends.

Give the bottom stitches a little tug to make the V point at the bottom.

“Small” Tiny Heart (the one on the right)
Repeat pattern, but replace sc for hdc.

embroidered baby quilt

There is something in Nebraska’s water. The past few months and the next few months seem to be filled with babies, babies, babies! So, expect to see lots of cute things for my friends’ wee ones here on the blog.

embroidered eyelet baby quilt

This is a really basic blanket, but the eyelet fabric makes it extra special. Bonus: the eyelet fabric was already quilted, so no need for batting!

embroidered eyelet baby quilt

I added an embroidered monogram to make it a little bit more fancy. I love the contrast of the dark pink on light pink!

stash: Eyelet fabric was from someone who was selling her grandmother’s fabric stash. Pink check fabric was the very first fabric I purchased when I got my sewing machine. Monogram letters from Sublime Stitching.

gift bag resolution

After my daughter was born, we had a huge supply of gift bags. Most of them were pink, but we had our fair share of gender neutral and holiday bags, too. It’s been over three years, but I’m almost finished using them for gifts.

Honestly, it felt like my stash would never be gone. When I got close to the end of my pile, I started thinking about how I would wrap presents in the future. I did a little bit of research on the web and found some startling statistics about gift wrap.

Wrapping paper, from an ecological point of view, is a pretty worthless use of trees. Each year in the United States, 4 million tons go from logs to landfills to make wrapping paper and holiday shopping bags, according to the Clean Air Council, a Philadelphia-based nonprofit organization.

Once I got past the shock of 4 MILLION TONS EACH YEAR I read something even more unsettling. You know how some people throw wrapping paper into their fireplace?

Decorative wrapping paper, much of which is made in countries such as China that have looser environmental regulations, can contain lead, synthetic inks, plastic film, chlorine or metal-based foils, which release toxic and carcinogenic compounds into the air when burned. Metallic paper may or may not have a greater environmental footprint than other types, but it’s certainly not meant to be inhaled. Who’s most vulnerable to this indoor pollution? Children, whose systems are still developing.

You may be able to recycle gift wrap depending on where you live, but metallic accents, glitter and too much tape can make them un-recyclable. Plus, if it’s unsafe to burn, is it really safe for your child to be tearing it apart?
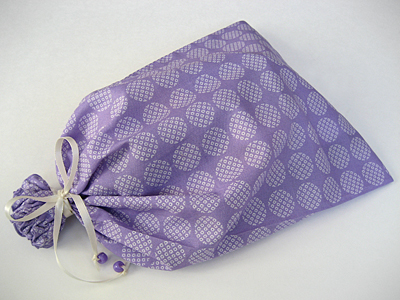
handmade fabric gift bag

So, I’ve resolved to only use fabric gift bags and plain recyclable paper going forward. I really like how my first fabric birthday bag turned out. Does anyone want to make this resolution with me? There are some great ideas to inspire you over at That Little Bit Greener.

resource: Quotes taken from this Washington Post article.
flower pins for haiti, doctors without borders

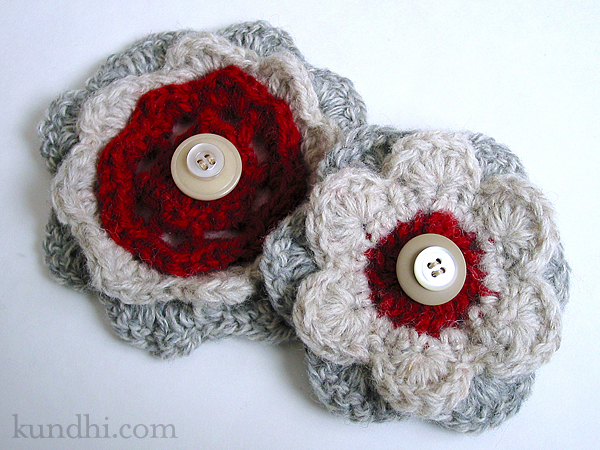
crochet flower brooch

As soon as I hit “publish” last week on my flower pin post I decided to donate all of the proceeds from my flower pins to Doctors Without Borders. I figured I needed a few more in my shop, though. There are currently four, but I plan to make more. I’ve also created a special section for them in my shop.

recycle: These pins are crocheted from unraveled sweater wool. Remember these balls of yarn?

crochet flower pins in the shop

crochet flower brooch

I tried really hard to write about fabric gift bags last night, but it seems so trivial right now with everything that’s going on in the world. I’ve got a lot of nervous energy to burn. Today I finished a blanket and crocheted more flowers. I can’t stitch flowers to everything in my daughter’s wardrobe, so I made a few into pins. They are in my shop. A cute alternative to hearts for Valentine’s Day, don’t you think?

etsy: Red flower here, pink flower here.

how to make microwave crayon shapes in 3 easy steps

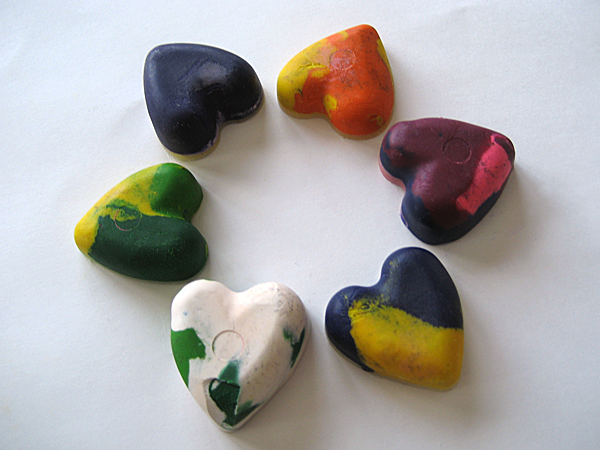
microwave heart crayons

Maybe I should call these Really Lazy Crayon Shapes. I’d been thinking of making them for awhile, but all of the tutorials I found online suggested baking in the oven, melting over a double boiler or melting into cups and pouring into molds. Those were just too many steps for me.

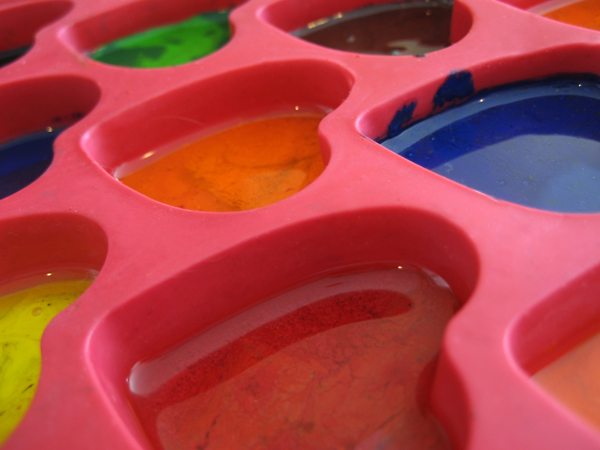
I found a silicone mold at the thrift shop for only a few bucks, so I wasn’t too concerned if I ruined it. I threw all caution to the wind and microwaved the crayons directly in the mold. It was simple, fast and easy to clean up.

microwave heart crayons

Materials
crayon bits
silicone mold
knife
toothpick

Step 1
Put your crayon bits directly in the mold. Break up any bits that are too big with a knife.

Step 2
Microwave on high for 1-2 minutes. (I’m sure times will vary based on microwaves. Watch your first batch carefully!) Use a toothpick to stir if your bits aren’t melting evenly.

Step 3
Allow to cool and then pop them out of the mold. I put mine outside because we’re having a frigid winter and it didn’t take long, but you could stick them in the freezer, too.

Clean up: Put some water in the mold, microwave it for about a minute and dump it out. The crayon residue wipes out easily with a paper towel.

*After searching, I found that my mold is actually an ice cube tray and shouldn’t be exposed to heat. It held up just fine, but I wouldn’t use it for ice cubes or food after heating just to be safe.

recycle: This is a great way to use all of those crayon bits that are too small for little hands to hold.