sew, mama, sew giveaway day!

Congratulations to Vicki for winning the Sew, Mama, Sew giveaway tote bag!

. . . . . . . . . .

I’m participating in Sew, Mama, Sew’s giveaway day again. I just love this idea. You can enter my giveaway below and then head over to their website and enter hundreds more! (Yes, hundreds!)

sew mama sew tote bag giveaway

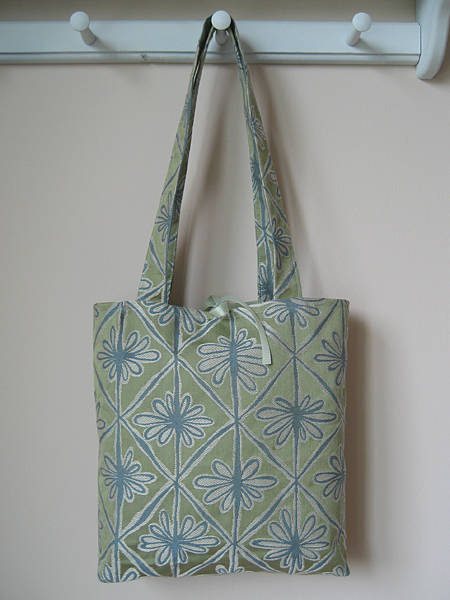
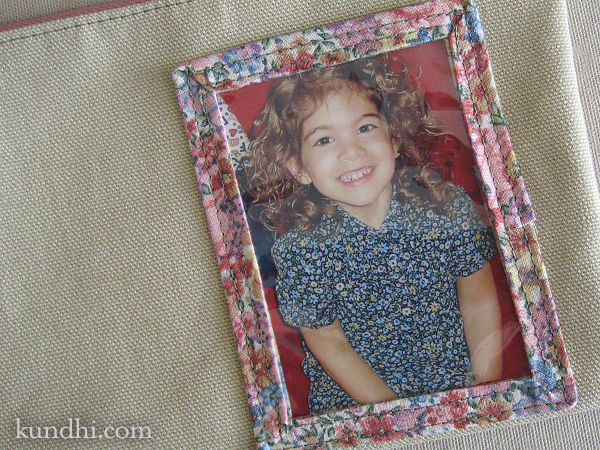
I’m giving away a tote bag. It’s a little smaller than some of my recent bags — the perfect size for knit and crochet, small sewing, and embroidery projects. It would also make a cute purse!

sew mama sew tote bag giveaway

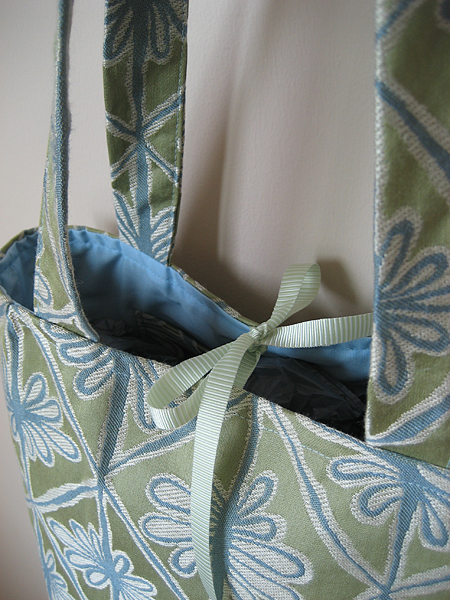
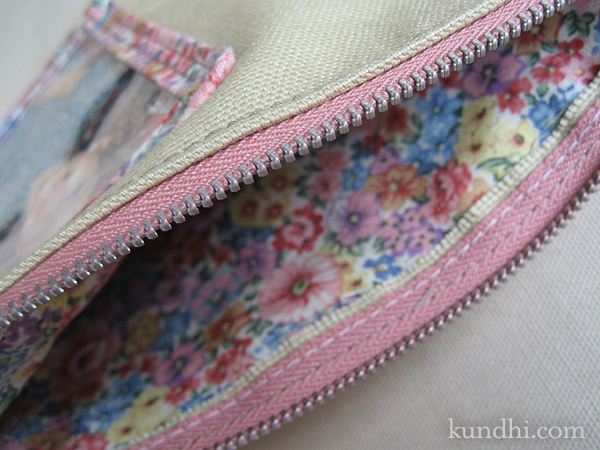
It’s got two big pockets inside and closes with a ribbon tie. The outside and pockets are from a really cute upholstery fabric sample.

sew mama sew tote bag giveaway

How to enter: Leave a comment and tell me how you would use this bag — to hold creative projects? as a purse? something else?

Bonus entry: Subscribe to my rss feed and leave another comment to be entered.

Another bonus entry: “Like” my Facebook page and leave another comment to be entered. (Why did they change that? It sounds even weirder than “Fan.”)

sew mama sew tote bag giveaway

I’ll ship internationally, so everyone has a chance to win! You have until Midnight CT, May 20th to enter. I’ll pick the winner using a random number generator. Good luck!

Now go check out more giveaways over at Sew, Mama, Sew!

recycle: All of the materials for this tote were thrifted (i.e., saved from the landfill).

world’s smallest garage sale

garage sale

I love going to garage sales. Having them is another story. Every May my neighborhood has garage sale weekend. My first one was very organized: everything was tagged, I had tables, there were signs. I spent all day Thursday, Friday and Saturday sitting in my least favorite room of the house. It was exhausting. I swore I’d never have another one.

Then the 2010 Spring Cleaning began. I found a lot of big items that I wanted to get out of the house. Big, heavy items that weren’t quite big and heavy enough to ask the Mission truck to come pick them up, but too big and heavy for me to pile in my car and make a few trips to donate. When I realized that the neighborhood sales were this weekend, I decided to put them out and beg people to take them away try to sell them.

Earlier in the week I had taken a lot of my daughter’s clothes and toys up to Once Upon a Child. This place is awesome. You drop off your bins of stuff, come back a few hours later and pick up a check. So I really didn’t have a lot to put out. My goal was to close shop once all of the big, heavy stuff was gone. If I sold any kid stuff in the process, it was icing on the cake.

Not much was tagged. My biggest signs were, “Make me and offer” and “Free.” I’m happy to report that I met my goal and closed the garage door after lunch on Friday (with a few hours to spare for my favorite church sale, which was this weekend, too).

The weirdest thing: I made almost the same amount of money with my Once Upon a Child visit and loosey-goosey garage sale as I made with the long, tiring and involved garage sale. Plus, I had A LOT LESS left over. Is this a recipe for success? Maybe I’ll test it out next year and see!

the string: Yes, it’s kind of weird, but I had to block off my garage. People kept wandering in and looking for stuff on sale. I had to tell them, really, what’s in the driveway is all. Our lawn mower and my daughter’s bike are not for sale!

my creative space

handmade gifts

Good grief! May is almost half over! You wouldn’t know it by the weather. It feels more like Fall than Spring. Yesterday I realized I’ve got some gift making to do this month. I can’t give too much detail right now, but I’m combining this with some handmade goodies from etsy.com. I’ll do a full reveal after they’ve been gifted.

Check out more creative spaces over at Kirsty’s blog.

drop spindles handmade by my husband

handmade drop spindle

First off: No, I am not starting another hobby! I’ve been thinking of plying some of my lighter weight sweater yarn to make a worsted weight. I looked at a few drop spindles online, but it seemed like such a silly thing to spend money on when I didn’t even know if it would work.

I thought maybe I could make a DIY spindle to try it out and if I had good luck, maybe I’d buy one. On Saturday, I asked my husband if he would pick up a wooden door pull for me. I already had some dowels and hooks. When I showed him what I was planning to do he said, “Give me a few minutes,” and headed to the garage.

handmade drop spindle

Within 15 minutes I had two drop spindles — a top and a bottom whorl. He used a drill hole saw, which worked perfectly. Aren’t crafty husbands great? (I doubt he’d consider himself crafty, but I think he is!)

I played around with them a little bit over the weekend and I think plying the sweater yarn might actually work! I hope to do another post soon with examples.

project details: The inspiration for these came from the one Abby Franquemont uses in her Drop Spindle Basics video.

Here are the specs: My husband used a 2 1/8 inch hole saw with a 3/8 inch mandrel. That gave him a 2 inch circle that fit my 1/4 inch dowels. The original wood was a 1 x 3 x 6 inch piece of poplar. He smoothed the edges with a file and sandpaper. If you have any questions, put them in the comments and I’ll get him to reply.

dressy bessy!

dressy bessy

Did you have a Dressy Bessy (or Dapper Dan?) when you were little? I did and I loved her! My daughter is learning to button/snap/tie and I really wanted to get her one. However, the dolls from the last few decades look very different than the one I had. This one isn’t so bad. I don’t even recognize this one!

Here is the Dressy Bessy I had. I’ve been searching on ebay for the past few months and these girls are hard to come by in nice condition. (New in the box went for $84!) Then I started to see dolls like the one above. She looks like the doll I remember, but doesn’t have the vinyl shoes and vest. I figured I could live without them if I could get something similar and clean.

I was so happy to win her! I’m also happy that my daughter likes her, although she’s not a fan of the buttons and snaps. I guess she’s officially a member of the Velcro generation. I’m going to keep working on her, though. Sooner or later she’s got to learn how to button/snap her own pants!

Do you have a favorite doll or toy from your past that you really wanted for your kids? When you gave it to them, they like it as much as you did?

mother’s day idea: how to make a photo frame applique in 3 easy steps

photo frame applique tutorial

A few years ago, my mother gave me a little photo frame change purse. I had been using it for knitting bits and bobs, but it’s kind of small. I decided to make a bigger one for myself.

This applique will add a great touch to any Mother’s Day gift. I love mine!

Materials
photo: 2 1/2 x 3 1/2 inches
plastic: 3 x 4 inches
bias tape (or make your own)
heavy duty sewing needle

photo frame applique tutorial

I used the packaging from a set of sheets for my plastic. The same kind of packaging is used for blankets, comforters, tablecloths and shower curtains. (Don’t forget to save the zipper, too!)

photo frame applique tutorial

Step 1
Stitch the bias trim to your plastic (A). Here’s a great video on how to miter your corners.

Step 2
You’ll only be stitching three sides of the applique to your fabric because you need an opening to slip in the photo. Top stitch the fourth side so it will match the others when you are finished (B).

Step 3
Position your applique on the fabric and stitch the remaining three sides in place (C). Make sure you don’t pin it through the plastic! Pin through the fabric trim instead.

Obviously it’s easier to add this to a work in progress while your piece is still flat, but you can stitch this to already made items, too.

Try other sizes like a 5×7 on a small bag or even a 8×10 on a large tote. Simply add the width of your bias tape to your photo dimensions to get the size for your plastic. Make sure you adjust the length of your trim and add 1-2 inches for overlap.

photo frame applique tutorial

project details: Zipper, upholstery and lining fabric all thrifted. Sheet packaging from my linen closet. I always save the ones with zippers because they make great storage for yarn and fabric.

my creative space

my creative space

I have this vision of my creative space. In it, there are no piles for my daughter to dig through asking, “Mama, can I use this fabric for a picnic bundle?” She won’t make off with buttons or ribbon from my desk. She definitely won’t be checking out sharp, shiny, pointy objects.

This room doesn’t have a lot of storage space because we sacrificed most of the closet for an angled entry with a french door. Ah, yes. The french door that exposes my works in progress to the rest of the house.

I started this project back in March with a major destash. Since then I’ve been doing little bits in the evenings. Yesterday I got a surge of energy and made some real progress. It took all day. I recycled, donated, rearranged, decluttered and reorganized.

My vision? I think I’m almost there.

test driving curtain fabric

sweater unravel crochet blanket

I haven’t been very successful at getting up early to have some creative time for myself. However, I am up early enough to know that my creative space is too warm for coffee and work in the morning. This big, beautiful window faces east. Not only does it heat things up, but it puts a glare on my laptop screen. Curtains are a must.

I love my view and was happy to find this nice muslin in my stash. I hung it up while my daughter was in school this morning and it immediately cooled the room down. You can’t see through it with the sun beaming, but after Noon, I had my view back! The big question comes tomorrow morning. Is it opaque enough to keep my creative space cool so I can enjoy my morning coffee while I work? I hope so!

stash: I bought a brand new bolt of this at a garage sale last year for a few bucks. It was still in the kraft paper wrapping! I have a feeling a few more rooms in my house will be getting curtains in the coming weeks.

recycling a sweater directly into a blanket

Toward the end of last week, I wasn’t feeling very inspired. Maybe it was the high pollen count? Maybe it was the non-stop conversation with my three-year-old? Maybe I just needed a little creative break? I decided a few days on crafty autopilot would be good for me, so I grabbed a sweater and started unraveling.

sweater unravel crochet blanket

Since I only unravel when my “helpful” daughter isn’t around, I still have some of the original sweater to show you. This is one of my trade sweaters. I usually don’t mess with acrylic, but this sweater was so pretty and soft. Plus, it’s super bulky weight yarn and it’s working up fast.

sweater unravel crochet blanket

I’m crocheting a petite afghan with a simple granny square pattern. The yarn is even more lovely after being unraveled. The kinks are falling out as I crochet, so I’ve eliminated that whole soaking and drying step. I’m curious to see just how big it will get.

Has anyone ever gone from sweater to blanket? How did it work up for you?

recycle: I wonder how many people we could keep warm if we turned all of the sweaters destined for the landfill into comfy blankets?