the little engine that could : season three

handmade train applique

I know I’ve complained about this before, but why do manufacturers make train, car and dinosaur shirts so gender specific? My daughter loves all three and she loves red, pink and purple. I hit the jackpot a few years ago when I found a white, new with tags, gender neutral train shirt at a garage sale. It was a size too big, but she wore it all the time with her sleeves rolled up. The next year it fit perfectly.

This year, it’s too small. I suggested maybe we pass it on to one of her friends who loves trains. “But Mama, can’t we just sew the train on to another shirt?”

I put this project off, but she kept bringing it up. I may be finished with it, but my daughter isn’t ready to give it up. In fact, she art directed the whole project, choosing the pink shirt and suggesting the border. After she got over her disappointment that I didn’t have any pink ric rac in my stash, she picked blue to match the puffs of steam.

She’s very proud of her new shirt. I’m happy that she’s happy. I think this might be the season finale for this little engine, though. After this, it’s going on a tote bag.

project details: I positioned the ric rac in place with a glue stick before stitching it on, which allowed me to fudge the corners so they matched. Worked like a charm! Also, I didn’t fold over the ends. Just lined them up and sealed them with a little bit of fray check.

almost two years ago: My tutorial on ruffling up a boy’s t-shirt. I wish this would have worked for the train shirt, but my daughter is growing too fast!

behind the scenes: I’m finally seaming the baby blanket. Can’t wait for the big reveal!

for japan with love

for japan with love

I discovered For Japan with Love, which was started by the bloggers of Ever Ours and Utterly Engaged, through Vintage Chica’s blog. Donations go to Shelter Box, which is a great organization that provides basic lifesaving supplies like a tent, blankets, water storage, and a stove to those who need it.

I gave. You can too.

Just a small donation can help. Spread the word!

my mom’s creative space

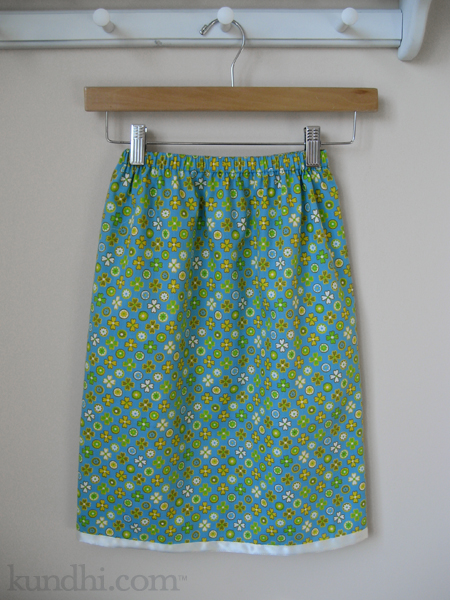
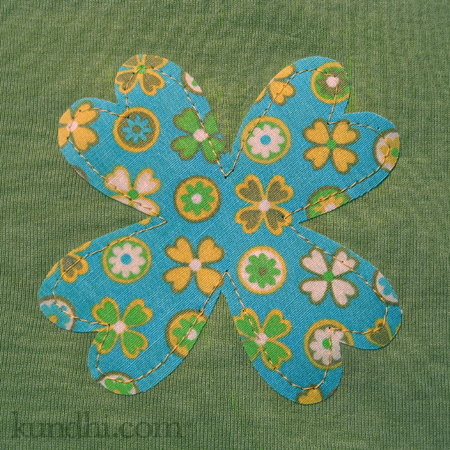
My daughter loved her St. Patrick’s Day outfit. She wore it yesterday and today. When I dropped her off at school this morning, I started thinking about the Irish dancing costume my mother made for me when I was younger.

Seems I wasn’t the only one thinking about it. I received this comment on my blog this morning…

“Does this take you back to your Irish dancing days? Wonder if you still have that dress?”

…and within in minutes, I received this photo from my mom via text:

Irish dancing costume

Isn’t it amazing? She sewed the dress and cape and then embroidered all of those motifs. (Larger photo here.) I wore this to dance at festivals and in competitions. I even wore it in the Baltimore St. Patrick’s Day parade!

I know there’s no comparison between this gorgeous costume and the little outfit I whipped up for my daughter. I just happened to think about it this morning and wanted to share her beautiful work with you. She totally deserves her own Creative Space, don’t you think?

Visit other creative spaces over at Kirsty’s blog.

favecrafts blog hop: st. patrick’s day outfit

summer twirly skirt

Tomorrow my daughter’s preschool class is having a St. Patrick’s Day party and everyone has to wear a green shirt. Over the past week, we’ve gone from her insisting on wearing her only green (too small) gumdrop shirt to her requesting an entirely new outfit. She rarely asks me to make her clothes, so of course I jumped at the opportunity.

four leaf clover shirt

She really wanted a green shirt and legging combo, but when I found this cute clover/flower fabric in my stash, she agreed that a coordinating skirt might be better. (Phew!) I’ll try to get a better photo of the top tomorrow, as I didn’t finish it until after the sun went down. I think both of these will get lots of wear over the summer, hopefully not always together.

The FaveCrafts Blog wants to know what you have finished on the 15th. Check out other finished projects and post one of your own!

project details: Green shirt from Target, thrifted fabric and ribbon from my stash. Lazy Days Skirt pattern from oliver + s.

tiny four-leaf clover pattern: Don’t forget to crochet up a little luck for yourself and friends. They work up super quick! My pattern here.

tea towel apron

tea towel apron

This tea towel was spared from the coffee experiment. I’ve been planning to turn it into an apron ever since I saw the project in Amy Karol’s first book. I love how it turned out, especially the pleats. I can’t wait to make more! Here’s a view of the tie.

tea towel apron

project details: This towel was part of a wedding gift. I’m so glad to give it a new life in the kitchen. Tie was in my stash from who knows where. Pattern from Bend-the-Rules Sewing.

coffee update: I took Happy Cat’s advice and re-brewed the grounds after my coffee yesterday. The towels have been soaking for over 24 hours and are still blue. I think they are made of kevlar.

thrifty find: new buffet!

thrifty find

It may have been a dresser in its past life, but I’ve got a new buffet, baby!

We’ve been looking for some kind of additional storage in our kitchen/dining area for months. I found this one at the thrift store this morning. It’s a little rough around the edges, but I think a coat of dark brown paint and new brushed nickel knobs will make it perfect.

The measurements for our space are also ideal. And it’s wood! Not particle board! It’s just right in so many ways. What a great start to the weekend!

Hope you have a great weekend, too!

p.s. The dishtowels from yesterday are still blue. Boo.

got a project brewing, literally

dyeing fabric with coffee grinds

I love these tea towels. They matched the kitchen in my old house. They’re super soft. They are the best tea towel fabric ever. They’ve even been burned a few times, which explains the holes here and there. But I love them and I had this crazy idea to make them work in my current kitchen. I’d trim off the holes and dye them brown. Even crazier, I’d dye them with coffee.

Tutorials online say you should use fresh brewed coffee. That just seems like a waste of perfectly good coffee to me. Coffee is for waking up, jump starting your afternoon and finishing off a fancy meal. It is not for dyeing fabric.

So I used coffee grinds. And they are still soaking. And they are still blue. I’m going to let them sit overnight. I’ll keep you posted.

my creative space

toy organizing bags

I’ve been trying to regain some control over my daughter’s closet. Lately she just wants to empty everything onto the floor to build a giant mountain of toys. Getting her to put away the toy mountain when she is finished has given me quite a few gray hairs.

In my creative space today, I’ve been making some bags for all of those Christmas presents that came without containers. I really should have done it sooner. Having a specific place to put things has helped a little. I also moved half of her toys to the very top shelf. That has helped a lot.

What’s in your creative space today? Play along over at Kirsty’s place.

how to fix a stuffed animal’s nose in 4 easy steps

stuffed animal new nose tutorial

What is it with the noses on stuffed animals? I know my daughter isn’t chewing on them, so how does something like this happen? If you look closely, you can see the original torn nose and the remains of my first patch. I’m becoming an expert on fixing these, so I’m sharing my little trick with you.

Materials
fabric that matches the original nose (I doubled up for extra durability)
thin cardboard (check your recycle bin for a cereal box or similar)
iron
aluminum foil
sewing notions

Step 1
Measure the nose (I used one of these circle templates) and cut a piece of cardboard the same size and shape. Cut your fabric a little bit larger than the cardboard.

Step 2
Lay down your aluminum foil, then the fabric and finally the cardboard. Fold the foil around the cardboard so the fabric is sandwiched nicely in between.

stuffed animal new nose tutorial

Step 3
Iron the foil on the top and bottom. Press really well around the edges. Let it cool before opening it up. It will be hot!

stuffed animal new nose tutorial

Step 4
Remove your perfectly pressed nose and hand stitch it in place.

stuffed animal new nose tutorial

He looks much happier now, doesn’t he? Hopefully the two layers of fabric will hold up a little longer this time.

fused plastic grocery bag lunch bowl

fused plastic grocery bag lunch bowl

So here’s the plastic bag project that feels like it’s been taking forever to finish. Some history on the idea: my husband has started taking salads to work. He throws everything into a plastic zipper bag* for easy transport, but said it’s not very easy to eat out of the bag.

fused plastic grocery bag lunch bowl

I thought some kind of bowl would help. Something stiff enough to stand up straight, but forgiving enough to be smooshed in a lunch bag. With this one, you just drop the zipper bag in and fold the edges over the bowl. It’s kind of deep, but salad greens take up a lot of room. I have a feeling I might need to adjust it after he tries it out.

fused plastic grocery bag lunch bowl

Some interesting things I learned while playing around with this project:

  • Target uses different kinds of plastic for their bags. They may look the same, but they don’t melt the same.
  • Parchment paper works much better than regular paper.
  • Measure twice, sew once. Ripping out stitches leaves holes!
  • I need some more project ideas to use up the leftover fused plastic.

stash: All of these bags came from my pantry. No matter how hard I try to bring my reusable grocery bags to the store, forgetting them on just one trip leaves me with a bunch of plastic bags in my pantry. I usually just recycle them, but this was kind of fun. I might keep on fusing them.

*Still trying to figure out how live without some plastic bags. We wash and reuse our plastic zipper bags until they practically fall apart. I wonder how they would fuse together. Hmmm…