valentine’s day rose pins

valentine's day crochet rose pin

Did you get roses for Valentine’s Day? Some of my daughter’s teachers did.* This is probably the cutest crochet flower I have ever made.

valentine's day crochet rose pin

I made them out of all types of yarn. I think the pattern looks best with cotton.

valentine's day crochet rose pin

Only problem with these and other tiered flower patterns is that they don’t have a flat back for the pin. I used a piece of felt to even out the back and tacked it securely to the flower before stitching around.

project details: Pattern from Crochet Embellishments. All of my supplies were from my stash.

*A few of her teachers received flower pins last year. This year I made them bookmarks with tiny crochet hearts.

finished: twirly skirt

twirly skirt mending

This week’s Finished on Friday project was just a little bit of mending. I received this skirt from a friend. It didn’t need that much work: just hem the raw edge and sew a button on for the adjustable elastic. I wish I would have done it sooner, though. My daughter LOVES it. She wore it two days in a row and would have worn it a third if I had let her.

Not much else noteworthy out of The Big To-do Pile, but I’m patting myself on the back for keeping my weekly project goal.

What did you finish this week?

double crochet with a twist

When I mentioned that I started doing my double crochets a different way, a few people wanted to know how I was yarning over. (Is yarning a word?)

Basically, I was yarning over front-to-back instead of back-to-front. It doesn’t seem that it should make that much of a difference, but going from back-to-front gives the stitch a bit of a twist. The texture is more defined.

wagon wheel square

Once I saw the difference, there was no going back. Only problem was all of those squares I made on vacation. I’ll admit that it took me awhile to get up the courage to rip them out and start over. But after seeing the difference, I knew I had to do it.

wagon wheel square

interesting note: the extra little twist uses up a bit more yarn and makes the squares a bit more bigger.

my creative space

my creative space

I mentioned last week that I started knitting a cowl for myself. A knitting project! For me!

I treated myself to some Malabrigo Silky Merino over the holidays. The pattern is Good Luck Cowl by Drop Stitch Knitter.

What have you made for yourself lately?

More creative spaces over at Kirsty’s place.

“return to julie-k” crochet heart necklace

I love e-window shopping on the Tiffany website. I get all happy when they send me a new email. Their product photography is so perfect and their jewelry designs are so timeless. My favorites are the pieces in their sterling silver collection.

tiffanys inspired heart necklace

With Valentine’s Day just around the corner, I’ve been getting (almost) daily emails filled with all sorts of beautiful hearts. Whenever I see the Return to Tiffany heart, I think of my little crochet heart pattern. They are about the same size and shape. I thought it would be cool to turn my little heart into a Tiffany-inspired charm.

tiffanys inspired heart necklace

I made a few and decided the less fuzzy the yarn the better. The pink heart is Koigu, I think. It makes a nice loop without interfering with the heart shape. I really wanted the sparkly silver and gray yarn to work better, but the loop was too bulky. It looks nice all by itself, though.

This is something that’s been bouncing around in my head for awhile. I’m glad I finally took a few minutes to sort it out. It really only took a few minutes, too. Love those little crochet hearts!

stash: pink yarn from the bits and bobs, silver and gray yarn from a recycled sweater, crochet heart pattern from the archives

valentine’s day pencil cards

valentine's day pencil toppers

We are doing very simple Valentine’s Day cards this year. I wanted to keep my daughter involved in the process, but between preschool and nature school, she’s got over 30 classmates. Even though she loves crafts, I can’t imagine her staying interested in such a big project.

valentine's day pencil toppers

We picked out Valentine’s pencils together and we used what we had for the cards. You’ll notice that she didn’t use any of the supplies I gathered, but chose her own stickers and pencil for the project — such crafty independence!

Using the big scallop paper punch, I cut out a bunch of flowers. I told her she could decorate them anyway she liked, but she had to make sure she put her name on them. Once finished, we taped them to the pencils.

We started this project early and she’s been doing a few a day. We’ll see if they get finished by next week or if I’ll have to make up the last few.

What do you do for Valentine’s Day cards? Buy or make? Include candy or not? Is your child involved in the process?

from the archives: handmade valentine’s cards, valentine’s day heart bunting, tiny crochet heart pattern

how to adjust the waist of your pants/jeans in 4 easy steps

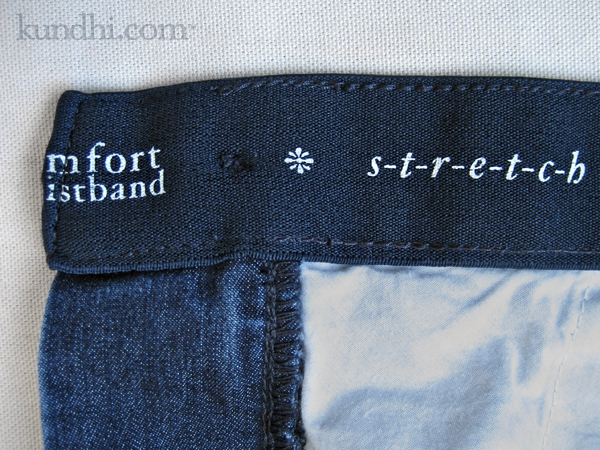
My “Finished on Friday” project this week has turned into a tutorial. I think you are going to love it. I had written a similar tutorial about a month ago complete with pictures. Something just didn’t feel right about it, though. I figured there must be an easier way to tackle this problem. Then I found a great fitting pair of jeans at the thrift store. The secret: a “comfort elastic waistband.” See how the elastic is incorporated around the entire waist?

take in pants jeans at the waist

Then my friend Amy commented on my frustrations taking in the waist on these pants. “When I have encountered that I sometimes just open the side seam in the waistband area and thread new elastic right over the old.”

Aha! Remember my adjustable elastic tutorial? This is kind of the same, but better. The elastic goes around the entire waist, so there’s no bunching up in any one place. The fabric is evenly distributed for a smoother finish.

You can even do this without a sewing machine as long as you don’t mind a little hand stitching.

take in pants jeans at the waist

Materials
3/4″ or 1″ wide elastic
small, sharp pair of scissors
Fray Check
pin, needle and thread

Step 1
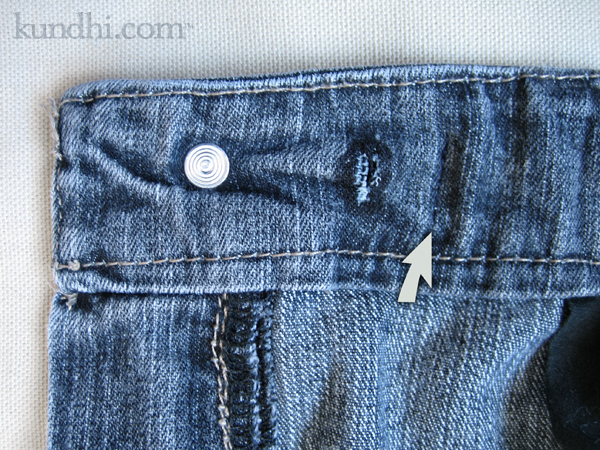
Snip two holes on either side of the waist to create a casing for the elastic — one just inside the buttonhole/snap and the other just inside the button/other snap. Make sure your scissors don’t go through to the other side! Apply Fray Check to the raw edges.

Step 2
Thread the elastic through the casing and secure with stitches on one side. (My thread matched the denim a little too well. The arrow is pointing to the stitches. If you look really close, you’ll see them.)

Step 3
Try on pants and pull on the elastic until you’ve got a good fit.

Step 4
Pin elastic in place, take off pants and secure with stitches on the other side. Trim excess elastic.

That’s it! Totally easy! You can do this to any pants that:

  • fit your hips, but are too big in the waist
  • fit everywhere except that annoying gap in the back
  • are made of denim without that 2% of spandex to make then snap back into shape after one wearing
  • need to tide you over while you lose weight and fit into the next size

my creative space

ice sun catcher

Snow days are finally over! This morning my creative space was filled with graphic design projects that needed to get done before school let out. During the afternoon I just kind of collapsed in a heap. It’s been a long week!

I did start knitting a cowl for myself, but forgot to take pictures. I also realized that it’s Thursday and I have to pick out something from the mending basket for my Finished on Friday post. Yikes!

We hung the sun catchers from Tuesday and they are beautiful. I keep looking out our back window to check out the sparkle.

What’s in your creative space today? Visit more spaces here.