another garden scarf!

birthday garden scarf

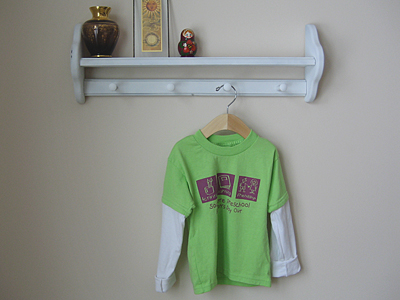
This was a gift for one of my daughter’s friends. The colors are so beautiful, it was hard not to keep it for myself! I decided to make it out of cotton because Spring is right around the corner. (Really! It is!) I hope she gets a lot of wear out of it before the weather turns warm.

birthday garden scarf

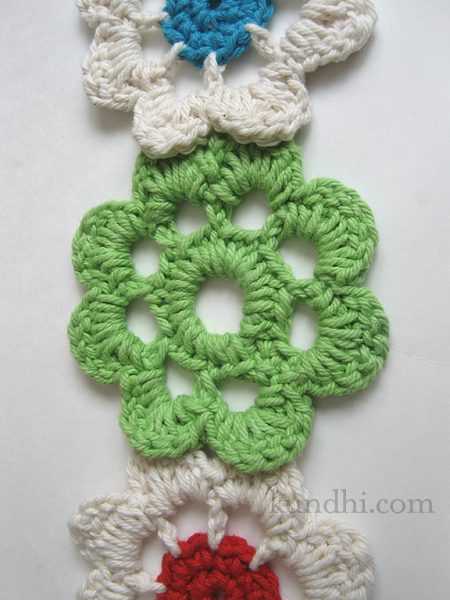
I’m still addicted to crocheting flowers, so I went through my stash and put all of my odds and ends in one bag for easy access. There were some colors that looked beautiful together, but I didn’t have enough for the whole scarf. I grabbed some natural cotton to help stretch the colors a little further.

stash: Just like a white t-shirt is to your wardrobe, natural colored yarn is a stash staple. It goes with everything, and you can dress it up or down, depending on your project.

pattern: I’ve had so many requests for this pattern. Sorry I forgot the link! It’s the Garden Scarf from Stitch ‘N Bitch Crochet: The Happy Hooker.

my weekend

Last week, my husband and daughter were both sick. I repeated this mantra over and over: I will not get sick. I will not get sick. I will not get sick.

IT WORKED!

crafty retreat

I spent a lovely weekend with friends. You can read all about it over at julie-k. In the meantime, I’m still repeating my mantra. We’ve got a busy week ahead. No time to be sick!

crafty retreat

crafty retreat

I spent this weekend thrifting and crafting and it was lovely! My friend Kaitlyn of Owl People organized a getaway at a local bed and breakfast for those of us who needed some time away from home to concentrate on our work.

crafty retreat

Before the event, Kelly of refibered and I met up for some early morning thrifting. (I think Goodwill’s 99 cent sale has officially become a standing date for us.) Then we headed over to the B&B for an afternoon and evening filled with creativity. So many crafts were represented: crochet, cross stitch, sewing, scrapbooking, decoupage, floral arranging. The next morning, Kelly and I checked out a Flea Market/Antiques Show before heading home.

This was such a great idea and everyone who attended insisted this be a biannual event. I know I’ll definitely be attending again!

tiny four-leaf clover pattern

tiny crochet shamrock

I had this idea. The top of my tiny crochet hearts kind of look like half of a four-leaf clover. What if I added two more leaves and a stem?

tiny crochet shamrock

After a few tries, I finally got it. Hope they bring you some good luck!

Tiny Four-Leaf Clover Pattern
worsted weight yarn
size G/5 (4.25mm) crochet hook
tapestry needle for weaving ends

dc: double crochet
hdc: half double crochet
sc: single crochet
sl st: slip stitch

gauge: not important, but mine are about 1 1/2 inches across

Make a magic ring.
R1: chain 1, sc into loop 5 times, pull loop closed, join with sl st (5 stitches)
R2: It might be easier to take this stitch by stitch:
— chain 1, hdc, 3dc, hdc in first stitch
— sl st into second stitch, hdc, 3dc, hdc in that same stitch
— sl st into third stitch, chain 4, sc in second and third bump from hook,
    sl st into third st again*
— hdc, 3dc, hdc in fourth stitch
— sl st into fifth stitch, hdc, 3dc, hdc in that same stitch
— sl st into first chain 1

*You’re going into the bumps on the back of the chain, not the stitches on the front of the chain.

Some folks were having trouble getting the V shape on the top of the heart, so I hope adding this chain 1 helps. I take the end, weave it in on the back toward the tail and then tie them tightly together.

wardrobe refasion: adding long sleeves to a t-shirt

long sleeves on t shirt

I was putting away laundry in my daughter’s dresser and found her preschool t-shirt. I can’t remember the last time it was warm enough to wear short sleeves. I don’t think it’s even been worn once. I decided to add some long sleeves so she can wear it before she outgrows it.

(I know what you are thinking. Why not just layer it over a long sleeve shirt and save yourself the trouble? Well, not only does my daughter dislike wearing sweaters, she doesn’t like to layer shirts, either.)

I used a size 4-5 T sleeve to make the pattern and figured I’ll just roll them up for now. Maybe next fall, I can use them on a different shirt. Look at that beautifully serged seam. Don’t you just love it?

long sleeves on t shirt

recycle: I used the body of one of my old t-shirts to make the sleeves. I was going to post a tutorial, but this seems easy enough. What do you think?

my creative space

cat fabric tote bag

In my creative space today is another custom bag for my friend Cathy with more cat fabric! She wanted this one really big to hold her ball winder, swift and tons of yarn.

I made it really big.

Then I was worried that it was too big.

I took it to knitting group tonight and she said it’s perfect!

I just need to finish it up and get it back to her. She’s got a bunch of yarn waiting for it.

Now I’m headed over to Kirsty’s blog for more Creative Space inspiration. You should, too!

blanket finished!

cross stitch baby blanket

I spent more time thinking about this project than actually sewing it. I guess I was being extra careful with it because of all of the handwork. It’s not like I could go out and buy new fabric if I messed something up.

Here were my concerns:

  • The cross stitch had caused the top piece to pucker. I needed it to lay flat. Pressing it with an iron didn’t help much.
  • Both the front and back pieces were quilted and together were too thick to easily fit into the ruffle trim.
  • The ruffle trim was in two pieces and one was wider than the other.

Here were my solutions:

  • I tied the top and bottom like a quilt, working from the center outward. I didn’t want the ties to be visible, so I started and finished inside, sandwiching the ends between the two pieces of fabric.
  • I serged the two fabrics together to create a nice even edge for the trim.
  • I took the trim apart a few inches on each end sewed them back together on a slight diagonal. There are places were the ruffle is shorter than others, but the transition from shorter to longer is a smooth one. I am probably the only one who will notice this.

I learned a lot putting this project together. I’m glad I took the time to think things through. I’m also happy that I had my serger to make things easier!

how your child can make wrapping paper in 3 easy steps

handmade eco-friendly wrapping paper

A few months ago I found these stamps while digging through the craft section at the thrift store. One of my daughter’s favorite things to do is stamp — anything and everything!

handmade eco-friendly wrapping paper

She already makes birthday cards for her friends by hand, and I thought it would be fun to have her make wrapping paper for the gifts, too. Fabric gift bags are great, but sometimes kids just need to rip paper.

I usually use kraft paper for this, but a paper bag works just as well.

Materials
kraft paper or paper bags
rubber stamps
washable ink stamp pads

Step 1
If using kraft paper off the roll, tape it to the table first so your child has a flat surface on which to stamp. If using a paper bag, cut it flat and use a low heat iron to smooth out the wrinkles. (They won’t disappear, but will flatten out.)

Step 2
Roll up your child’s sleeves. We’ve had elbows in the stamp pad many times, which is why washable ink is a good idea.

handmade eco-friendly wrapping paper

Step 3
Wrap the gift! If your child wants to help with this step, hold the paper and let her apply small pieces of tape.

Bonus!
Have your child stamp the envelope to match the paper.

handmade eco-friendly wrapping paper

recycle: If you missed my post with the frightening statistics about wrapping paper, you should really check it out. I’m happy to say this is one resolution that I’ve had no problem keeping! (Price for the stamps: $4.)

more crochet, more recycled sweater yarn

recycled sweater yarn granny square scarf

I know it seems like I crochet all the time now. I haven’t abandoned knitting or sewing. My daughter is going through what I call a “grabbie” phase. She’s always been very interested in my crafting, but now she’s all about touching everything. I joke that it’s like living with an octopus. There seem to be way more than two little hands trying to get at my projects.

Sewing is hard because of all of the shiny, pointy tools: pins, needles, scissors. She loves the heavy click the sewing machine on-switch makes and how the light turns on. Knitting and crochet are both difficult, too. She LOVES to pull out my needle or hook and try to do it herself. Pulling out a crochet hook isn’t that bad, but pulling out a knitting needle makes an unraveled yarny mess.

Sometimes I’m lucky to get a stretch of time when she’s playing with playdoh or concentrating hard on her letters and numbers. And there’s always that hour during Sesame Street. Until this phase is over, I’ll just grab a stack of books, sit on the floor next to her and crochet while we read.

recycle: Yes, I’m still working from my stash of recycled sweater yarn. I’m thinking about another granny square scarf. It’s snowing today, so I’m guessing I’ll get a lot of time to work on it!

did i mention i made a new purse?

poppy purse soule mama handmade home

Seriously, how could I forget to blog about this?! Last week I made the Mama’s Bag from Amanda Soule’s latest book with fabric to match my laptop bag. I absolutely love it. My only modification to the pattern was to add a divider on the inside. You can see it a little bit on the left here:

poppy purse soule mama handmade home

That’s mostly to keep knitting and crochet projects from getting tangled up in my other purse stuff. At first I thought it was a little small, but once I freed myself from carrying around so many of my three-year-old’s things* in my bag, I think it’s just perfect.

*It is a Mama’s Bag after all!

stash: Fabric came from this remnant sale. Book is from the library, but after checking it out twice, I think I should probably just buy it. There are so many things I want to make!