Last month, Meredith, the Editor in Chief of Craftier magazine, asked me if they could feature my remote control pillow pattern in their DIY Holiday issue. Here I am on page 22!
i made it myself: custom laptop bag
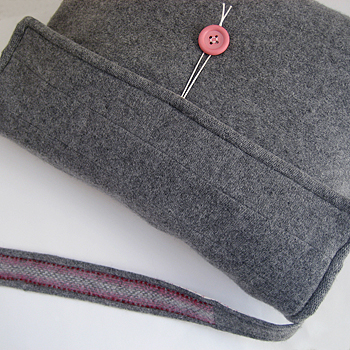
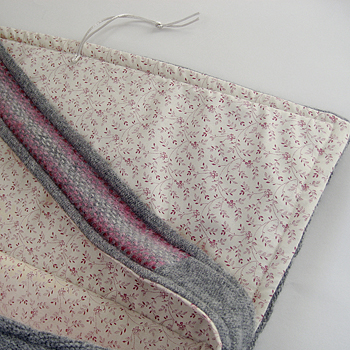
I love this bag. It was a little challenging because it wasn’t felted. It was a custom order from an etsy member and the size she wanted was the exact size of the original sweater. I used every last bit of wool to complete it.
She sent me her own lining fabric, which was beautiful. I also used the hand-embroidered sleeve stripes as the strap.
This was another bag that was hard to let go. You can see all the pics over on etsy.
Next up on the handmade agenda: a custom baby blanket. In the meantime, did you make something yourself? Post it here!
i made it myself: candy corn amigurumi giveaway
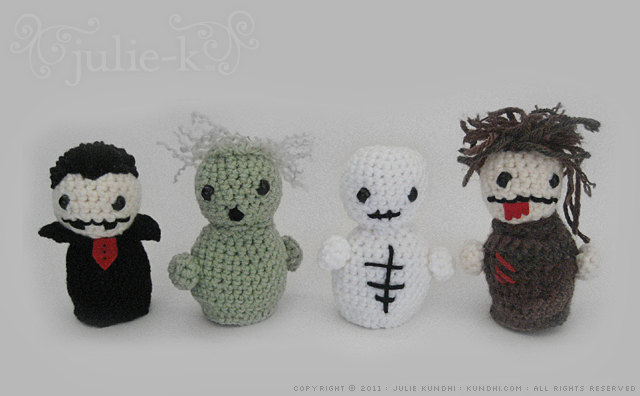
The other day I was discussing my amigurumi addiction with Lauren. “I have to stop,” I said. “It’s getting out of control. Bella doesn’t need anymore little hippos, pumpkins, vampires, cats, etc.” She suggested that maybe I start giving them away. Aha! A giveaway! And just in time for Halloween!
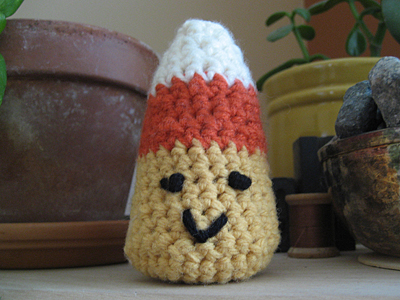
What the winner will get: This cute amigurumi candy corn, which is totally fat free and has zero calories! It’s crocheted out of soft acrylic yarn and stuffed with polyester fiberfil. Eyes and mouth are embroidered on, so it’s safe (and washable!) if you want to give it to a little one. It’s about three inches tall and two inches wide at the base.
Here’s the skinny (ha, ha): Leave a comment before Wednesday, midnight CST and tell me about your favorite Halloween treat. M will draw a name out of a hat on Thursday and I’ll announce the winner on the blog.
Oh, and in case you are wondering, my favorite Halloween treats are mini twix bars.
Did you make something yourself? Post it here!
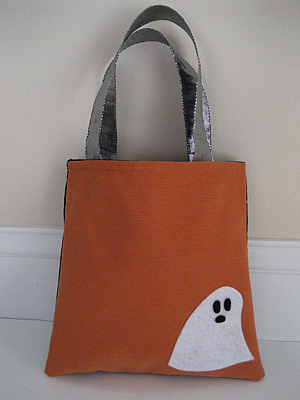
trick or treat bags featured on mighty junior!
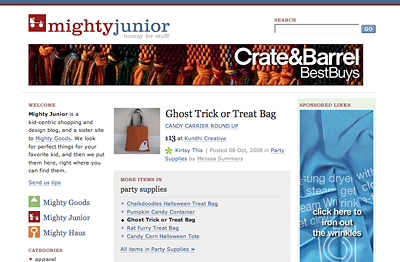
Have you heard of this site before? It’s cool! Mighty Junior is a kid-centric shopping and design blog, and a sister site to Mighty Goods. I received a note from them the other day that they had featured my trick or treat bags on their site.
Kind of makes me wish I had made more! Today I sold one of my Halloween cards and in the comments, she mentioned that she found me on Mighty Junior. Sweet!
glow in the dark ghost pattern
A few weeks ago I totally got sucked in by Halloween marketing. “We’ve got glow in the dark yarn!” screamed the ad. “Wow! That would make a cool amigurumi ghost!” I thought. I marched off with my 40% of coupon, got my yarn, and then came home to look for a pattern. But I couldn’t find any I really liked, so I just improvised. You’ve already seen the first one.* I like this one a little better, especially with the picot ruffles at the base. This little ghost is for sale in my etsy shop, but if you know how to crochet, don’t buy it from me unless you’re really busy saving lives or something because it takes no time at all to whip one up. Heck, crochet a whole pile of them and string them together to make a Halloween garland!
*By the way, when T turned out the light and the little ghost started to glow, M handed it right back to him. It’s sitting on my windowsill now keeping my pumpkin and apple company.
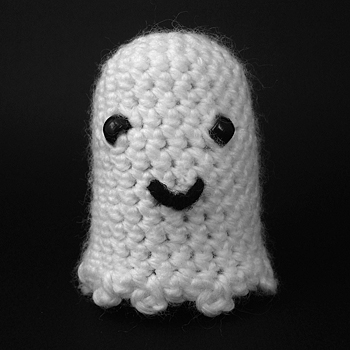
Glow in the Dark Ghost with Picot Ruffles
materials:
glow in the dark yarn or any worsted weight white yarn
size G/6 (4mm) crochet hook
two black beads for eyes
black yarn for smile
tapestry needle for beads and weaving ends
optional: polyester fiberfil
sc: single crochet
sl st: slip stitch
R1: chain 2, sc 6 in second chain from hook
mark the beginning of your row, move your marker up on each completed row
R2: 2 sc in each stitch around (12 stitches)
R3: *sc 1, sc 2 in next stitch* around (18 stitches)
R4: *sc 2, sc 2 in next stitch* around (24 stitches)
R5-7: sc around
R8 : sc 9, sc with bead, sc 3, sc with bead, sc 10
R9-15: sc around
R16: *[sl st, chain 3, sl into same st] sc* around for picot edging
Tie off, sew on a little smile, and weave in your ends.
I didn’t crochet a base because of the picot ruffle. Not to say that it couldn’t be done. This is more decoration than a toy, so I stuffed it with fiberfil to give it shape, but it’s open on the bottom.

i made it myself: upcycled straw coasters with wool felt
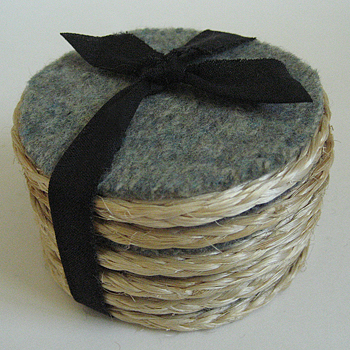
I found these little straw coasters and they were just begging for a makeover. I used wool from the sleeves of my felted sweater stash. I can’t decide which set I like more: the lights or the brights. I hope they find a happy home through my etsy shop. I had lots of fun making them.
Did you make something yourself? Post it here!
mmmuffins!
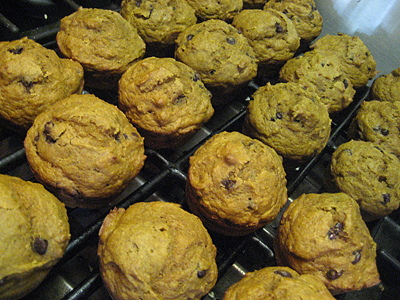
I made these muffins the other day they are awesome! I made the pumpkin chocolate chip. The mini chips are a great idea and they really hit the spot when we’re hungry for a little something sweet. I am going to make more today using some extra fruit purees we have: banana, pumpkin and nectarine. Yum!
i made it myself: slip stitch scarf
Yay! My dad’s scarf is finally finished. He’ll be so happy. I bought him this yarn last year from Liberty in London. It’s Rowan Cashsoft and is super soft and cuddly! He got a hat for his birthday and this scarf was his Father’s Day present. Since it was hot in June, I gave myself until Fall to finish it. It still needs to be blocked—the edges could use a good straightening. You’re probably thinking, oh no, not more Halloween colors! Well, just so you know, they are Orioles colors. Heh.
It’s a simple slip stitch pattern I pulled out of my stitch calendar. I think it’s the same as the Mason Dixon burp cloths (from their first book). Work in multiples of five:
Row 1 (ws): k2, *p1, k4; rep from * to last 3 sts, p1, k2
Row 2 (rs): k2, *sl 1, k4; rep from * to last 3 sts, sl 1, k2
Repeat these two rows.
Other specifics:
I knit both sides at the same time from the stripes up and then grafted them in the middle with the kitchener stitch. I did that because I wanted to use up as much black yarn as possible and I figured it was the easiest way to make sure the stripes matched up at the bottom.
I also practiced weaving in ends as I knit. Kind of tricky, but I think I finally got the hang of it.
Finished size: 8 inches x 1 1/2 Bellas
Did you make something yourself? Post it here!
i made it myself: amigurumi pumpkin
I feel silly posting about this little pumpkin. It looks almost the same as last week’s apple. But, I got all excited yesterday and posted my trick or treat bags and Halloween cards and totally forgot that today was I Made it Myself Day. (I have to support my fellow crafters!) So, here it is.
It will be up for sale on etsy later this week. I was thinking about writing up the pattern and posting it on the blog, but does the Internet really need another How to Crochet a Ball pattern? Aren’t they all the same?
In the meantime, I’m designing some new felted sweater bags for Fall. Hopefully, I’ll have something new to post next week!
Did you make something yourself? Post it here!
only 47 more days until halloween
Around here on the blog, though, you’d think it was already October! I’ve been busy sewing up some orange and black goodness that I wanted to share with you. It all started with a doodle.
Then, M and I were sorting through (playing with) fabric, and I got inspired to make her a trick or treat bag.* It turned out so cute, I made a bunch more.
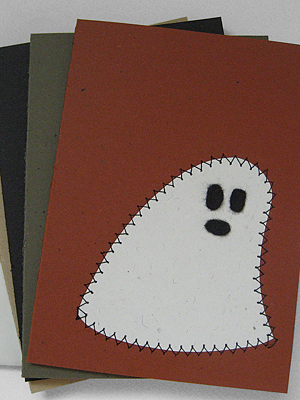
Then I sewed up a stack of Halloween cards. I’ve been trying to do more things with my left over stash from paper trade shows. I made these cards out of Fox River Confetti paper. (Love, love, LOVE this paper!)
There’s more coming. Remember how I said I was becoming slightly addicted to amigurumi? I’ve got two little pumpkins on my windowsill looking for a new home. I hope to get a picture posted soon. I also may have possibly bought some glow in the dark yarn for a little amigurumi ghost. Oh, and I was thinking a little black cat might be cute to make, too.
All in good time, my little pretties.
*No, I’m not taking her around this year to collect a bunch of sugar. She’s still too young. She’ll probably just stash her keys, phone and baby Elmo in her bag. What? Like you don’t have a baby Elmo in your bag.