homemade granola recipe

homemade granola

If you’ve been waiting for me to post this recipe, thank you for being patient! I took a granola break for awhile. I got frustrated because you really can’t make a totally healthy version of this stuff. I’ve done the best I can, but it’s still packed with calories. Luckily, it tastes good enough that I only need a little sprinkle to jazz up my plain yogurt.

Preheat oven to 325 degrees F.

Mix in one bowl:
2 cups old fashioned oats
1 teaspoon cinnamon
1 teaspoon kosher salt

Mix in a second bowl:
2 tablespoons oil (I use light olive for baking)
1/4 cup blue agave (or honey)
1/4 cup light brown sugar
1 teaspoon vanilla extract

Combine the wet and dry ingredients. Pour onto a baking sheet with edges, like a jelly roll pan.

Bake for 10 minutes. Remove pan and stir.

Add 1/2 cup chopped nuts. I’ve used almonds and pecans.

Bake for another 5 minutes. Remove pan and stir. Bake for a final 5 minutes. Take it out sooner if it starts to get too brown.

Keep stirring so the granola doesn’t stick. (I skipped this the first time. You get a giant block of granola! If this happens, warm it up a little in the oven until you can stir it again.)

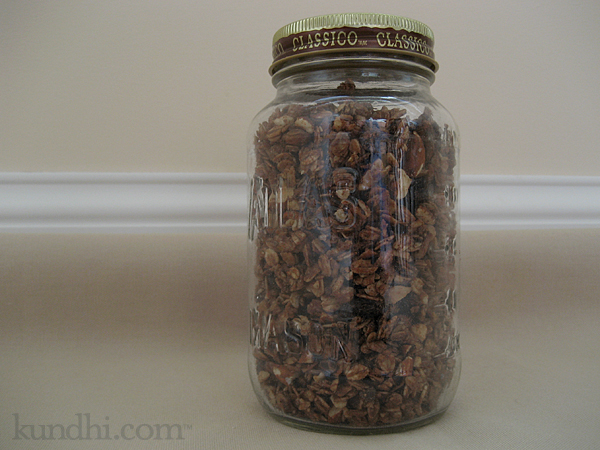
When cool, add 1/4 cup dried fruit. I’ve used raisins and cranberries. If you are feeling really decadent, sprinkle in a few mini chocolate chips, too.

recipe credits: This is an adaptation of the recipe my daughter brought home from Cooking Camp last year, which was an adaptation of the granola recipe in Baked: New Frontiers in Baking. I’ve never seen the original recipe.

old cat, new tricks

I’d like to say that I adapt fairly well to change, but that doesn’t mean I like it. Today I tried three new things and I’m actually exited about them.

crochet yarn over
Recently, my friend Jennifer pointed out that our double crochet stitches look different. She watched me do mine and I watched her do hers. The difference? How we did the yarn overs. I spent the day practicing her yarn over and I’m hooked. (Ha, ha)

granny square basics
I’ve been making my granny squares the same way since my very first one. I happened across a tutorial on Sarah’s Crochet a Rainbow post and I really like how she does her color changes. Starting the next color in a different chain space makes it easier to crochet over the previous row’s tail. Sweet!

chai concentrate
Awhile back, Amy posted a link to chai concentrate. I don’t think I’ve ever had milk in my tea. Milk my coffee, sure, but in tea? (When I visited India, I was the weird American who ordered my tea black.)

Today I made a double batch: one for a friend and one for myself. I have to say that I don’t hate it. I’m not used to sugar in either coffee or tea, so the sweetness is a little weird. What I do like about this recipe: you can switch up your tea with each serving: caff, decaf, green. I’ll be trying it again tomorrow.

Three new things in one day. Who says you can’t teach an old cat new tricks?

my creative space

peppermint bark

In my creative space today I’m making peppermint bark gifts, inspired by Amanda’s “elving” post on Monday. What you see in the pic above are all the little edge bits.

Oh my, do they taste amazing. Just as yummy as the big chunks of bark. I have a little container of them hidden in the back of the fridge — my little secret treat. They taste especially yummy with a hot cup of coffee or tea.

What kinds of yummy treats are you making this holiday?

original 1977 moosewood cookbook

1977 moosewood cookbook

Last week organic carrots were on sale and I bought three pounds. The colder weather has me thinking about soup and wandering around the internet looking for some fresh recipes. I found a couple of references to The Moosewood Cookbook carrot soup, specifically that the originally published version was much tastier than the one found in later printings.

1977 moosewood cookbook

I picked up the original version this morning at my library and Oh My Goodness is it ever beautiful! All 221 pages are hand lettered and illustrated. We are talking tons of text, right down to the table of contents and index. Every recipe has some type of illustration: some simple, some super ornate.

1977 moosewood cookbook

Can you imagine anyone taking the time to hand letter that much text these days? The only person who comes to mind is SARK.

1977 moosewood cookbook

I had a hard time choosing only four pages to show you. If I could, I would have posted half of the book! I haven’t tried the carrot soup recipe yet. I’ll let you know when I do!

putting some apples by for winter

big canning apples

This weekend I canned apples. Before I moved to Nebraska, canning anything would have never crossed my mind. Going to an orchard to pick my own apples never crossed my mind, either. Unfortunately, vacation and being sick kept us from prime picking season, but when we went to this pumpkin patch, they had local, harvested apples we could buy. Cool!

I was really nervous about doing this. The word “botulism” comes up quite frequently in the canning books. Yikes! It was really easy, though. To prepare, I bought a stock pot, jar lifter and wide mouth funnel. (The funnel comes in handy on a daily basis around here, since we store lots of things in mason jars.) I got the pint jars from the grocery store and used the Ball Blue Book as my guide. One peck of apples filled six pints almost perfectly.

What I’d really like to do is can soups. I dream of opening up the pantry on a cold, snowy day and pulling out a hearty, homemade soup instead of a can of Campbell’s. Most of the things I’d really like to can need a pressure canner. I’m definitely not ready to make that commitment. I figure I’ll try jam and pickles next and see how things go. Maybe in the Spring I’ll be ready to join a CSA and take the next step.

What about you? Do you grow and can your own produce? Buy from local farms? Love the idea or think it’s crazy? I’m curious!

wacky wednesday preschool snack

Today was my daughter’s snack day at school. On Monday at the grocery store she announced she wanted to take grapes and milk. I thought that was pretty easy. Then we got home and she informed me that her snack day is on Wacky Wednesday.

I don’t remember doing this in school, do you? You wear wacky clothes: socks that don’t match, shirts backwards, off season things. The whole day is weird with wacky crafts and games. I figured we needed to bring a wacky snack, but what to do with grapes? I finally came up with this little caterpillar kabob.

caterpillar grape kabob

I used bamboo skewers that we had on hand and cut them in half with heavy duty scissors. I also cut off the sharp points. Eyes were made out of little balls of (very cold) cream cheese frosting and mini chocolate chips. The teachers thought they were pretty cool. I hope the kids like them, too.

hello november!

early morning frost

I don’t have any crafty pictures today, so I thought I’d share one that I took of the morning frost at the park. It’s got me thinking about the cold weather that’s almost upon us. (Here’s a larger size so you can see the ice crystals.)

My daughter goes on a hike at nature school, so we can’t simply run from the car to the door. Well, I can, but she’s got to dress for the weather. I have to pull out her hat and mittens and see if they still fit.

I’m mending one of my favorite sweaters that has worn elbows. I’m taking pictures and will share all of the steps with you this week.

I made a big pot of soup and an apple crisp this weekend. I also spent a lot of time under my one of my favorite blankets.

I’m looking forward to Thanksgiving and making holiday gift lists.

Today I voted. Tomorrow I will turn the phone ringer back on.

homemade granola!

homemade granola

Wow, just wow. Homemade granola tastes awesome. I adapted a recipe that my daughter brought home from Cooking Camp this summer. I need to do a little bit more fiddling with it to get the calorie count down, but this is definitely going to become a staple in our house. Right now I’m sprinkling it over my morning oatmeal. Delish!

reuse: Did you notice the mason jar? Classico pasta sauce comes in jars that are great for reusing as storage. Their organic pasta sauce is pretty tasty, too.

this weekend i made a dinosaur cake

dinosaur cake

It did not have a volcano or really big teeth. It wouldn’t win a spot in the Craftiest Cake Hall of Fame. It did, however, have some really awesome dinosaur sprinkles, along with some moons and stars, carefully applied by the birthday girl herself. And it is the only thing I made this weekend.

I didn’t make her a fancy dino applique anything (although my friend Kelly made her an awesome dino tote), no special #4 shirt like last year (she wanted to wear her Liberty party dress), not one stitch sewn, knit or hooked.

I have done other crafty things, though. We’ve colored a lot, gone through an amazing number of stickers and built cool houses with magformers. We’ve also read lots and lots of dinosaur books and eaten lots of cheesy carbohydrates.

It’s been awesome, but I’m ready to get back to my usual creative self. I’m also buying my own set of skinny magic markers because coloring these cool animals is really fun.

recipe: thrifty crispies

homemade bread and croutons

Around the same time that I was reading Silverstone’s Kind Diet, Elli Metz was sharing her thoughts about Pollan’s In Defense of Food. Her post made me get up and check the label on my favorite store-bought bread. It didn’t have 32 ingredients, but it did have 16, most of which I couldn’t pronounce.

I decided to pull out my bread machine and we’ve been eating homemade ever since. When I bake bread in the oven, I use the Artisan Bread recipe and make small loaves. It’s too hot in my kitchen during the summer months to use the oven, and the bread machine makes such large loaves. It’s hard to finish it before it goes stale.

One day last week I made a big batch of hummus and realized I had nothing for dipping. Then I thought: stale end of bread = croutons! I made mine really big and now I’ve also eliminated store-bought pita chips for snacks.

Thrifty Crispies (or just really big croutons)

Preheat your oven to 350 degrees F.

Using a serrated knife, cut that stale hunk of bread into dipping-sized pieces. Watch your fingers! Depending on how much bread you have, put 1-2 tablespoons of olive oil in a bowl and add some seasonings. I use a little salt, pepper, garlic powder and onion powder. Add the bread to the bowl and toss until lightly coated.

Place them single layer in a baking pan or cookie sheet and bake for 6-8 minutes. Stir once and then bake the other side for 3-4 minutes. The time will depend on how big you cut your pieces. Don’t let them burn!

Cool and store in an air tight container.

These don’t last very long in our house. I like them with hummus, but my husband and daughter snack on them straight out of the container.

thrifting: I got my first bread machine on freecycle. It was a little dusty, but with some elbow grease, it cleaned up nicely. Plus, it was free! My current machine came from a garage sale and was a little pricey relatively speaking, but it matches my kitchen appliances. You can usually find them “as-is” at the thrift store for around $10.