inspiration and paper cuts

I’m still spring cleaning my creative space. Last night I went through all of my knitting and crochet magazines. I was surprised how much paper I was holding on to for just a handful of patterns. I cut out the ones I liked and bundled up the rest to pass on to my friends at knitting group on Wednesday.

Tonight I’m tackling my inspiration magazines. I rarely tear out pages, but after seeing all of the advertising that is just cluttering things up, I started ripping. How inspirational can all of these beautiful photos really be when they are mixed in with ads for all kinds of uncreative things? I’m cutting out what I love and recycling the rest.

Both of these steps are in addition to thinning out my craft books, which I did a few weeks ago. I put a lot of stuff on swaptree.com and have given some away to friends. My spring cleaning goal is to only have things around my creative space that are inspiring to me.

I know some of you are out there spring cleaning, too. What are you tossing?
what’s the most creative time of your day?

I love the wee hours of the morning. Some of my fondest memories are from my little apartment in Baltimore staying up until 2, 3, or 4 a.m. just drawing, reading or listening to music.

Summertime was my favorite. I lived right in the middle of Mt. Vernon’s night life: restaurants, bars, dance clubs. I’d throw open the windows and work to the background of music and laughter rising up from the streets. Sometimes I’d walk to the bookstore cafe and get a late night coffee just before they closed at midnight. The humidity in the air made the street lamps glow. It was magical.

Fifteen years later I am facing the fact that my favorite time of day just isn’t working for me anymore. I need my full eight hours of sleep. Count backward from when my daughter springs out of bed and the numbers just don’t work. One late night can throw off my whole schedule and start me on a downward spiral of over-caffeinated mornings and afternoon naps.

I know I need to get up before the rest of the house to get quality work done. I know the mornings can be magical in their own special way: the smell of freshly brewed coffee, sunrises, dew drops outside my window. I know I need to make a change. I just can’t let go of my nights.

What about you?

Do you get up when the rooster crows or are you a night owl, too? Have you ever changed things up? How did it work for you? Did it stick? Was it hard to do? Do you miss your old ways or love your new way of life? Please share your thoughts and experiences in the comments. I really want to know!

gift bag resolution

After my daughter was born, we had a huge supply of gift bags. Most of them were pink, but we had our fair share of gender neutral and holiday bags, too. It’s been over three years, but I’m almost finished using them for gifts.

Honestly, it felt like my stash would never be gone. When I got close to the end of my pile, I started thinking about how I would wrap presents in the future. I did a little bit of research on the web and found some startling statistics about gift wrap.

Wrapping paper, from an ecological point of view, is a pretty worthless use of trees. Each year in the United States, 4 million tons go from logs to landfills to make wrapping paper and holiday shopping bags, according to the Clean Air Council, a Philadelphia-based nonprofit organization.

Once I got past the shock of 4 MILLION TONS EACH YEAR I read something even more unsettling. You know how some people throw wrapping paper into their fireplace?

Decorative wrapping paper, much of which is made in countries such as China that have looser environmental regulations, can contain lead, synthetic inks, plastic film, chlorine or metal-based foils, which release toxic and carcinogenic compounds into the air when burned. Metallic paper may or may not have a greater environmental footprint than other types, but it’s certainly not meant to be inhaled. Who’s most vulnerable to this indoor pollution? Children, whose systems are still developing.

You may be able to recycle gift wrap depending on where you live, but metallic accents, glitter and too much tape can make them un-recyclable. Plus, if it’s unsafe to burn, is it really safe for your child to be tearing it apart?

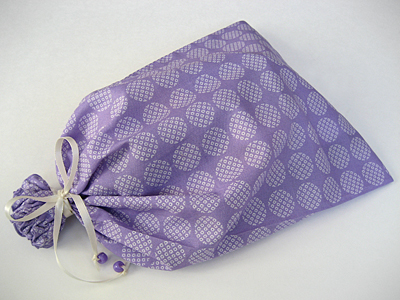
handmade fabric gift bag

So, I’ve resolved to only use fabric gift bags and plain recyclable paper going forward. I really like how my first fabric birthday bag turned out. Does anyone want to make this resolution with me? There are some great ideas to inspire you over at That Little Bit Greener.

resource: Quotes taken from this Washington Post article.

granny stars!

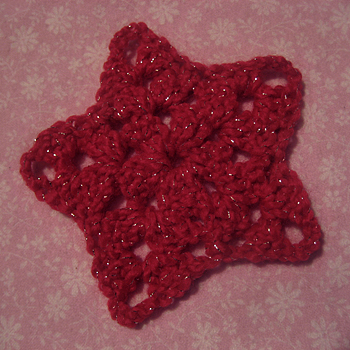
Once I decided to crochet some stars for a garland, I started seeing stars everywhere. Isn’t it funny how that happens? My favorites are these totally adorable granny stars.

crochet granny star

I’ve ditched my Chromium Blanket stars for these. They work up a lot faster and are so much fun! If you crochet, you should really give one a try.

inspiration: tutorial from The Royal Sisters, multi-colored stars by Lucy over at Attic24, Sarah London’s garland, and Emma Lamb’s wee flowers and stars.

handmade, no-sew abby cadabby costume

abby cadabby sesame street

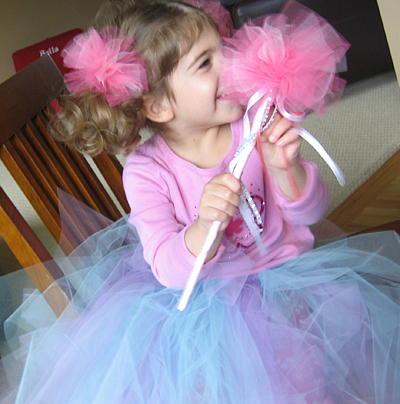
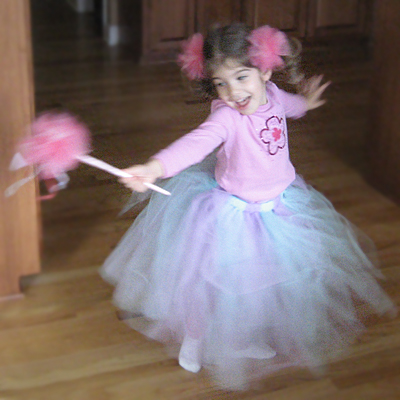
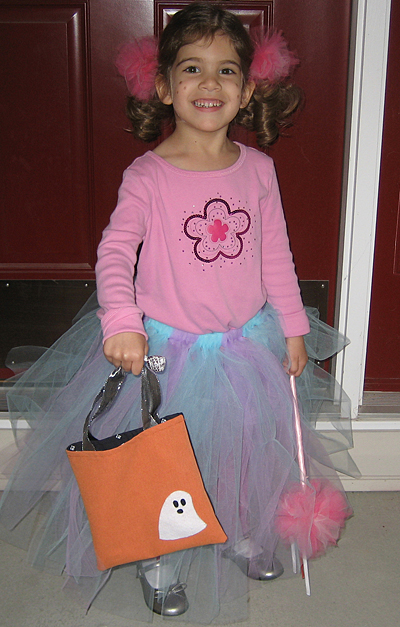
I hope that all of the handmade costumes in my future are as easy as this one. Remember the tulle I found at the thrift store awhile back? Even then I had a feeling it might make its way into an Abby Cadabby costume.

handmade abby cadabby costume

Tutu
I found both of these tutorials very helpful: how to make a ribbon tutu (video) and how to make an elastic tutu. The first one is totally no sew. The second one needs a little bit of hand sewing— you need to sew the ends of the elastic together. I made my strips 40 inches long, so folded and knotted they fell right above the ankle.

Magic Wand
I had never used a glue gun before and borrowed husband’s for this project. Why was I so intimidated by hot glue? It was so easy! I used this tutorial for the wand, and the wooden dowel was the only part of this costume that wasn’t from my stash.

Hair Poufs
These are just smaller versions of the pouf I made for the wand. I tied them to elastic hair bands.

Wings
I didn’t make wings. Actually, I don’t know if my daughter even realizes that Abby has wings. She is all about the magic wand. I figured they’d just get in the way, especially if she wore the costume all day, which she did.

Everything Else
The shirt, pants and shoes all came from my daughter’s closet. The trick or treat bag is from last year’s Halloween crafting.

no sew abby cadabby halloween costume

stash: My whole family was sick the last week in October and I didn’t start this until the night before Halloween. I was thankful that I had everything I needed in my stash, as I was really not up to shopping for costume supplies with a sick 3-year-old. Luckily, we were all well enough to go trick-or-treating on Saturday!

how to sew a baby quilt in five easy steps

snoopy baby quilt

So you’d like to make a quilt, but you’re intimidated by all of those little pieces, right? I am, too. But you can make a quilt without blocks. It’s easy and looks just as nice! Here’s how I did it:

Materials
1 – 36×36″ piece of top fabric
1 – 36×36″ piece of bottom fabric
1 – 36×36″ piece of batting
1 – 38×8″ piece for making the trim*
matching thread
bias tape tool
rotary cutter and ruler
walking foot (optional)

*even easier: use 4 yards (plus a few inches) of pre-made bias tape

Step 1
Lay your fabric on the floor wrong sides together with the batting in the middle. Pin baste from the center outward.

Step 2
Starting from the center and working your way outward, draw parallel lines every four inches with sewing chalk, water soluble pen or light pencil.

Step 3
Starting from the center, sew along these lines working your way outward, taking out the basting pins as you go. Here’s where a walking foot is helpful, but if your batting isn’t too thick, you should be fine without it. Square up your edges with a rotary cutter and ruler.

Step 4
Cut your trim fabric according to the measurements for your bias tape tool and make the trim. Even easier: open the package of pre-made bias tape.

Step 5
Fold the trim over the edge and attach with a zig zag stitch. Fold the ends over at the corners to enclose the raw edges.

snoopy baby quilt

I hope I didn’t oversimplify this, but it’s really easy. The zig zag trim takes a little practice. This was my first time, and I’m sure it will get a lot neater the more I do it.

resource: I was inspired by Soule Mama’s Beach Blanket To-go for this blanket. One day I hope to make something as beautiful as her daughter’s quilt, but for now, I’m going to stick with single pieces of fabric until I’ve got more free time.

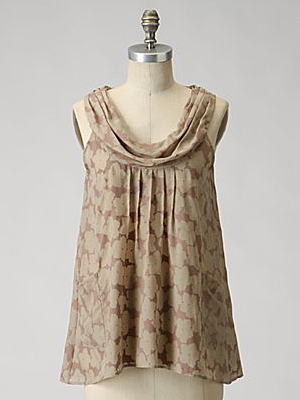
inspiration: anthropologie tank top

I was browsing through the Anthropologie website and saw this cute top.

anthropologie transparency cowlneck

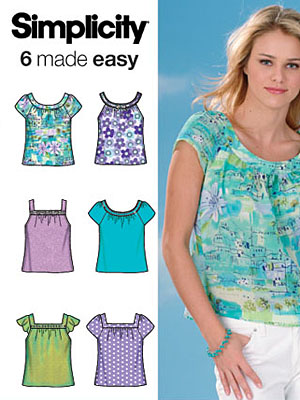
I immediately thought of a pattern I have in my stash. (View #2)

simplicity 4589

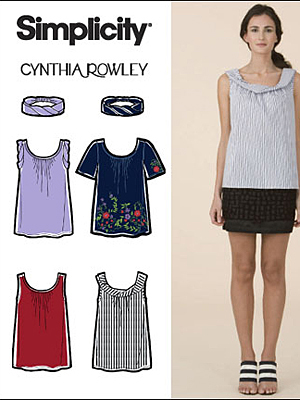
Then I thought of another one. (View #4)

simplicity 2593

Clearly I need to stop thinking so much and start doing. My list of potential and unfinished projects is getting much too long!