wardrobe refasion: adding long sleeves to a t-shirt

long sleeves on t shirt

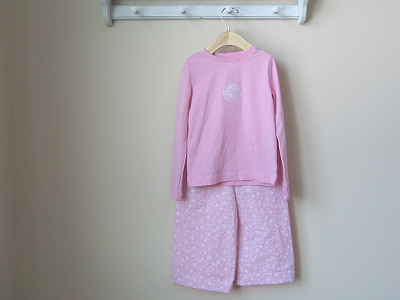
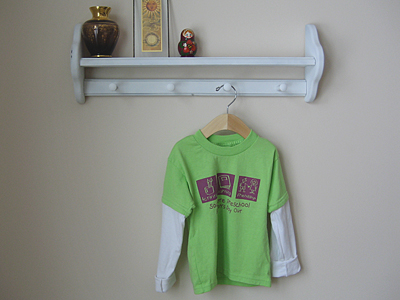
I was putting away laundry in my daughter’s dresser and found her preschool t-shirt. I can’t remember the last time it was warm enough to wear short sleeves. I don’t think it’s even been worn once. I decided to add some long sleeves so she can wear it before she outgrows it.

(I know what you are thinking. Why not just layer it over a long sleeve shirt and save yourself the trouble? Well, not only does my daughter dislike wearing sweaters, she doesn’t like to layer shirts, either.)

I used a size 4-5 T sleeve to make the pattern and figured I’ll just roll them up for now. Maybe next fall, I can use them on a different shirt. Look at that beautifully serged seam. Don’t you just love it?

long sleeves on t shirt

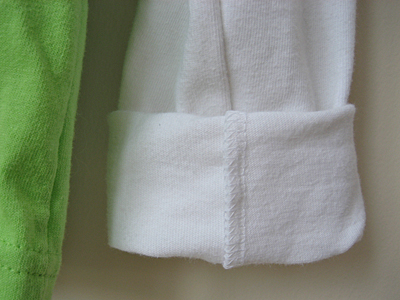
recycle: I used the body of one of my old t-shirts to make the sleeves. I was going to post a tutorial, but this seems easy enough. What do you think?

how your child can make wrapping paper in 3 easy steps

handmade eco-friendly wrapping paper

A few months ago I found these stamps while digging through the craft section at the thrift store. One of my daughter’s favorite things to do is stamp — anything and everything!

handmade eco-friendly wrapping paper

She already makes birthday cards for her friends by hand, and I thought it would be fun to have her make wrapping paper for the gifts, too. Fabric gift bags are great, but sometimes kids just need to rip paper.

I usually use kraft paper for this, but a paper bag works just as well.

Materials
kraft paper or paper bags
rubber stamps
washable ink stamp pads

Step 1
If using kraft paper off the roll, tape it to the table first so your child has a flat surface on which to stamp. If using a paper bag, cut it flat and use a low heat iron to smooth out the wrinkles. (They won’t disappear, but will flatten out.)

Step 2
Roll up your child’s sleeves. We’ve had elbows in the stamp pad many times, which is why washable ink is a good idea.

handmade eco-friendly wrapping paper

Step 3
Wrap the gift! If your child wants to help with this step, hold the paper and let her apply small pieces of tape.

Bonus!
Have your child stamp the envelope to match the paper.

handmade eco-friendly wrapping paper

recycle: If you missed my post with the frightening statistics about wrapping paper, you should really check it out. I’m happy to say this is one resolution that I’ve had no problem keeping! (Price for the stamps: $4.)

handmade valentine’s day cards

handmade valentine's day card

My daughter’s preschool is having a valentine exchange tomorrow. Usually the rule for school treats is no candy, but this time they’ve made an exception: one small piece is allowed. I found this cute valentine flower on Martha’s website.

The first thing I did was trace and cut out some leaves. I gave them to my daughter to sign while I traced and cut out the hearts. After she went to bed, I added the “from:” to her leaves and glued the flowers. The next day, she helped me put in the lollipops.

Even though she’s too young to use scissors, I think my daughter had fun with this project. Signing her name to all of those leaves made her feel really involved.

stash: Paper from my never-ending stash of graphic design paper samples. Lollipops are always on hand around here. You never know when you need an emergency “treat.”

embroidered baby quilt

There is something in Nebraska’s water. The past few months and the next few months seem to be filled with babies, babies, babies! So, expect to see lots of cute things for my friends’ wee ones here on the blog.

embroidered eyelet baby quilt

This is a really basic blanket, but the eyelet fabric makes it extra special. Bonus: the eyelet fabric was already quilted, so no need for batting!

embroidered eyelet baby quilt

I added an embroidered monogram to make it a little bit more fancy. I love the contrast of the dark pink on light pink!

stash: Eyelet fabric was from someone who was selling her grandmother’s fabric stash. Pink check fabric was the very first fabric I purchased when I got my sewing machine. Monogram letters from Sublime Stitching.

how to make microwave crayon shapes in 3 easy steps

microwave heart crayons

Maybe I should call these Really Lazy Crayon Shapes. I’d been thinking of making them for awhile, but all of the tutorials I found online suggested baking in the oven, melting over a double boiler or melting into cups and pouring into molds. Those were just too many steps for me.

I found a silicone mold at the thrift shop for only a few bucks, so I wasn’t too concerned if I ruined it. I threw all caution to the wind and microwaved the crayons directly in the mold. It was simple, fast and easy to clean up.

microwave heart crayons

Materials
crayon bits
silicone mold
knife
toothpick

Step 1
Put your crayon bits directly in the mold. Break up any bits that are too big with a knife.

Step 2
Microwave on high for 1-2 minutes. (I’m sure times will vary based on microwaves. Watch your first batch carefully!) Use a toothpick to stir if your bits aren’t melting evenly.

Step 3
Allow to cool and then pop them out of the mold. I put mine outside because we’re having a frigid winter and it didn’t take long, but you could stick them in the freezer, too.

Clean up: Put some water in the mold, microwave it for about a minute and dump it out. The crayon residue wipes out easily with a paper towel.

*After searching, I found that my mold is actually an ice cube tray and shouldn’t be exposed to heat. It held up just fine, but I wouldn’t use it for ice cubes or food after heating just to be safe.

recycle: This is a great way to use all of those crayon bits that are too small for little hands to hold.

my first crochet hat

first crochet beanie

I’ve got too much acrylic yarn. I like to keep a stash on hand for spontaneous amigurumi projects, but it’s gotten out of hand. I was planning to give it away, but it’s been so cold out, I thought maybe I’d do something useful with it.

A few months ago, my friend Lisa asked all of her crafty friends if they would consider making some hats for students at her school who needed warm clothing for winter. I actually started one and then the holidays hit and I completely forgot about it.

As you probably know (unless you’ve been living under a very warm rock), it’s been pretty cold in Nebraska the past week. I’ve been thinking about the kids who usually walk to school. Then I remembered the hat I started.

I was surprised how fast this worked up. (I was also surprised that my daughter agreed to wear it for a photo.) I definitely plan to make a few more of these.

pattern: This is a basic double crochet beanie like this one. I modified it a bit as I went along. My yarn was sport weight, so I double stranded it and used a larger hook. It is thick and warm!

the flower appliqué experiment

My daughter is a little heater. She takes after her father, who wears shorts in the winter. She’s never cold. She just wants one small blanket when she sleeps and she refuses to wear sweaters.

hand knit sweater with crochet flower applique

Her Grandmom loves to knit her sweaters, the warmer the better. Every time we talk, she expresses concern over my daughter not wearing her sweaters. I’m not sure if it’s because she’s afraid our child is really cold or she’s disappointed that all of her hard work isn’t getting worn.

hand knit sweater with crochet flower applique

I decided to do a little experiment and crocheted a flower appliqué for her pink fuzzy sweater. My daughter LOVES the flower, but when I asked her if she wanted to wear the sweater, she said no. Meanwhile, I’m wearing a sweater and bundled up in a blanket by the fireplace. Just looking at her makes me cold! I’m going to keep trying, though.

hand knit sweater with crochet flower applique

The only pink yarn in my stash was wool, so I had to make the applique easy to remove for washing. I stitched the petals on with a large piece of yarn and tied a bow in the back. It will also be easy to move to other sweaters in the future.

flower details: Flower is an Irish rose and the middle is a vintage button.

new year pajamas

I finally got around to finishing up my daughter’s second pair of “Christmas” pajamas. We’re now calling them New Year Pajamas.

handmade pajamas

They are pink with little white flowers, but with the weather we’ve been having, my daughter has been calling them snowflakes. We’re supposed to get more snow tomorrow. I might let her were these all day long.

handmade pajamas

stash: I wish I could remember where I picked up this fabric. It’s so soft and thick. Nice and toasty for the chilly temps we’ve been having in The Heartland.

embroidered sun pillow

handmade embroidered sunshine pillow

A few months ago, my daughter was drawing at her easel while I was making dinner. She said, “Look, Mom! A sun!” Not only was it a sun, but it was her very first face, complete with two eyes, a nose and a smile. Since then, she’s drawn lots of suns with faces: fat ones, small ones, some even with freckles. This one is special, though. This one was the first.

handmade embroidered sunshine pillow

I decided to share her sun with her grandparents for Christmas. I took a photo of her original artwork, printed it and traced over it with a marker. Then I taped it to a window, taped the fabric over the paper, and traced it with disappearing ink. After embroidering it, I sewed it up into a pillow cover.

handmade embroidered sunshine pillow

I hope to make one for myself this year. Maybe a smaller version for her room? She loves her sun and has the printout taped to her wall. I’ve got the original tucked away for safe keeping.

stash: Everything except the pillow forms came from my stash. The upholstery fabric colors were perfect for this project and I used quite a bit of yellow embroidery thread.