wardrobe refashion: t-shirt to cardigan

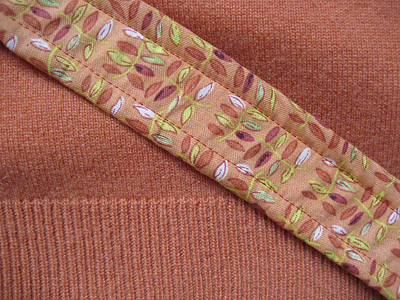
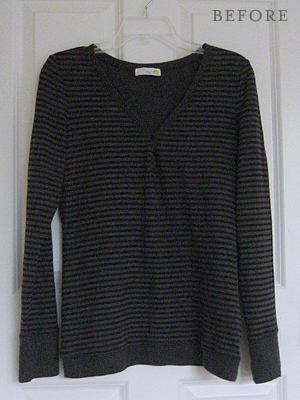
A few days ago I went to straighten up downstairs for house guests and I found this shirt in the closet. I forgot that my mom had left it for me after her last visit. She wasn’t happy with how the v-neck looked. When I tried it on, I thought the same thing. It didn’t look bad; it just didn’t look great. It was a nice size on me, though. I liked the colors and it’s really soft.

t-shirt to cardigan

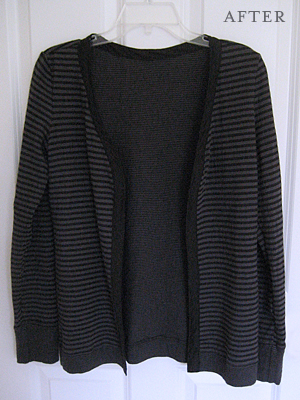
I decided to turn it into a cardigan. I’m always chilly in the summer when I’m inside in the air conditioning. I think this will be perfect to throw over a tank top or short sleeve shirt.

t-shirt to cardigan

How I Did It
• Made the bias tape out of some black cotton from my stash.
• Removed the buttons.
• Cut a straight line from the v-neck to the bottom.
• Sandwiched the raw edge in the bias tape and pinned.
• Sewed all the way around 1/8 inch from the inside edge of the tape.
• Sewed all the way around 1/8 inch from the outside edge of the tape.

I really like how it turned out. I did an ok job sandwiching the edges in the bias tape. I may fiddle with how I do that in the future. Overall, I think my first wardrobe refashion was a success!

refashion: If you have a shirt that you really like, but it doesn’t fit well, turn it into a cardigan. Cotton for bias tape from my stash, shirt from my mom.

too many projects started…

…not enough finished.

I’ve been really busy lately, but don’t have many pictures to post. How does that happen? This week I worked on a custom sweater bag with coordinating box bag. It’s almost ready for pics. Here’s a peek.

cathy bag

Doesn’t it look soft? It’s cashmere and sewing up beautifully.

I also finished up a gift for a friend who is moving at the end of the month. She brought some yarn to knitting group to destash because she didn’t want to move it all back to NYC with her. The yarn was so pretty and soft I decided to knit a cowl for her. You can check out pics on her blog. I’ve been really bad with pics this week. I just realized I didn’t take one of another box bag I finished and mailed off. Oh, well.

I’ve also started some refashioning projects. The denim pants are halfway to becoming a skirt. The striped shirt is going to become a cardigan. The floral shirt and jacket were from my neighbor’s garage sale.* I wasn’t planning to buy anything at the neighborhood sales this weekend, but felt I should at least stop by and say hello. I’m not sure how these made it home with me. Oops! The jacket has a removable quilted lining! Both are a little too big, but should be easy to resize.

refashion

A tablecloth sort of kind of came home with me as well. I’m thinking it will make some really beautiful tote bags.

table cloth for tote bags

All right. Better stop writing and start sewing so I have something to post tomorrow!

*If you are looking for kids clothes and toys, come to our neighborhood this weekend. The garage sales are kid central around here!

recycle and refashion: sweater was thrifted, client provided coordinating fabric, box bags made from stash fabric, clothes are from my closet, my mom, and garage sales, tablecloth from garage sale

embroidered handprint for mother’s day

bella's handprint

My mom really wanted a handprint of Bella. When she last came to visit, she spent a lot of time tracing Bella’s hand, along with Pete the Penguin’s wing and Puppy the Dog’s paw, of course. I traced one of those handprints onto some muslin and embroidered it. It turned out way cuter than I thought possible. I made one for my mother-in-law and hope to make one for myself.

bella's handprint

notes: embroidery hoops from goodwill craft bin, muslin and embroidery thread from my stash, inspiration from plumpudding

my faux burberry scarf

flannel

Remember when I mentioned that some of that stash flannel was going to become a faux Burberry scarf? It was a really easy project and great for some instant sewing gratification.

  • The original piece was about 14 x 43 inches. I cut it in half and joined the 7 inch ends with a french seam.
  • I sewed the edges just as you would for a napkin or tea towel: fold all four sides 1/4 inch and press, then fold over again, press and pin.
  • Then I top-stitched the edges down. I mitered my corners, but don’t think it was necessary.

That’s it! Here are some online tutorials for a french seam (via Hoppo Bumpo) and mitered corners (via CraftStylish).

recycle: This would be a great way to save a flannel shirt from the landfill. If you have smaller scraps of flannel, just add a few more french seams.

recycled crafts at the farmers’ market

farmers market

I am so excited that it’s May because that means Saturday mornings at the Farmers’ Market. There’s a little area called Iron Horse Park where Bella likes to play. This is also where you’ll find most of the craft vendors. So, while T and Bella hang out by the fountain and the train-shaped jungle gym, I wander and window shop (or should that be e-z-up-tent shop?).

I saw a lot recycled crafts this year. My two favorites were the t-shirt grocery bags and earrings made out of cds. I didn’t think to take pictures, but they are similar to this bag and these earrings on etsy. The lady who makes Capri Sun tote bags (like these) is also back this year.

Later in the season, when there are usually more vendors, I’m hoping to see more recycled crafty goodness. (And hopefully, I’ll remember to take some pictures!)

10 garage sale tips for crafters

It’s that time of year! Green grass, budding flowers and garage sales! At below thrift store prices, though, it’s easy to come home with too many potential projects. Here are some tips for productive bargain hunting. I’ve written them from the perspective of a sewer and knitter, but most apply to all types of crafts.

Go online. Check the newspaper classifieds and craigslist. Search for terms like craft, yarn, fabric, sewing, etc. and read through the ad. If you’re looking for fabric by the yard and the description says fabric is cut into quilting squares, skip it!

Make a list. Group sales that are near each other and start closest to home. Save the sale on the other end of town for last. You want to spend more time bargain hunting and less time in the car.

Stick to the basics. Garage sales are a great way to enhance your stash. When you’re shopping without a specific project in mind, look for neutral fabric, yarn and ribbon. Stock up on batting, interfacing and thread.

Stay focused. Go with one or two projects in mind. I’m looking for a big, sport sweatshirt to make another remote control pillow. I’m also looking for a few floral print shirts to make into tote bags. Focusing on these things will keep me from coming home with things I don’t really need.

Don’t waste your time. Drive by the sale slowly to see if it is worth parking your car. If you don’t see anything promising, keep driving.

Ask if the price is firm. You’ll be surprised how many people mark up their prices expecting you’ll barter down. Note: Don’t haggle with the little old lady who is selling yards of fabric for 50 cents each. Give her a little extra and tell her to keep the change.

Inspect items closely. Look for tears, holes and snags. It’s not a deal if you can’t fix it!

Buy clothing a little too big. You can always take it in, but it isn’t always possible to let it out.

Take along a snack and a drink. Wear comfortable clothing. Use sunscreen when walking around neighborhood sales.

Don’t be afraid to walk away. Chances are that if you’re not sure if it is a good deal, it probably isn’t. It’s better to regret missing a bargain than wasting money. Besides, there will be another deal in your future. That’s what garage sale shopping is all about.

Do you have any tips for your specific craft: paper, stamping, beading, etc.? Please share them in the comments!

. . . . .

Thank you to all who entered the coffee sleeve giveaway! The random number generator picked comment 11. Congratulations Cicoi Ingrid!

coffee sleeve of the month giveaway:
spring flowers

I must have been really tired when I wrote my last post because when I came home from my weekend away the coffee sleeve looked totally fine. Sometimes we just need a little distance from our work to give it some perspective.

felted wool coffee sleeve

I know April is all about showers, but I lately I have been obsessed with flowers, especially little crocheted ones. I’ve tried a few different patterns, but keep coming back to this one by Mimi. The stem is a simple chain stitch.

crochet flower applique

Would you like these little flowers for your cup of java?

How to enter: Mention this giveaway along with a link back here in a blog post, twitter update or facebook status and then leave a comment telling me you did so. If you don’t have any of the above (really? are you serious?), then leave a comment here and tell me what’s your favorite spring flower.

Since I didn’t get this post up until late on Monday, I’ll give everyone until Thursday, midnight CT to enter. Cool? Good luck and Happy Spring!

recycle: thrifted wool sweater sleeve, thrifted yarn

coffee sleeve of the month: oops!

Yesterday I really wanted to sew, but I had so many things to do! I tried really hard to fit it in, but didn’t get a break until after Bella went to bed. By then I was really tired, but I wanted to work on this month’s coffee sleeve for a weekend giveaway.

I planned to use a blue sleeve that was already cut at the seams. I figured I could just resew the cuff, which worked fine. Then I went to trim my threads. Oops! Accidentally cut the sweater. Then I thought I could stitch up the hole, but I must have been really tired because it just wouldn’t close. Finally, I just gave up.

Some days are just not meant for sewing, I guess. Instead, I’ll share this great Whip Up article  by Betz White on applique techniques. Appliques are great for refashioning clothes. They cover holes and stains. (Hmmm… maybe that’s just what my coffee sleeve needs!) They also can transform toddler clothes for reuse. Cover that little boy decal with a  flower; hide the princess with a puppy.

In the meantime, I’ll get to work on the coffee sleeve giveaway for next week. Just gives you something to look forward to, right?

stash enhancement: fabric

A few weeks ago, I went through and did a massive declutter of my fabric stash. I’m so glad that I did. I know exactly what I have and what I need. When Christy mentioned that she had 18 (!) boxes of free fabric to giveaway, it was easy for me to stay focused when going through all of them.

Swapping fabric with friends is a great way to enhance your stash without buying new. I was surprised how much I found knowing that my crafty friends had already sorted through everything a few days before. Everyone has different tastes and projects on the brain. Here’s what came home with me:

floral

These will resurface in tote bags and clothes for Bella and me.

fun

Most likely these will show up in tote bags or maybe some aprons.

flannel

I’m planning pj bottoms for Bella and me.
The smaller pieces will be for blankets.
I see a faux Burberry scarf in that top piece!

holiday

Look for re-usable gift bags next holiday season!

I think I was pretty restrained for the most part, except for bringing home the entire box of flannel. What can I say? I love flannel. I even wear it in the summertime (I’m always cold!).

I’m going to have to destash again to make room for all of this. When I’m finished, I’ll have some fabric to share!

pinquitos change purse

bean bag zipper pouch

I love how these little purses turned out. They weren’t at all what I was thinking, but I really wanted to show off the flowers and mountains. A square zipper pouch was the best way to do just that.

bean bag zipper pouch

I didn’t want to wash them because I was afraid that the color might fade, but I had to because they were kind of dirty. I was worried that they might unravel, so I sewed a basting stitch around the edges before I put them in the wash. Good thing, too! The edges totally frayed up to the stitches.

The bags were a little delicate and I wanted to make them more substantial so I used some cotton quilt batting to give them their shape. I used the front of the bag for the outside and the back of the bag for the lining. To solve the fraying issue, I enclosed the raw edges in a french seam. There were a few holes from the original stitching that didn’t work themselves out in the wash. They don’t look like they are going to unravel, but I dotted them with some Fray Check just in case. These were super fun to make and I finished them in one evening.

recycle: bean bags purchased at garage sale, leftover batting from stash, one zipper was thrifted, one zipper was reclaimed from a garment