my new laptop bag…and all the details

laptop bag

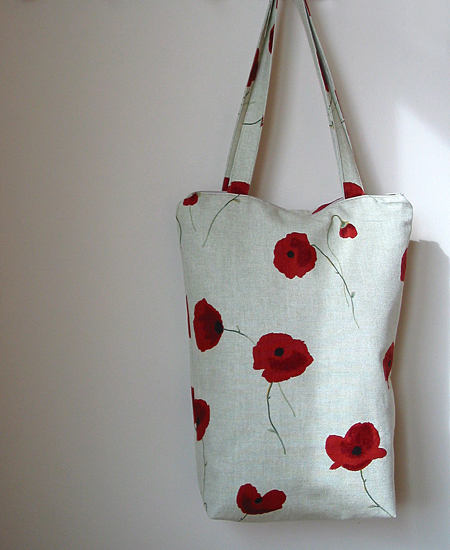
During the past week, this bag has carried my laptop through the airport, been my purse to a wedding, and toted stuff to the beach. That’s a lot of jobs for one bag. I’m happy to say it performed all of its required duties wonderfully. And it looked pretty darn cute, too. Here’s how I planned the design:

Size
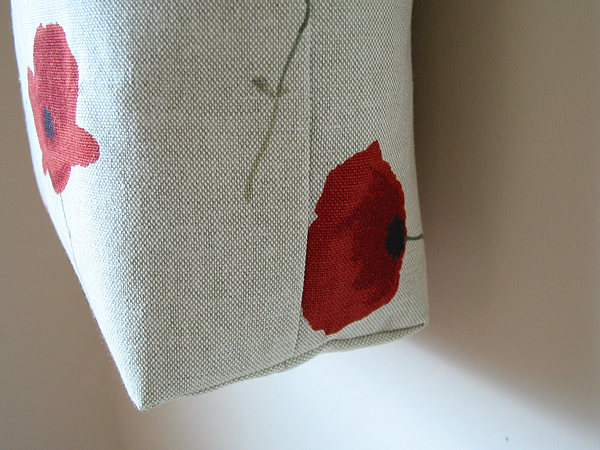
Most importantly, this bag needed to be large enough to fit my laptop, but small enough to meet airline carry-on luggage guidelines. I checked the FAA and NWA website and both set my limit at 45 linear inches. Mine turned out to be 13.5 x 16.5 x 4 inches, or 34 linear inches. Part of me wished I had made it a little bigger, but there’s less room for your bag under an aisle seat, so in the end, this size worked great.

laptop bag

Inside
I wanted a separate sections for my laptop and my other things. I created two pockets and added a tie to the laptop side. When I used this as a purse, the laptop side was filled with fun things for distracting my daughter, like coloring books, story books, stickers, etc. At the beach, it held my book and knitting project.

laptop bag

Outside
A zipper closure was essential. I didn’t want anything to fall out during airport screening and I didn’t want any sand getting inside. Durability was important, also. The outside is an upholstery fabric and the inside is a cotton canvas.

How-to
This bag is basically an oversized zipper pouch with handles and two inside large pockets. It seems silly to write up a tutorial when there are so many great ones already out there. For this project, I referenced the following:

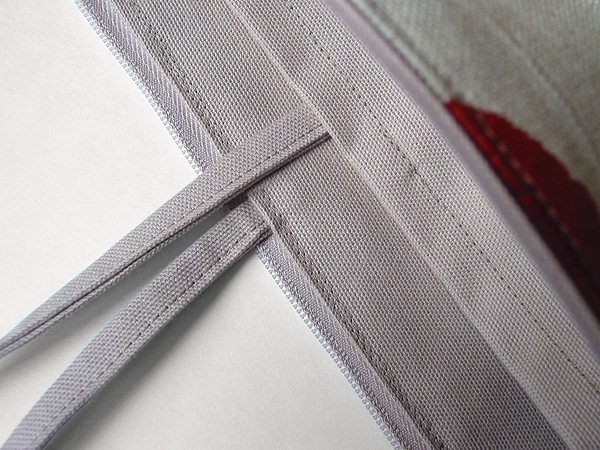
Adding the handles was easy. I just sandwiched them between the outside fabric and zipper when I was sewing it all together. I reinforced the handles with a few rows of extra stitching.

stash: Fabric came from this remnant sale. Zipper was thrifted.

how to sew a baby quilt in five easy steps

snoopy baby quilt

So you’d like to make a quilt, but you’re intimidated by all of those little pieces, right? I am, too. But you can make a quilt without blocks. It’s easy and looks just as nice! Here’s how I did it:

Materials
1 – 36×36″ piece of top fabric
1 – 36×36″ piece of bottom fabric
1 – 36×36″ piece of batting
1 – 38×8″ piece for making the trim*
matching thread
bias tape tool
rotary cutter and ruler
walking foot (optional)

*even easier: use 4 yards (plus a few inches) of pre-made bias tape

Step 1
Lay your fabric on the floor wrong sides together with the batting in the middle. Pin baste from the center outward.

Step 2
Starting from the center and working your way outward, draw parallel lines every four inches with sewing chalk, water soluble pen or light pencil.

Step 3
Starting from the center, sew along these lines working your way outward, taking out the basting pins as you go. Here’s where a walking foot is helpful, but if your batting isn’t too thick, you should be fine without it. Square up your edges with a rotary cutter and ruler.

Step 4
Cut your trim fabric according to the measurements for your bias tape tool and make the trim. Even easier: open the package of pre-made bias tape.

Step 5
Fold the trim over the edge and attach with a zig zag stitch. Fold the ends over at the corners to enclose the raw edges.

snoopy baby quilt

I hope I didn’t oversimplify this, but it’s really easy. The zig zag trim takes a little practice. This was my first time, and I’m sure it will get a lot neater the more I do it.

resource: I was inspired by Soule Mama’s Beach Blanket To-go for this blanket. One day I hope to make something as beautiful as her daughter’s quilt, but for now, I’m going to stick with single pieces of fabric until I’ve got more free time.

handmade father’s day bookmarks

father's day bookmarks

I had a hard time coming up with a gift for my dad and father-in-law this year. We did our daughter’s hand print for Mother’s Day and wanted to do something Bella-related for Father’s Day, too. After surfing crafty blogs for inspiration, I decided on a photo booth bookmark. Both of our dads like to read, so it seemed like a perfect idea. When we talked with them yesterday, it sounded like they were a hit. I’m sure they’ll get a lot of use!

inspiration: Bookmark idea from Make and Takes. Photo booth artwork from Sugarplum Paperie. Blue sparkly paper from my stash. Laminated at our local office supply store.

10 garage sale tips for crafters

It’s that time of year! Green grass, budding flowers and garage sales! At below thrift store prices, though, it’s easy to come home with too many potential projects. Here are some tips for productive bargain hunting. I’ve written them from the perspective of a sewer and knitter, but most apply to all types of crafts.

Go online. Check the newspaper classifieds and craigslist. Search for terms like craft, yarn, fabric, sewing, etc. and read through the ad. If you’re looking for fabric by the yard and the description says fabric is cut into quilting squares, skip it!

Make a list. Group sales that are near each other and start closest to home. Save the sale on the other end of town for last. You want to spend more time bargain hunting and less time in the car.

Stick to the basics. Garage sales are a great way to enhance your stash. When you’re shopping without a specific project in mind, look for neutral fabric, yarn and ribbon. Stock up on batting, interfacing and thread.

Stay focused. Go with one or two projects in mind. I’m looking for a big, sport sweatshirt to make another remote control pillow. I’m also looking for a few floral print shirts to make into tote bags. Focusing on these things will keep me from coming home with things I don’t really need.

Don’t waste your time. Drive by the sale slowly to see if it is worth parking your car. If you don’t see anything promising, keep driving.

Ask if the price is firm. You’ll be surprised how many people mark up their prices expecting you’ll barter down. Note: Don’t haggle with the little old lady who is selling yards of fabric for 50 cents each. Give her a little extra and tell her to keep the change.

Inspect items closely. Look for tears, holes and snags. It’s not a deal if you can’t fix it!

Buy clothing a little too big. You can always take it in, but it isn’t always possible to let it out.

Take along a snack and a drink. Wear comfortable clothing. Use sunscreen when walking around neighborhood sales.

Don’t be afraid to walk away. Chances are that if you’re not sure if it is a good deal, it probably isn’t. It’s better to regret missing a bargain than wasting money. Besides, there will be another deal in your future. That’s what garage sale shopping is all about.

Do you have any tips for your specific craft: paper, stamping, beading, etc.? Please share them in the comments!

. . . . .

Thank you to all who entered the coffee sleeve giveaway! The random number generator picked comment 11. Congratulations Cicoi Ingrid!

thrifty yarn ideas

Hey all you knitters and crocheters! Vickie Howell has posted some creative ideas on how to keep those needles and hooks going in this crazy economy. My favorite suggestion is recycling sweaters for the yarn. I tried this once, but had a tough time picking the seams. I wound up giving it away to someone with more patience. Next time, I’ll check out the seams more carefully. You can read her entire list of ideas here.

resource: Vickie has lots of eco-friendly project ideas. I’m saving my Amy’s burrito wrappers to make this cute purse.

Bean bag update: I finished these, but it’s too late for a photo shoot. I wound up making little change purse zipper pouches. They are so cute! Details after I get some pics.