how to refashion a dress into a skirt
in five easy steps

Even though I wrote this tutorial for a kid’s size dress, you can do this with adult sizes, too. This is the same way I turned a shirt into a skirt.

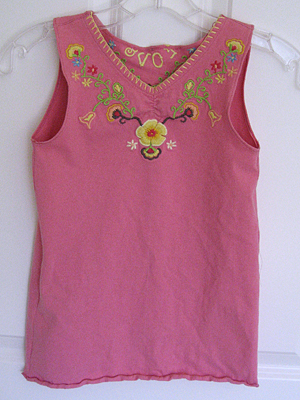
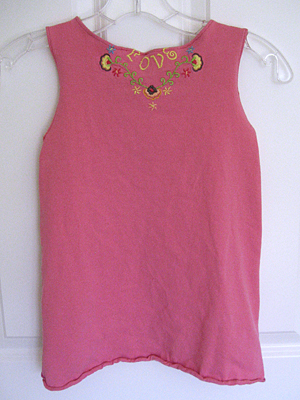
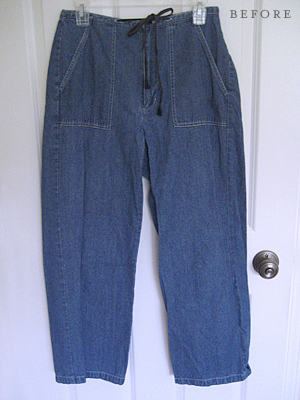
My daughter and I both love this dress. She only wore it a few times last season because it was too big. This year it is too small. It probably would have fit her best when it was 20 degrees outside.

easy kids skirt tutorial

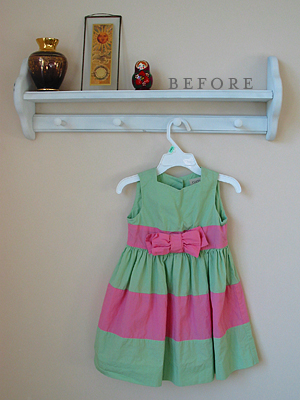
The other day she insisted on wearing it. (Yes, it was still hanging in her closet even though it was too small.) I let her try it on so she would see that the buttons could no longer be buttoned. While she had it on, I realized that it was just the top that was too small. The bottom fit just fine. Hmmm… what if I turned it into a skirt?

easy kids skirt pattern

Step 1
Cut off the bottom of the dress. If your daughter is as tall as mine, use a seam ripper. It takes longer, but she needs every bit of length I can save.

Step 2
Measure your daughter’s waist. Add an inch and then cut a piece of elastic. I used 3/8″ wide elastic.

Step 3
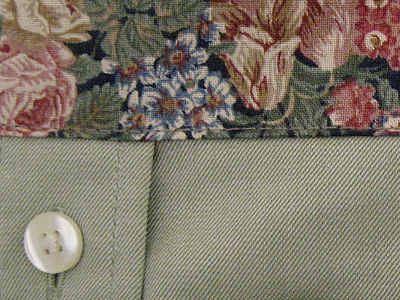
Fold the top edge down 1/4″ and press. Then fold 5/8″ and press.
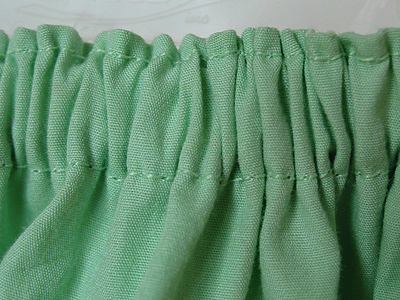
easy kids skirt tutorial

Step 4
Sew the waist leaving an opening for the elastic. Edge stitch the top to help the elastic stay in place.

Step 5
Thread the elastic through the waist casing, sew elastic ends together with a 1/2″ seam allowance, and close up the waist.

easy kids skirt pattern

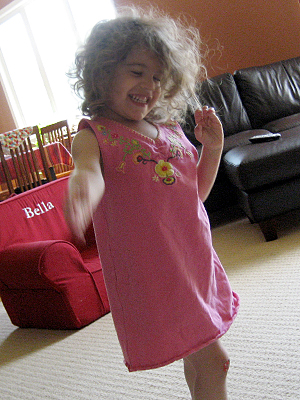
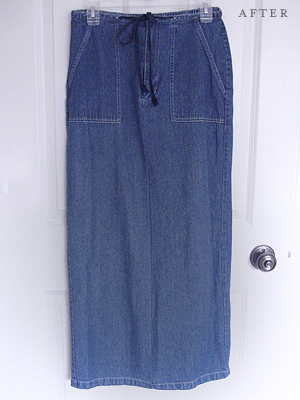
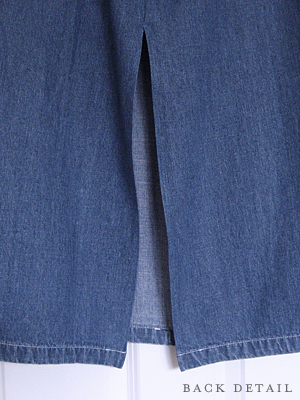
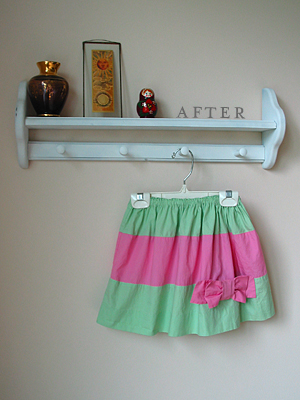
My daughter was so excited to see her new skirt. She especially loves the bow. The original dress had a two inch hem. If she’s still in love with it next season, I guess I’ll be letting the hem down, too.

refashion: Sewing clothes is sometimes easier if you don’t start from scratch. Refashioning a favorite piece of clothing can make you happy, your budget happy and the earth happy.

Thanks to whipup.net for linking to my tutorial and welcome new readers! For more crafty updates, visit my Facebook page!

mixing bread bags and wool with crochet

A long time ago I started to crochet a tote out of plastic grocery bags. I thought it would be a good way to keep the bags out of the landfill. It wasn’t fun. The plastic was sticky and it hurt my wrists. Then my recycle guy started accepting the bags for curbside pick up. That was the end of the guilt and the project.

The past few weeks, I’ve been taking a hard look at what we put in the trash. Was there anything else I could possibly recycle? Tea bag envelopes? Receipts? Bread bags?

I did some investigating and my recycling guy only accepts newspaper, dry cleaning and grocery bags. If I can’t put them at the curb, what else can I do with them? I know others have crocheted them just like grocery bags, but when I tried, they kept breaking. Plus, I’d need to eat a lot of bread to make anything substantial. Then I got an idea. What if I cut really thin strips and held them along with something else?

crochet bread bag and wool

I am totally loving this! I’m using recycled sweater yarn that has a bunch of knots. The plastic hides the yarn imperfections and the yarn keeps the plastic from breaking. If the plastic does break, the yarn holds the “fabric” together.

This is so much easier on my wrists! And check out the pretty colors! Not bad for some plain old gray recycled yarn.

crochet bread bag and wool

So far I’ve used bread and tortilla bags. I’ve also got a salad bag to throw into the mix. I’ll keep you posted on my progress!

recycle and reuse: I love thinking of new things to knit and crochet. The yarn is from my first attempt at recycling sweater wool. This is a good project for both frugal and green crafters!

two dollar deals!

The past few days I’ve been cleaning and straightening the house because my parents arrived last night for a nice, long visit. I am looking forward to some serious sewing time while they are here!

I did manage to get out a little bit and score some serious thrifty deals. Thursday, my daughter and I went to a garage sale looking for kid stuff. Instead we found a London Fog wool coat for my husband. I swear it is brand new. It was even his size, so no alterations needed. It was a mere $2. Can you believe it? I had to pinch myself. And he likes it!

london fog coat

Saturday afternoon I went out with an actual mission. I’m tired of having a door knob in all of my photos and decided I need some kind of wall shelf with pegs to hang my totes and refashion projects. I found this on sale for $2 at the first store I visited. I’m going to paint it white. Yay!

shelf

I still had some time to myself, so I went to a few more stores just to browse around. I’ve been looking for some pretty sheets to make some pajama bottoms and happened to stumble upon these bright and cheery flowers. These were also on sale for $2.

flower sheets

thrifting: Some days it feels like I never find anything at the thrift stores and I wonder why I even bother. Then I have jackpot days like this and it reminds me that the extra effort is worth it!

wardrobe refashion: t-shirt toddler dress

I’ve got way too many pictures for this little refashion, especially because it was just a practice project. I bought this shirt because I liked the embroidery on the front and back. You’ve gotta love fabric that comes already embellished!

t shirt toddler dress

It’s loosely based on this Simplicity for Kids pattern. I say loosely because the pattern didn’t really cooperate with the embroidery. Not only that, but the shirt was crooked! There was more pink fabric on one side than the other.

t shirt toddler dress

I used the 3T size, because that’s what Bella is mostly wearing these days. It turned out a little big.

t shirt toddler dress

I’m still trying to work on two skills: sewing knits and using my rolled hemmer foot. My seams are still a little wonky, but they are improving.

t shirt toddler dress

Here’s the awesome thing, though. When I was taking these pictures, Bella asked me what I was doing. When I told her I made her this dress, she grabbed it and said, “Thanks, Mommy! I love this dress! I love it!” Then she rolled it up in a little ball and began to hug it.

t shirt toddler dress

It wasn’t until she tried it on that I realized how big it was. She told me it was fine. I’m hoping she’ll grow into it before the end of the summer. (Please excuse the post-quiet time crazy hair.)

t shirt toddler dress

refashion: I’ve been collecting cute t-shirts to turn into dresses. This one was from a church garage sale. Most of them are from 99 cent days at Goodwill. Pattern was also from Goodwill. It goes up to size 8!

handmade student emergency kit

virginia tech birthday gift

My brother is very smart. He’s got one of those jobs where he can’t tell you what he does. I have a feeling I probably wouldn’t understand a lot of it if he could. He’s also working on his PhD. Both involve a lot of hard work and math. Two things that he can always use: pencils and caffeine.

virginia tech birthday gift

If you’ve been reading my personal blog for awhile, you know that he went/goes to Virginia Tech. He never tires of Hokie-themed gifts. (I asked.) I figured what he needed these days was something for all of those pencils and caffeine. I made him a pencil case and tucked some extra mechanical pencils, lead and erasers inside. I also made him an adjustable coffee sleeve and sent him a big bag of his favorite tea.

recycle: I can’t believe I am still using up VT fabric scraps from a yard I purchased over a year ago. Denim was from a pair of jeans. (Freecycle is a great source for denim!) Fabric and button were from my stash. Elastic was a colored pony tail holder.

wardrobe refashion: pants to skirt

I finished the refashion of those denim pants that made me look like I was waiting for a flood. It was much easier than I thought. I have a pair of khakis that are the same style. I think I’m going to to take some pics next time and write up a tutorial.

jeans

jeans

jeans

refashion: sewing a cute skirt is a great way to transform out-dated pants so you can continue to wear and enjoy them.

recycle plastic easter eggs into music shakers

plastic eggs

A few months ago, I signed Bella up for music class. It was a very basic introduction to different kinds of music and dance. One of the activities was making a shaker egg. The kids had so much fun with them that I decided to make a bunch more with our leftover plastic Easter eggs.

shakers

I dug through the pantry and my craft supplies to get a range of items that would make different sounds: rice, lentils, chick peas, buttons, beads and bells. I put a teaspoon of each item in a separate egg. I applied crazy glue to the inside edge of the egg and snapped it shut. Then I wiped the excess off the outside of the egg and let it dry overnight. I made enough for Bella and her friends and sewed up some cotton bags stamped with each child’s name.

egg bags

I learned the hard way that you really need a super, duper bonding glue for these. My first attempt was a non-toxic plastic model cement. It didn’t keep the eggs shut, so I opted for the heavy duty crazy glue instead.

These are great for kids ages three and up. If they eggs do come open (say, perhaps, if a toddler were to step on one, ahem) the inside items could be a choking hazard.

reuse: Instead of throwing out little containers that aren’t recyclable, turn them into something musical and fun.

mini santa hat pattern!

from the julie-bird.com archives

Last year I tried knitting a little stocking for our knitting group’s ornament exchange and it turned out really wonky. The night before the exchange, I whipped up this little Santa hat instead.

santa hat

For this year’s exchange, I knit the stocking from Last Minute Knitted Gifts and it turned out MUCH better. Tana, who picked my Santa hat from last year, picked the stocking this year. I knit them both out of the same yarn. Too funny! I should see if I can complete her set with a mini sweater next season.

I’ve been thinking a lot about the little Santa hat ornament. It was so cute and easy! So the other night I decided to knit another one for our tree. I love it so much! Here’s the pattern so you can knit up some cuteness for your tree.

Knitted Santa Hat Ornament

Yarn: Lion Brand Micro Spun colors red and white
Needles: I used size 3 dpns
Gauge: 6 stitches = 1 inch
Time to complete: Less than two episodes of the Sopranos.

Hat

Using white yarn, cast on 30 stitches and divide evenly over 3 dpns.
Join and knit 8 rows in white (add rows if you need to so it forms a nice roll brim).
Change to red yarn and knit 12 rows.

Begin decreases:
Knit the first two stitches on each needle together.
Knit a plain round.

Repeat these two rows until you only have 3 stitches left. Tie them off.

Pom Pom

Start with a slip knot of white yarn on a single needle.
Knit in the front and back of the stitch, increasing to 2 stitches.
Knit in the front and back of both stitches, increasing to 4 stitches.
Repeat once more for a total of 8 stitches.

Begin decreases:
Knit two together across, decreasing to 4 stitches.
Repeat, decreasing to 2 stitches.
Repeat once more and tie off.

Pull the two ends together and shape a little ball. With a darning needle, thread the ends through the top of the hat and tie a knot.

If you want your hat to hang straight, string it up from the top. If you want it to have a little curl, like mine, string it up from the middle.

Hang on the tree and admire your craftiness. Merry Christmas!

reuse: Don’t let all of those tiny balls of leftover yarn go to waste. Use them for small projects like tree ornaments.