totes in waiting

upholstery sample totes

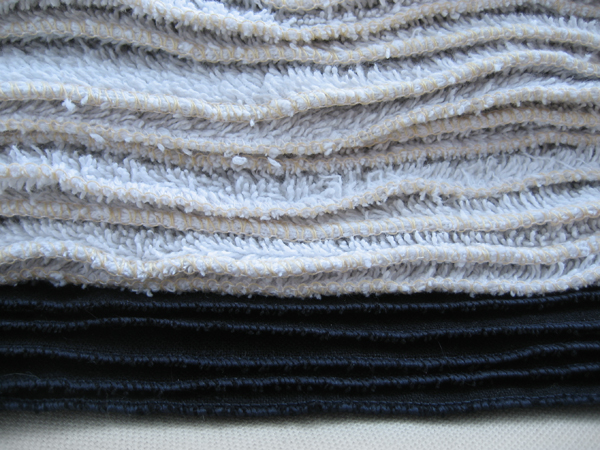
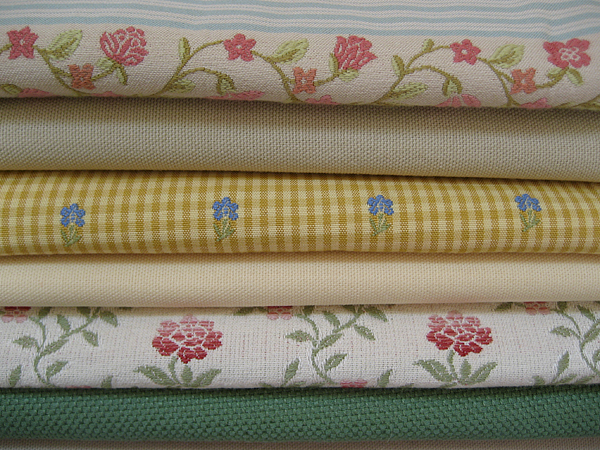
Thank you everyone for the sweet comments on my giveaway tote. I’ve been overwhelmed by your responses! They’ve inspired me to make some more totes from my upholstery stash. Last night I put together color combinations for three more bags. Now, if I can only find the time to sew them up!

recycle: All of these are thrifted fabrics. Aren’t they lovely?

sew, mama, sew giveaway day!

Congratulations to Vicki for winning the Sew, Mama, Sew giveaway tote bag!

. . . . . . . . . .

I’m participating in Sew, Mama, Sew’s giveaway day again. I just love this idea. You can enter my giveaway below and then head over to their website and enter hundreds more! (Yes, hundreds!)

sew mama sew tote bag giveaway

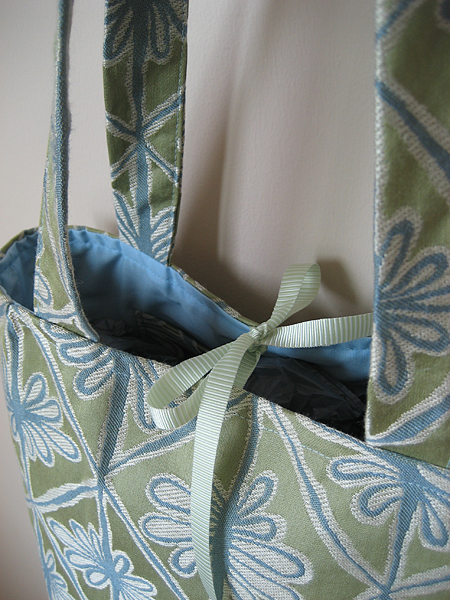
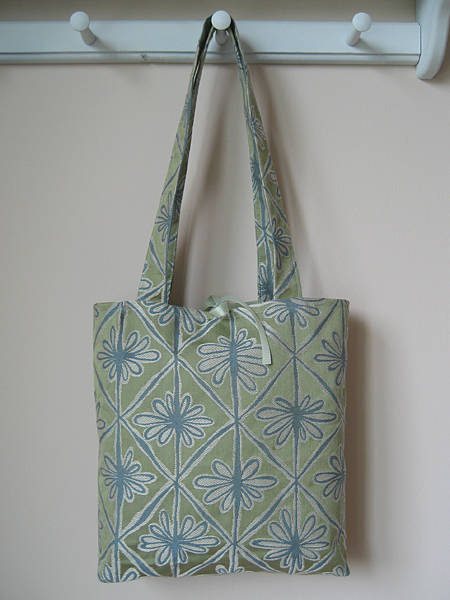
I’m giving away a tote bag. It’s a little smaller than some of my recent bags — the perfect size for knit and crochet, small sewing, and embroidery projects. It would also make a cute purse!

sew mama sew tote bag giveaway

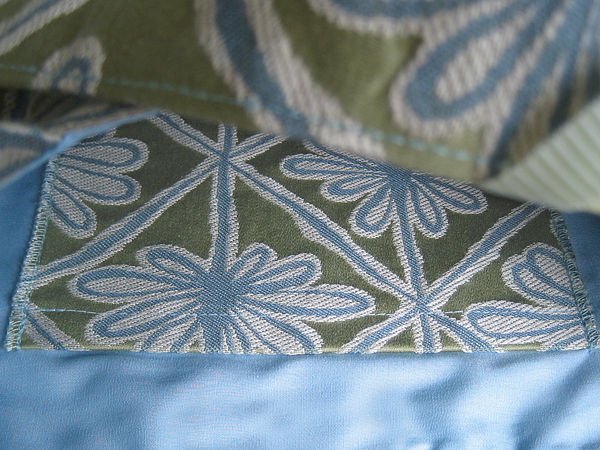
It’s got two big pockets inside and closes with a ribbon tie. The outside and pockets are from a really cute upholstery fabric sample.

sew mama sew tote bag giveaway

How to enter: Leave a comment and tell me how you would use this bag — to hold creative projects? as a purse? something else?

Bonus entry: Subscribe to my rss feed and leave another comment to be entered.

Another bonus entry: “Like” my Facebook page and leave another comment to be entered. (Why did they change that? It sounds even weirder than “Fan.”)

sew mama sew tote bag giveaway

I’ll ship internationally, so everyone has a chance to win! You have until Midnight CT, May 20th to enter. I’ll pick the winner using a random number generator. Good luck!

Now go check out more giveaways over at Sew, Mama, Sew!

recycle: All of the materials for this tote were thrifted (i.e., saved from the landfill).

mother’s day idea: how to make a photo frame applique in 3 easy steps

photo frame applique tutorial

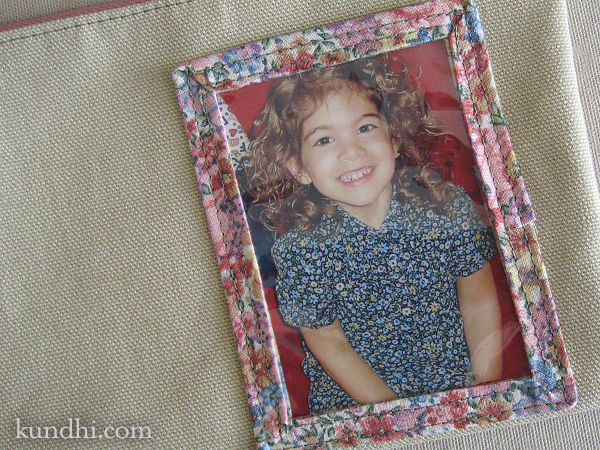
A few years ago, my mother gave me a little photo frame change purse. I had been using it for knitting bits and bobs, but it’s kind of small. I decided to make a bigger one for myself.

This applique will add a great touch to any Mother’s Day gift. I love mine!

Materials
photo: 2 1/2 x 3 1/2 inches
plastic: 3 x 4 inches
bias tape (or make your own)
heavy duty sewing needle

photo frame applique tutorial

I used the packaging from a set of sheets for my plastic. The same kind of packaging is used for blankets, comforters, tablecloths and shower curtains. (Don’t forget to save the zipper, too!)
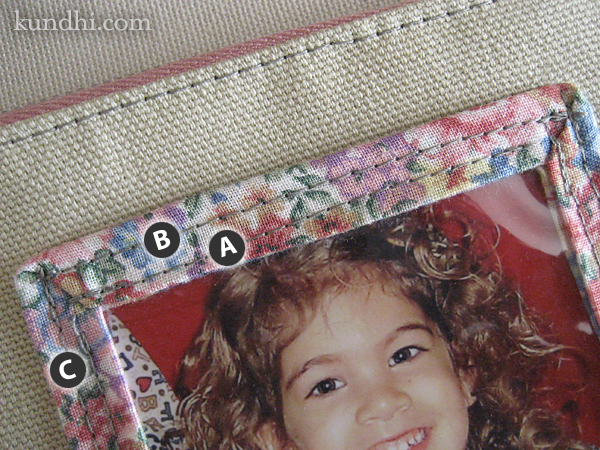
photo frame applique tutorial

Step 1
Stitch the bias trim to your plastic (A). Here’s a great video on how to miter your corners.

Step 2
You’ll only be stitching three sides of the applique to your fabric because you need an opening to slip in the photo. Top stitch the fourth side so it will match the others when you are finished (B).

Step 3
Position your applique on the fabric and stitch the remaining three sides in place (C). Make sure you don’t pin it through the plastic! Pin through the fabric trim instead.

Obviously it’s easier to add this to a work in progress while your piece is still flat, but you can stitch this to already made items, too.

Try other sizes like a 5×7 on a small bag or even a 8×10 on a large tote. Simply add the width of your bias tape to your photo dimensions to get the size for your plastic. Make sure you adjust the length of your trim and add 1-2 inches for overlap.
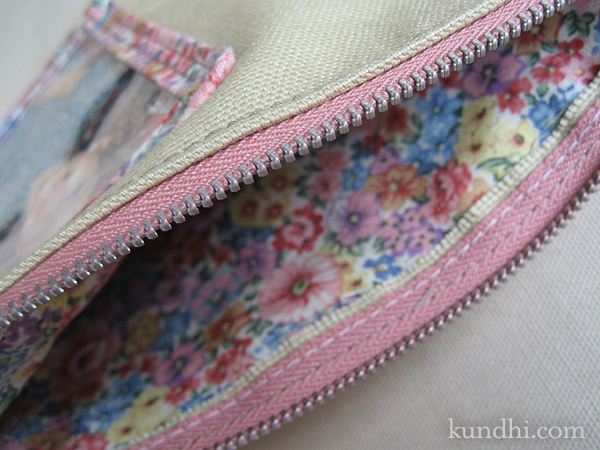
photo frame applique tutorial

project details: Zipper, upholstery and lining fabric all thrifted. Sheet packaging from my linen closet. I always save the ones with zippers because they make great storage for yarn and fabric.
cool birthday gift idea for boys

I was at the bookstore the other night and found a book called How to Draw Cool Cars.* These weren’t your average cool cars, but super fast ones like Ferrari, Alfa Romeo, Maserati, Lamborghini — you get the idea. I had never seen anything like it and knew I needed to get it for Wyatt’s ninth birthday.

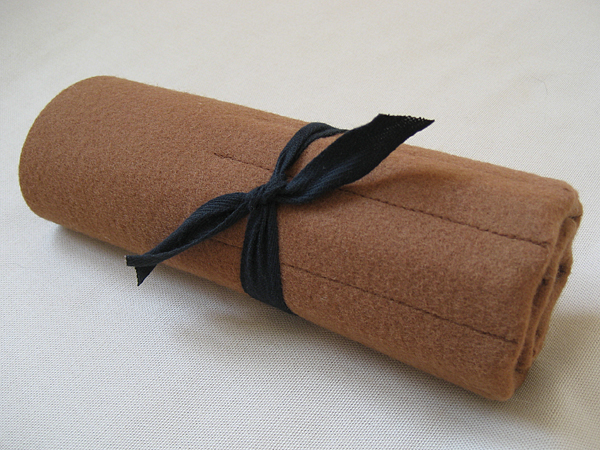
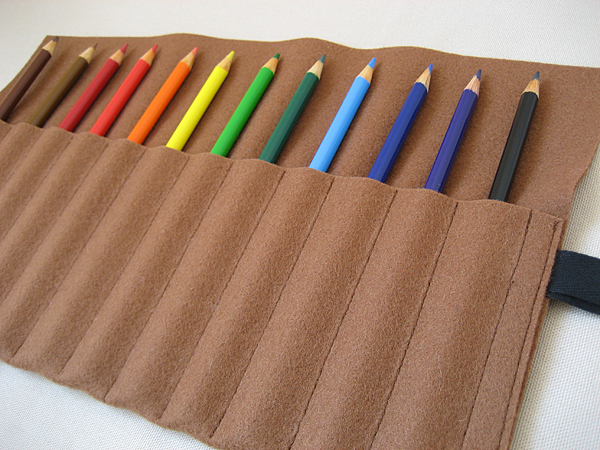
A few years ago I made a bunch of crayon rolls, including one for Wyatt with car fabric. You can’t really draw a Lamborghini with crayon, though. It just doesn’t seem right. So, I made him a much more grown-up colored pencil roll.

felt pencil roll

I have this really nice, thick wool felt that I got at a garage sale a few years ago. I never knew what to do with it, but it had Japanese characters printed on it with a sparkly gold ink. I knew I had to save it. I was so glad I did. It was perfect for this project!

felt pencil roll

I saved the printed part of the wool for myself. It will make a cool crochet hook roll, don’t you think?

stash: If you don’t have a use for a certain fabric right away, but it speaks to you somehow, I recommend keeping it in your stash. It might just be waiting for the perfect project to come along.

*I can’t find the exact book online, but this one looks similar.

upcycling in the kitchen

recycled towels

I’m finally getting around to some household stuff I’ve had in my to-do pile for awhile. Last year I made some rags out of an old bath towel, but I never finished the edges. They’d get frayed and messy in the wash and every few months I’d trim off the scraggly bits. Yesterday I finally switched my serger over to 2-thread overlock and cleaned up those edges. I also went ahead and cut up and finished another towel. This stash of rags should last awhile!

I also tried to make some tea towels out of a thrifted linen dress. The blend has too much nylon though, and they aren’t very absorbent. My husband suggested that they’d make great napkins. I’m so excited that he’s open to the idea of cloth napkins, because they are on my to-do list, as well. This project gave me a lot of practice with rolled hems. Oh, how I love my serger!

I hope to have some more household stuff to post soon, including curtains for my office!

reuse: Towel came from my linen closet, dress from 99 cent sale.

liberty of target tote hack

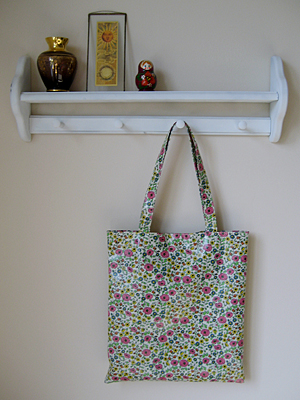
Confession time: my daughter’s dress wasn’t the only Liberty of Target item I bought last month. I fell in love with this tote on the website and was disappointed when I got to the store and realized it was oil cloth. I almost put it back a few times while I was shopping, but in the end, the print won me over.

liberty of london target tote bag

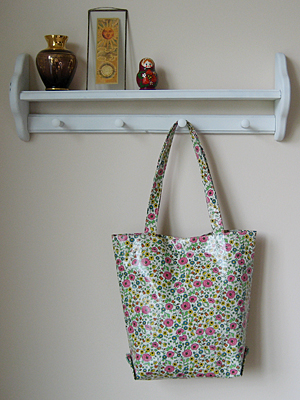
After using it a few times as a knitting tote, I wished I hadn’t bought it. The cloth was so stiff that even a small ball of yarn gave it a goofy bump in the middle. Then I thought, I make tote bags. Why don’t I stop complaining and just fix the darn thing?

liberty of london target tote bag

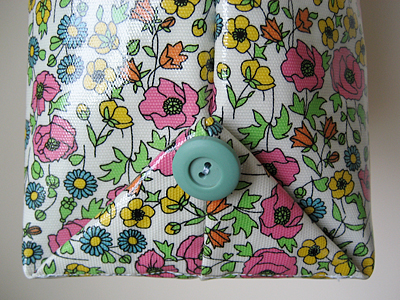
So I added a four inch gusset and prettied it up with some vintage buttons on the side. It’s still stiff, but much more functional.

liberty of london target tote bag

I’ve actually started using it for my daily purse, even though it’s kind of big. I still wish it was fabric, but I really do love those little flowers.

future thrifting?
I’m wondering if others were as frustrated with this bag. Maybe they’ll start showing up at the thrift stores?

wardrobe refashion: red linen skirt

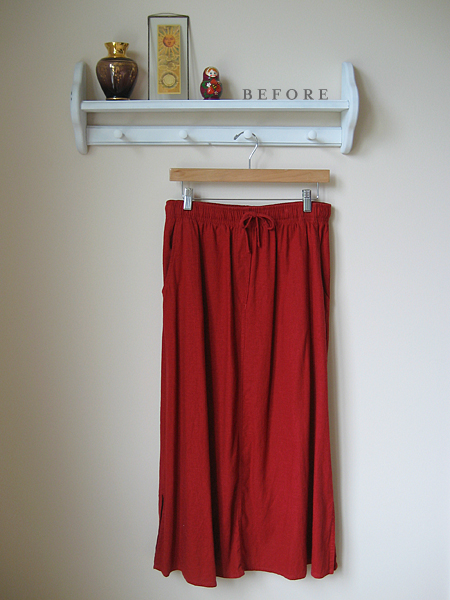
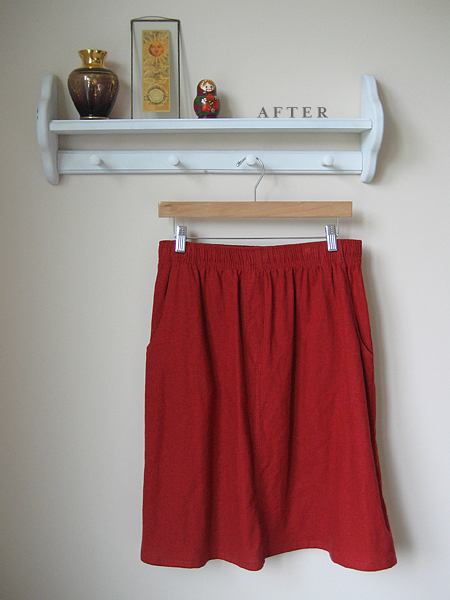
So, what was I doing Friday evening instead of writing a blog post? Sewing! Unfortunately, I didn’t finish until it was too dark to take pictures. But to make up for it, I’ve got a before pic for this one!

red linen skirt

Another long skirt — this one I originally bought to use for tote bags. That was before I started refashioning. But there were a few nit picky things that bugged me about it, so I had to weigh my options.

Pros

  • Pockets!
  • Beautiful red color.
  • Linen/rayon blend.

Cons

  • Really wide elastic waistband.
  • Drawstring.
  • Faux zipper flap. (Seriously? What the heck?)

red linen skirt

I figured I could fix two out of three and live with the wide elastic, so out came the scissors! First I cut about 10 inches off the bottom and finished it with a 1/2 inch double hem. I removed the drawstring and closed up the holes with a slip stitch. Then I tacked down that weird faux zipper flap with a slip stitch, too.

red linen skirt

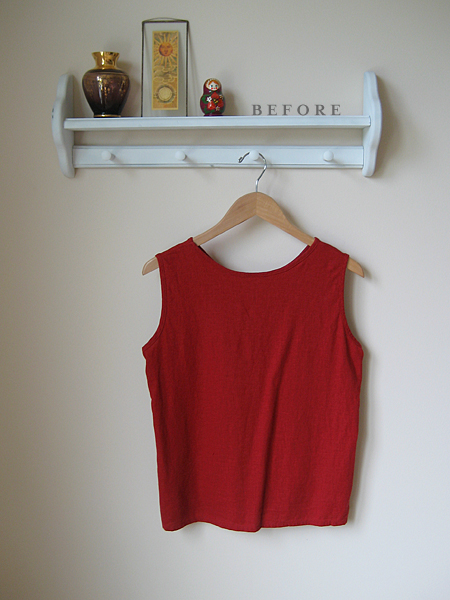
This skirt comes with a bonus matching top. I plan on using the leftover fabric from the skirt to make this a little longer. I think it might also need some shaping. Any other suggestions?

thrifted: Both of these were garage sale finds. I think it’s kind of funny that I bought them to make totes and now I’m going to wear them!

how to make a ruffle scarf in 3 easy steps

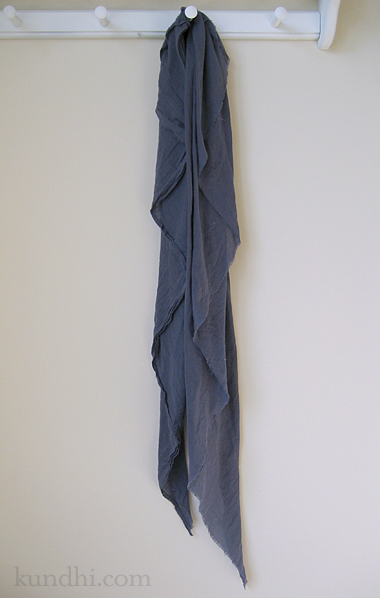
The other day I saw a woman wearing a cotton scarf that was layered and unfinished in the most beautiful way. She looked like she just walked off a catalog shoot. I’ve never been able to pull off that “I just threw it on and it looks perfectly ruffled” look, so I decided to design one that made it easy.

ruffle scarf tutorial

Step 1
Cut a large triangle of fabric on the bias. I chose a lightweight cotton, but anything with a nice drape would work. (Flannel would be nice for Fall.) My piece measured 80 inches across the base and 32 inches high. Run it through the washer and dryer to fray the edges.

Step 2
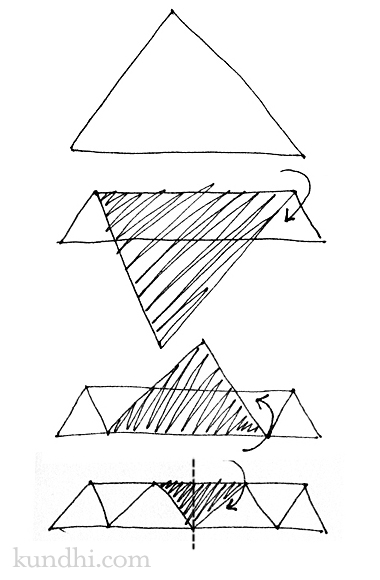
Fold the ruffles. I figured a diagram would be easiest to understand. I folded mine 8 times, but you don’t need to see that many steps to get the idea.

ruffle scarf tutorial

Step 3
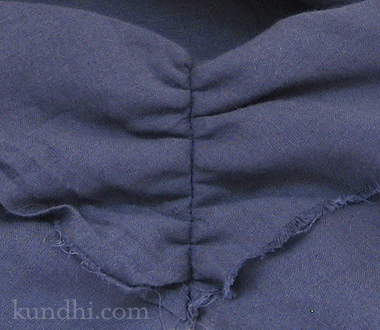
Stitch the ruffles in place. I didn’t back tack and pulled on the threads to create a little gather before I tied them off.

ruffle scarf tutorial

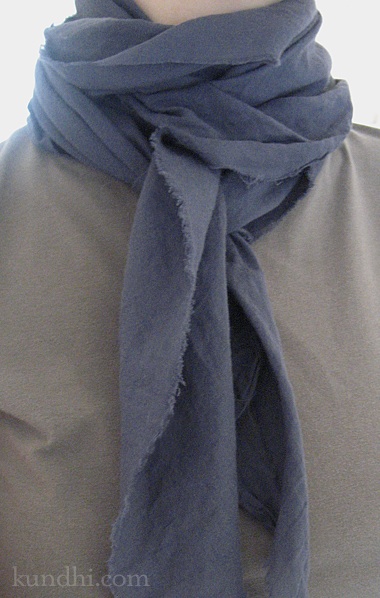
That’s it! You can wear it with the ruffles hanging down or wrap it around a few times with the ruffles facing out for that perfectly unfinished look.

ruffle scarf tutorial

custom bag: tropical lunch tote

tablecloth lunch tote

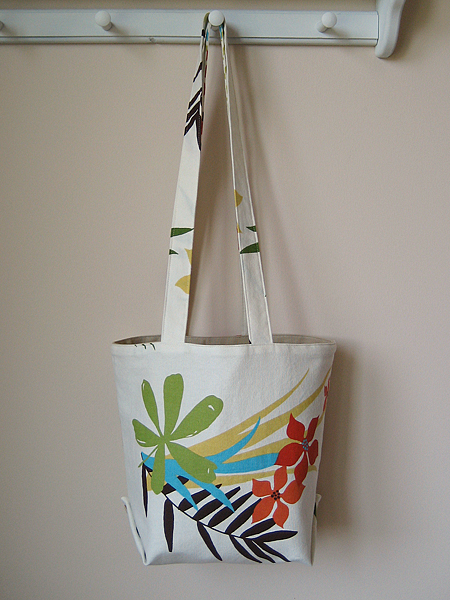
When I posted pics of my Tropical Tablecloth Tote, I received a request for a lunch tote. The bag is a little smaller, but a lot wider to hold lunch containers and a water bottle. I think it’s pretty darn cute!

There are two more totes worth of fabric cut and waiting to be sewn. I admit that I wish I had this idea on my own. Anyone out there looking for the perfect tropical bag? Let me know!

. . . . .

Thank you for all of the great suggestions on the sweater upcycle. I’m seriously considering pillow cushions now, too!

wardrobe refashion: white cotton skirt

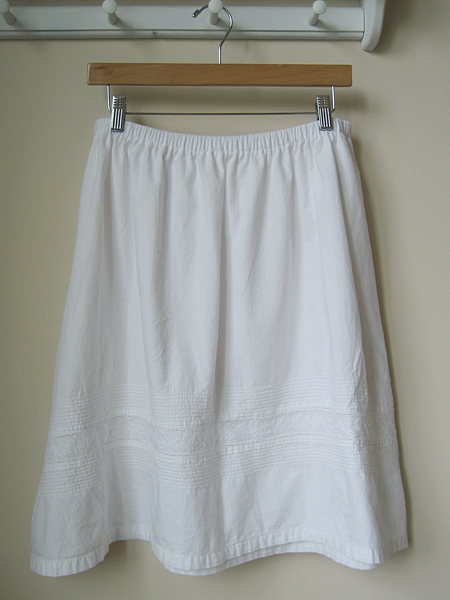
Three skirts down! I really wish I would have taken a before picture of this one. When I cut off the waist and flattened out the fabric, there was so much!

refashioned white cotton skirt

I used an a-line pattern I drafted for myself from Sew What! Skirts. I took about 5/8 inch off of each side after trying it on and will be adjusting my pattern for the next one. Aside from that, this was super easy. I cut it out a few weeks ago and sewed it up today in about an hour.

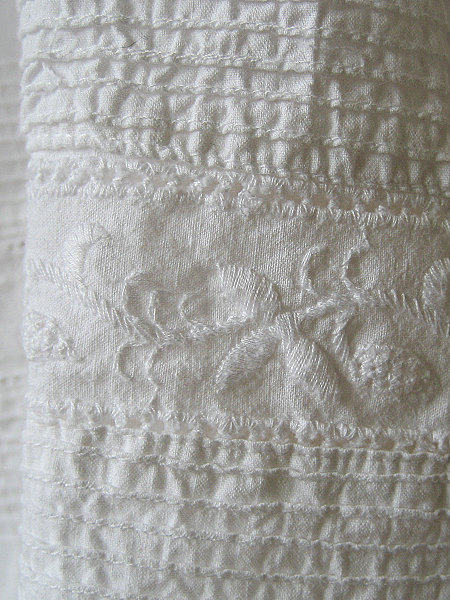
Usually I shy away from white of any kind on my lower half, but I fell in love with the detail at the bottom. Isn’t it lovely? (Yep, I kept the original bottom hem, which made this project go really fast.)

refashioned white cotton skirt

The skirt is a little sheer, but I’m thinking slip instead of lining. Any suggestions for fabric type? I worry that a traditional polyester slip might be too hot in the summer.

thrifted: I think this might be my last skirt from the Goodwill 99 sale. I can’t remember! Time to dive back into the stash.