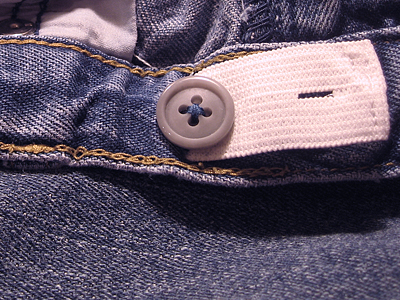
My daughter is growing like a weed, except she’s only growing up, not out. She’s got 4-5T legs and a 3T waist. That means that most of the pants we find that are long enough won’t stay up.
I try to only buy pants with an adjustable waist, but sometimes I come across a great deal or something super cute that I just can’t pass up. I decided to try adding elastic myself, and you know what? It’s super easy!
You can even do this without a sewing machine as long as you don’t mind a little hand stitching.
Materials
button hole elastic
small, sharp pair of scissors
two buttons that fit through your elastic
Fray Check
needle and thread
Step 1
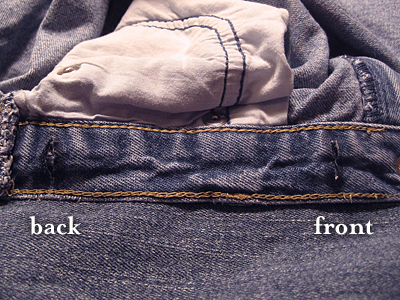
Starting on the right inside of the waist, snip two holes to create a casing for the elastic. Make sure your scissors don’t go through to the other side! Apply Fray Check to the raw edges.
Step 2
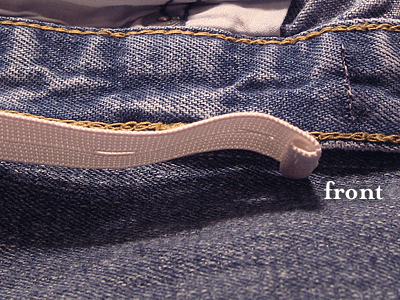
Cut a piece of elastic that’s about one inch longer than between your holes. Fold one edge over and sew. This is the edge you’ll be using to adjust the pants.
Step 3
Sew a button in front of the casing you’ve created.
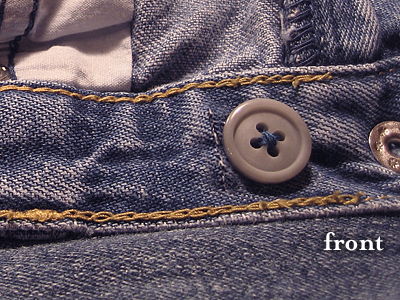
Step 4
Thread the elastic through the waist casing with the finished edge going through the front. You can tuck the unfinished edge into the back.
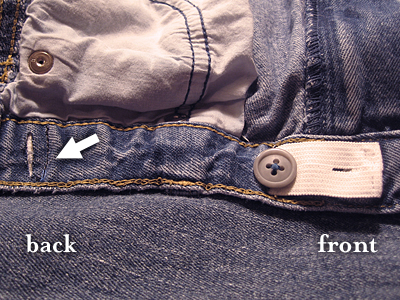
Step 5
Sew a line of stitches to secure the elastic. See arrow.

Here’s what you’ll see on the outside of the pants.
Repeat on left inside of the waist.
refashion: The only thing worse than sizing for women’s pants is sizing for kids’ clothes. At least with this little trick, I can just make sure pants look long enough when I buy them. It’s nice knowing how easy it is to adjust the waist. Maybe I should try this on my jeans!
