my creative space

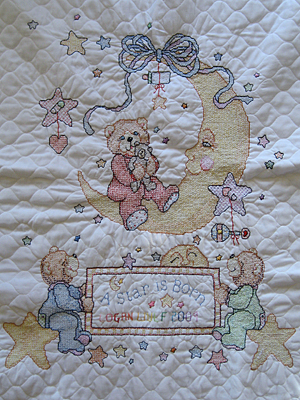
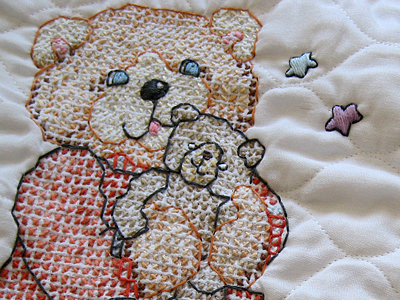
My creative space is full of tiny little stitches. A friend of mine hand stitched this blanket, but doesn’t sew, and asked me to help put it together.

cross stitch baby blanket

I am amazed at her patience and perfect little stitches.

cross stitch baby blanket

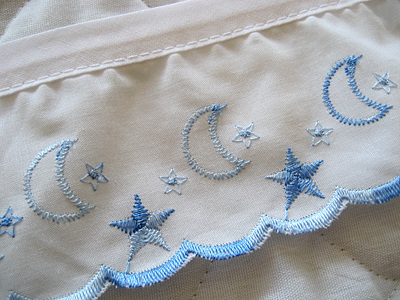
And check out this cute ruffle trim!

cross stitch baby blanket

I’ll be sewing the front to a quilted back and adding the trim. I don’t want to machine quilt the two pieces together, so I have to come up with a way to tie or stitch them without interfering with the design. Suggestions welcome!

Creative spaces are hosted by Kirsty in Australia. No matter how early I post mine I always feel a little late to the party because of the time difference. So, I’m going to start posting these on (U.S.) Wednesdays. Now you get an extra day to check out all of the creative goodness!

embroidered baby quilt

There is something in Nebraska’s water. The past few months and the next few months seem to be filled with babies, babies, babies! So, expect to see lots of cute things for my friends’ wee ones here on the blog.

embroidered eyelet baby quilt

This is a really basic blanket, but the eyelet fabric makes it extra special. Bonus: the eyelet fabric was already quilted, so no need for batting!

embroidered eyelet baby quilt

I added an embroidered monogram to make it a little bit more fancy. I love the contrast of the dark pink on light pink!

stash: Eyelet fabric was from someone who was selling her grandmother’s fabric stash. Pink check fabric was the very first fabric I purchased when I got my sewing machine. Monogram letters from Sublime Stitching.

how to sew a baby quilt in five easy steps

snoopy baby quilt

So you’d like to make a quilt, but you’re intimidated by all of those little pieces, right? I am, too. But you can make a quilt without blocks. It’s easy and looks just as nice! Here’s how I did it:

Materials
1 – 36×36″ piece of top fabric
1 – 36×36″ piece of bottom fabric
1 – 36×36″ piece of batting
1 – 38×8″ piece for making the trim*
matching thread
bias tape tool
rotary cutter and ruler
walking foot (optional)

*even easier: use 4 yards (plus a few inches) of pre-made bias tape

Step 1
Lay your fabric on the floor wrong sides together with the batting in the middle. Pin baste from the center outward.

Step 2
Starting from the center and working your way outward, draw parallel lines every four inches with sewing chalk, water soluble pen or light pencil.

Step 3
Starting from the center, sew along these lines working your way outward, taking out the basting pins as you go. Here’s where a walking foot is helpful, but if your batting isn’t too thick, you should be fine without it. Square up your edges with a rotary cutter and ruler.

Step 4
Cut your trim fabric according to the measurements for your bias tape tool and make the trim. Even easier: open the package of pre-made bias tape.

Step 5
Fold the trim over the edge and attach with a zig zag stitch. Fold the ends over at the corners to enclose the raw edges.

snoopy baby quilt

I hope I didn’t oversimplify this, but it’s really easy. The zig zag trim takes a little practice. This was my first time, and I’m sure it will get a lot neater the more I do it.

resource: I was inspired by Soule Mama’s Beach Blanket To-go for this blanket. One day I hope to make something as beautiful as her daughter’s quilt, but for now, I’m going to stick with single pieces of fabric until I’ve got more free time.
sleeping snoopy baby quilt

sleeping snoopy baby quilt

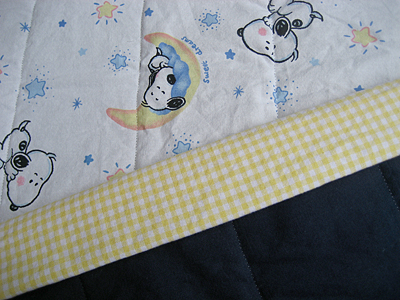
Every time I turn around it seems like someone else is having a baby. I love crafting for babies. This quilt is almost finished. All I need to do is attach the binding. I bought a lot of this fabric off of ebay awhile ago. You might be thinking, “That looks familiar!” The first quilt I made was backed with fleece. This one is backed with navy cotton. (It’s really not that dark, but I don’t have much sun for taking pictures today.) I only have a little bit of the binding fabric, but it should be just enough.

Update on birthday crafting: The knitted gift is finished. The embroidery tea towels are almost done. These are going much better than my experiment with cross stitch. I’m using a simple split stitch and loving it. I can’t wait until I can post pictures!

stash: So far I’ve used stash yarn, embroidery thread, fabric and batting for all of my projects. Having everything at my fingertips really makes all of the thrifting and garage sale-ing I did earlier in the year worth it!

handmade baby shower gift

My knitting group had a baby shower for my friend Tana last night. I couldn’t figure out what to make because she has already created so many beautiful sweaters, blankets and quilts herself. I decided to sew something instead. I figured her daughter is going to be the best dressed baby when the weather is cold, so she would need something for the warm weather.

mccall's m5083

I sewed the 12-month size with the hope that it will fit sometime next year between June and August. Estimating the size was tricky! I added a little extra elastic on the inside so Tana can adjust the waist if necessary. Luckily, the top ties in the back, so that should be an easy fit.

mccall's m5083

project notes: Pattern is McCall’s M5083. Fabric is from my stash. It’s one of my first and favorite purchases. I can’t believe it’s almost gone!

doll for shelley

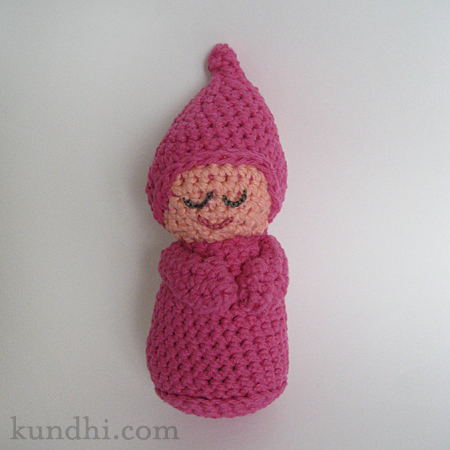
It’s getting harder and harder to come up with something original to make for all of the baby showers we’re having at knitting group. I wanted to give something different than the expected blanket, bib or sweater. After I found this little doll on ravelry, I grabbed my yarn and started right away. For those of you not on ravelry, you can find the free pattern on Owlishly. Isn’t she adorable? She looks tiny in this pic, but she’s actually about six inches tall. I think she turned out perfect.

sleepy sarah

stash: I used new materials for the doll, which I usually do for baby gifts, but the yarn, embroidery thread and stuffing all came from my stash.

february 10th, cpsia, and a snorkeling turtle

What do these things have in common? Over a year ago, one of M’s Baby Einstein Discover & Play Color Blocks was recalled. The paint used for the snorkeling turtle contained lead in “amounts that exceed US lead standards.” Following the instructions for returning the block was easy. They gave postage-paid label to return it and sent me a new block.

It took a long time to receive the replacement block. It didn’t matter, though. M wasn’t really attached to it, so it wasn’t missed. I had actually forgotten about it and then one day it arrived in the mail. End of story.

Fast forward to this year; February 10th, in fact. The day that the Consumer Product Safety Improvement Act was supposed to go into effect. I’ll leave my opinions and rants about the actual law for some other blog post. Instead, I’d like to show you what showed up in my mail that day.

package

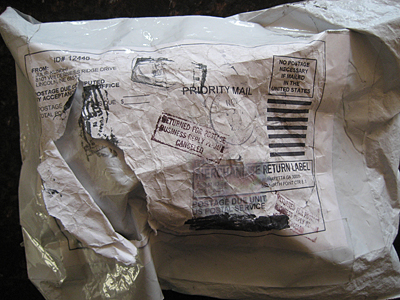
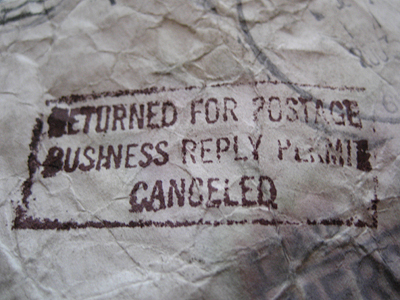
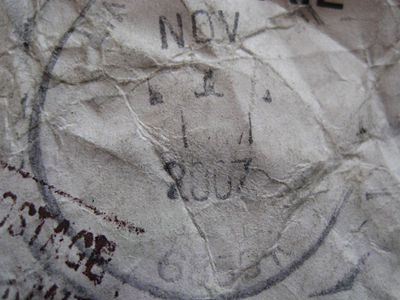
At first I thought maybe it was surprise yarn or something. It was light, soft and smooshy. Then I figured out it was a cube. It made a little rattle sound when I shook it. It was the little lead snorkeling turtle. (Why do turtles need snorkeling equipment?) The package looked like it had been through a war zone. It was battered, ripped and covered with stamps that had marked its journey through the postal system.

package

Apparently, its journey was so long that by the time it arrived to its destination, the postage-paid label permit had expired. The only thing more incredible than the thought of a recalled item being returned to the consumer was the original post mark date.

package

I sent Kids II an email explaining what had happened. I was concerned. What should I do with the block? I mean, if it was dangerous enough that they had wanted it returned, what was I supposed to do with it now? Toss it in the trash? Yep. That’s exactly what they advised me to do.

It all seems a little crazy, doesn’t it?