satin stitch: making a buttonhole smaller

20121109-141844.jpg

A few years ago I found a really nice raincoat at a garage sale. It’s got a removable, quilted lining that makes it extra toasty on cold days.

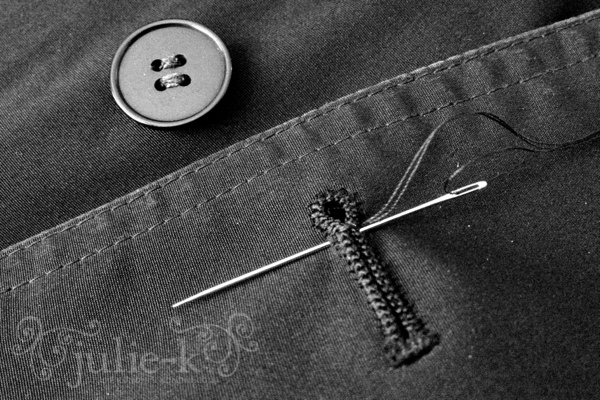
I love everything about it except one thing: the buttons. They’re always popping out of the holes. I chalked it up to the fabric being slippery, but one day while I was complaining about them, my daughter said: Why don’t you just make the buttonholes smaller? Upon closer inspection, I realized they are bigger than necessary.

Smart kid!

I’m closing them up with a little bit of satin stitch on the side of the hole that will be hidden when buttoned. I’m ready for the cold, rainy autumn days ahead — if we ever get any.

finished: twirly skirt

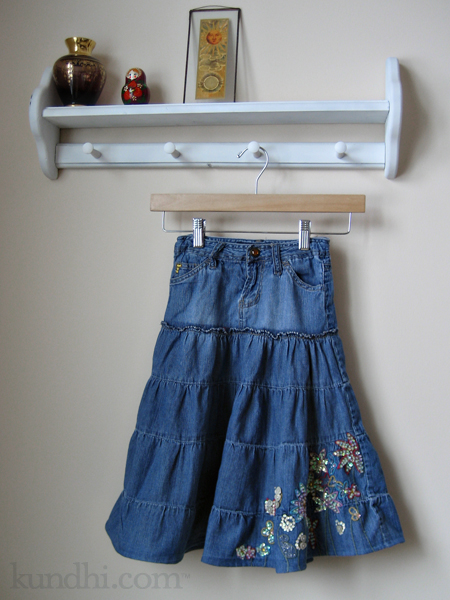
twirly skirt mending

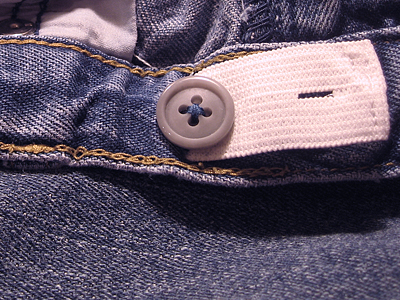
This week’s Finished on Friday project was just a little bit of mending. I received this skirt from a friend. It didn’t need that much work: just hem the raw edge and sew a button on for the adjustable elastic. I wish I would have done it sooner, though. My daughter LOVES it. She wore it two days in a row and would have worn it a third if I had let her.

Not much else noteworthy out of The Big To-do Pile, but I’m patting myself on the back for keeping my weekly project goal.

What did you finish this week?

liberty of target tote hack

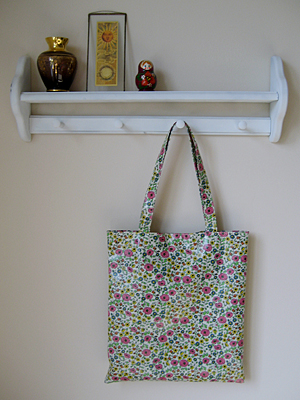
Confession time: my daughter’s dress wasn’t the only Liberty of Target item I bought last month. I fell in love with this tote on the website and was disappointed when I got to the store and realized it was oil cloth. I almost put it back a few times while I was shopping, but in the end, the print won me over.

liberty of london target tote bag

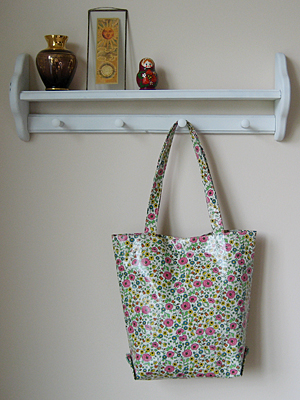
After using it a few times as a knitting tote, I wished I hadn’t bought it. The cloth was so stiff that even a small ball of yarn gave it a goofy bump in the middle. Then I thought, I make tote bags. Why don’t I stop complaining and just fix the darn thing?

liberty of london target tote bag

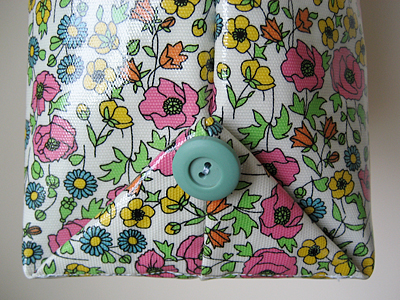
So I added a four inch gusset and prettied it up with some vintage buttons on the side. It’s still stiff, but much more functional.

liberty of london target tote bag

I’ve actually started using it for my daily purse, even though it’s kind of big. I still wish it was fabric, but I really do love those little flowers.

future thrifting?
I’m wondering if others were as frustrated with this bag. Maybe they’ll start showing up at the thrift stores?

crochet flower pins in the shop

crochet flower brooch

I tried really hard to write about fabric gift bags last night, but it seems so trivial right now with everything that’s going on in the world. I’ve got a lot of nervous energy to burn. Today I finished a blanket and crocheted more flowers. I can’t stitch flowers to everything in my daughter’s wardrobe, so I made a few into pins. They are in my shop. A cute alternative to hearts for Valentine’s Day, don’t you think?

etsy: Red flower here, pink flower here.

how to add adjustable elastic to kids’ pants in 5 easy steps

adjustable elastic kids pants

My daughter is growing like a weed, except she’s only growing up, not out. She’s got 4-5T legs and a 3T waist. That means that most of the pants we find that are long enough won’t stay up.

I try to only buy pants with an adjustable waist, but sometimes I come across a great deal or something super cute that I just can’t pass up. I decided to try adding elastic myself, and you know what? It’s super easy!

You can even do this without a sewing machine as long as you don’t mind a little hand stitching.

Materials
button hole elastic
small, sharp pair of scissors
two buttons that fit through your elastic
Fray Check
needle and thread

Step 1
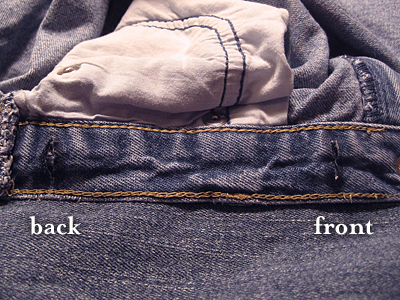
Starting on the right inside of the waist, snip two holes to create a casing for the elastic. Make sure your scissors don’t go through to the other side! Apply Fray Check to the raw edges.

adjustable elastic kids pants

Step 2
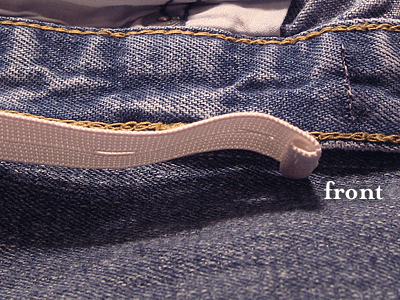
Cut a piece of elastic that’s about one inch longer than between your holes. Fold one edge over and sew. This is the edge you’ll be using to adjust the pants.

adjustable elastic kids jeans

Step 3
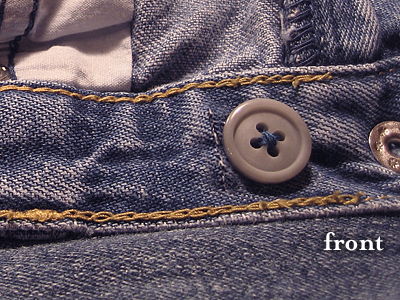
Sew a button in front of the casing you’ve created.

button hole elastic

Step 4
Thread the elastic through the waist casing with the finished edge going through the front. You can tuck the unfinished edge into the back.

adjustable elastic kids jeans

Step 5
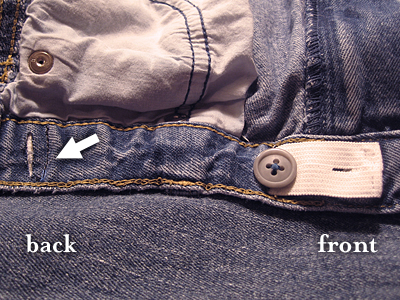
Sew a line of stitches to secure the elastic. See arrow.

adjustable elastic kids pants

Here’s what you’ll see on the outside of the pants.

Repeat on left inside of the waist.

refashion: The only thing worse than sizing for women’s pants is sizing for kids’ clothes. At least with this little trick, I can just make sure pants look long enough when I buy them. It’s nice knowing how easy it is to adjust the waist. Maybe I should try this on my jeans!

my creative space

adjustable elastic kids pants

In my creative space today is an unfinished tutorial. I was hoping to have it posted this week.

If you follow me on Facebook, you know that was feeling a bit like a mending rock star last week when I figured out how easy it is to add adjustable elastic to kids’ pants.

I took all of the pics—just need to get them in order and write it up. Stay tuned!

In the meantime, head on over to Kirsty’s blog for more creative spaces.

how to sew a remote control pillow in five easy steps

I’m not sure why I’ve had pillows on my mind. Maybe because the sun has been hiding behind the clouds for too many days to count? Maybe it’s because I’ve been feeling under the weather? Maybe it’s because the holidays are fast approaching and I need some gift ideas for the guys in my life? Whatever the reason, I’ve been having fun. These are really easy. I know you’ll have fun, too.
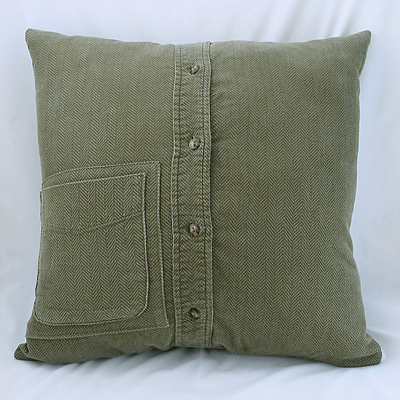
remote control pillow

Notes

  • Remote Control Pillow v 2.0 is for those who only have one tv remote or are using a universal remote for all of their equipment. If you need a multi-pocket pillow, check out my Remote Control Pillow v 1.0 pattern.
  • Most likely, your pocket will have to be flipped and moved to accommodate a remote control. If your shirt doesn’t have a pocket, you can easily make one out of the sleeve or a contrasting scrap fabric. Be creative! Try a denim pocket from a pair of jeans.
  • Some men’s shirts don’t have buttons past the belt line. You can take one from the collar or cuff and stitch it on the band.
  • If you are using a smaller shirt, simply use a smaller pillow form. I usually sew the cover 1″ smaller than the pillow form size so the final pillow will be nice and firm.
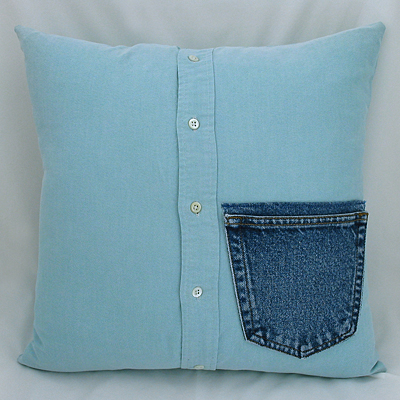
denim pocket men's shirt pillow

Materials
1 – large men’s button shirt with pocket
1 – 18″ pillowform
seam ripper
matching thread

Step 1
With the shirt buttoned, cut a 17 1/2″ square out of the front of the shirt. Cut another 17 1/2″ square out of the back of the shirt.

Step 2
Carefully remove the pocket using a seam ripper. Spritz shirt with water and steam press to close up any holes. Reposition the pocket and topstitch in place.

Optional Step 3
If your holes don’t close, if you accidentally rip your fabric, or you are using a shirt like corduroy and the nap won’t fluff back up, you’ll need a patch. Just cut a square from the sleeve and topstitch it over the original area.

Step 4
Lay the pieces together right sides together and sew around the whole square with a 1/4″ seam allowance. Make sure to undo one or two buttons before sewing so you can turn it right side out afterward.

Step 4
Clip your corners, turn right side out and press.

Step 5
Insert your pillow form and button it up!
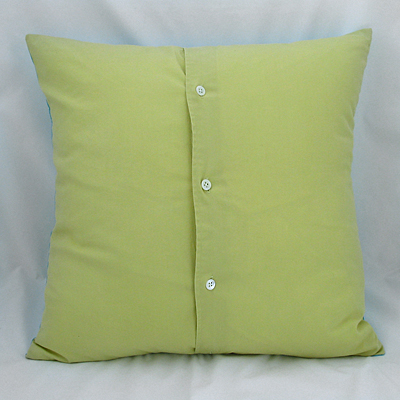
affordable decorative pillow button down shirt

This is an easy way to make decorative pillows, too. If you go to Goodwill on 99 cent day, this becomes a really affordable project. Plus, they organize their clothes by color, which makes it easy to find shirts that match your fabric. I used a little less than a fat quarter of fabric for the decorative pillow.

home decor pillow on a budget

recycle: Before you head out to the thrift store, check your own closet. All three of these shirts came from my husband. In fact, I have him trained now to ask me first before donating any of his clothes!
wardrobe refashion: de-ruffling a shirt

floral shirt

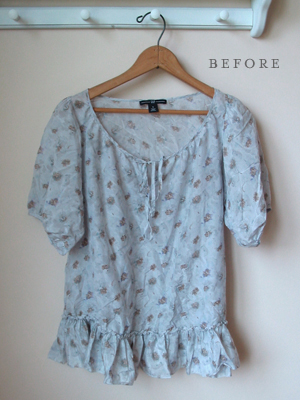
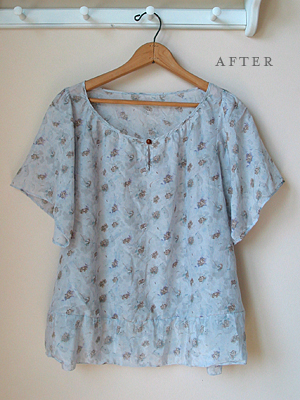
Here’s the shirt from yesterday’s garage sale finds. I really liked the fabric, but the shirt was a little bit too frilly for me.

floral shirt

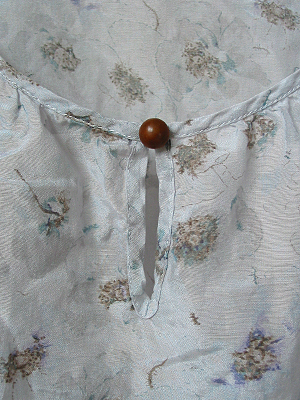
The first thing I did was cut off the gathered cuff and replace it with a simple rolled hem. Next I removed the ruffle and reattached the fabric with no gathers. Finally, I snipped off the ties, stitched the center closed and added a vintage button.

floral shirt

I like the shape of peasant style blouses, but I’m not a big fan of all of the frilly stuff. This turned out just perfect for me. Plus, I totally love that button!

refashion: Shirt 75 cents from a garage sale. Vintage button from my stash.