my creative space

handmade train applique

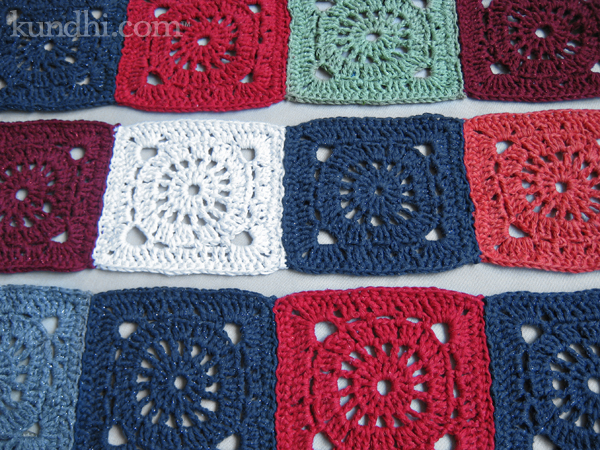
In my creative space today, I’m getting in the rhythm of seaming square after square (after square…). I know I could have crocheted these together as I went along, but I want that nice patchwork-y square look. Plus, it’s always nice to play around with color combinations before putting them together.

What’s in your creative space today? Kirsty is up to something with coffee. I hope it turns out better than my coffee project. Don’t forget to check out all of the lovely spaces while you are there.

double crochet with a twist

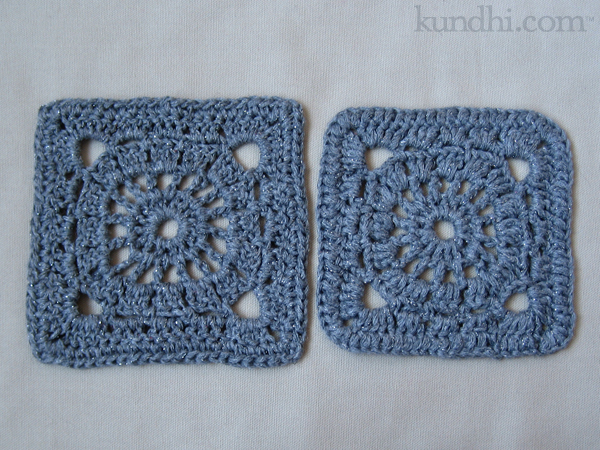
When I mentioned that I started doing my double crochets a different way, a few people wanted to know how I was yarning over. (Is yarning a word?)

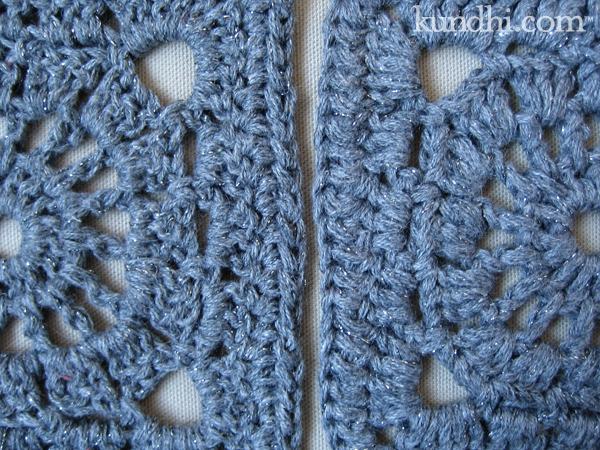
Basically, I was yarning over front-to-back instead of back-to-front. It doesn’t seem that it should make that much of a difference, but going from back-to-front gives the stitch a bit of a twist. The texture is more defined.

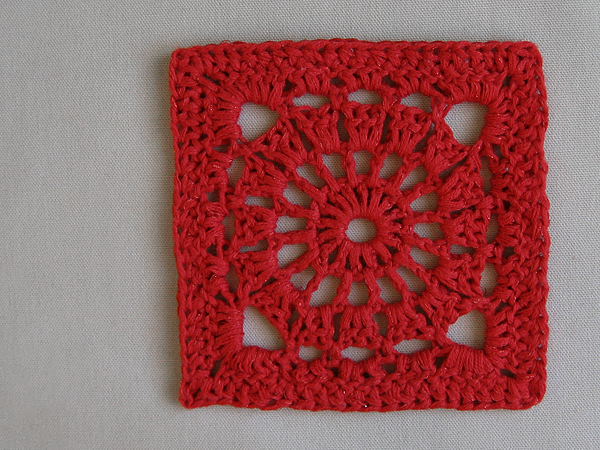
wagon wheel square

Once I saw the difference, there was no going back. Only problem was all of those squares I made on vacation. I’ll admit that it took me awhile to get up the courage to rip them out and start over. But after seeing the difference, I knew I had to do it.

wagon wheel square

interesting note: the extra little twist uses up a bit more yarn and makes the squares a bit more bigger.

quick and easy wrist warmer pattern

wrist warmer crochet pattern

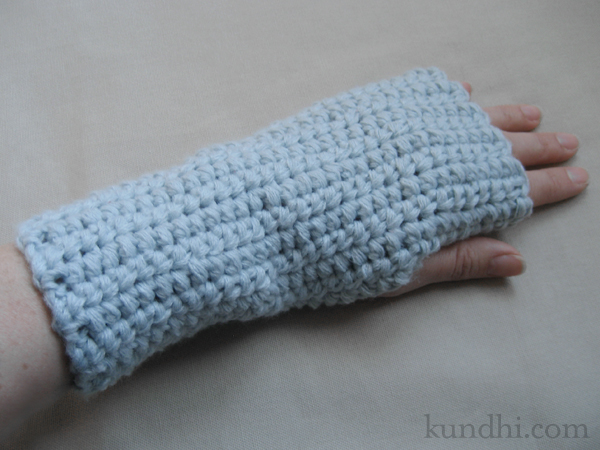
I made these wrist warmers for our mail carrier. She is awesome. We ship and receive a lot of mail packages and she always comes to our door, even in below zero temps. I know she has to keep her fingertips exposed, so I thought wrist warmers would be a nice gift.

The pattern as written fits an average size woman’s wrist. If you need it bigger or smaller (for a guy or child), whip out your tape measure and adjust the measurements accordingly. I measured around my knuckles, not including my thumb, and rounded down to 7 inches for a snug fit.
wrist warmer crochet pattern

Materials
any yarn (I used bulky yarn to make the project go fast)
corresponding size hook (I used size I)

DC: double crochet
SC: single crochet

tip: I tend to make my first chain really tight no matter how hard I try to keep it loose. To compensate for this, I chain and dc my first row with a hook size larger. That keeps my edges consistent for Step 6.

Step 1
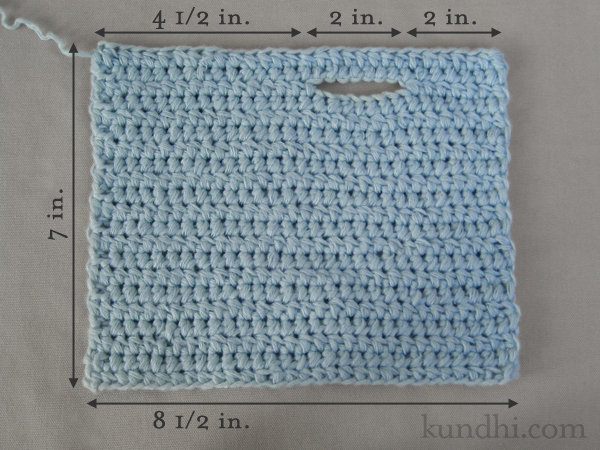
Crochet a gauge swatch in double crochet. I know some people hate making these, but it’s really not that hard, so just do it. Figure out how many stitches you have in an inch, then figure out the following:

A = gauge x 8 1/2
B = gauge x 2
C = gauge x 4

My gauge was 3 1/2 stitches per inch. I’ll put my numbers in parentheses in case you find the letters confusing.

Step 2
Chain A. (30)

Step 3
DC back and forth for six inches.

note: You’ll notice that I don’t chain at the beginning of each row. I use faux double crochets instead. They really make your edges much neater.

Step 4
Make the thumb opening: DC B (7), chain B (7), skip B (7), dc to end of the row.

Step 5
DC across, including chain stitches, and continue back and forth until piece measures 7 inches.

Step 6
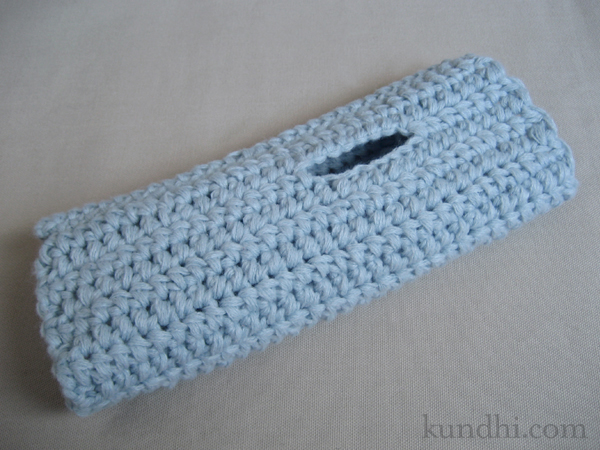
SC the last row and your first chain row together to make a tube. Cut yarn, weave ends and turn inside out.
wrist warmer crochet pattern

Step 7
Repeat for the other hand, but change Step 4 to the following:
Make the thumb opening: DC until C (14) stitches remain, chain B (7), skip B (7), DC B (7).

stash: I used recycled sweater yarn for these. It’s a soft acrylic that’s machine washable. I may need to make a pair for myself, too!
pattern: tiny crochet pumpkin

crochet pumpkin amigurumi

On Monday I mentioned that I had been playing around with variations on the Tiny Crochet Ball pattern. Hmmm… it’s October. Is it any surprise that I’m making pumpkins? Here’s how you can, too.

Using Tiny Crochet Ball pattern:

Pumpkin
Magic ring, R1-2: brown yarn
R3-R11: orange yarn
R12: brown yarn

Stem
R1: using brown yarn, chain 5
R2: sc in second bump from hook, sc in next three bumps*

Finishing
Break yarn and tie a knot. Using a darning needle, attach the stem at the top and bring the ends down through the bottom. Squinch the ball until it’s pumpkin shaped and tie a knot to hold the shape. Bury the ends inside the pumpkin.

*Go into the bumps on the back of the chain, not the stitches on the front of the chain.

Enjoy!

my creative space

my creative space

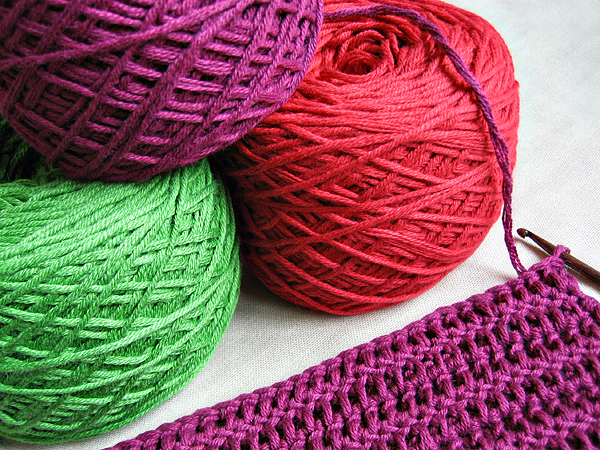
Our knitting guild has received yarn from the Land’s End Share the Warmth project. Have you heard about this? For every Feel Good sweater that is purchased, Land’s End will donate yarn to The Knitters Guild Association to be made into squares for Warm Up America. Our guild received three cones and I’ve got three “yarn cakes” to turn into squares. The colors are really beautiful and the yarn is super soft. I’m enjoying these squares a lot.

What are you doing in your creative space today? If you knit or crochet, consider making some squares for WAU! (You can use any yarn.) Details are on their website. Don’t forget to hop on over to Kirsty’s blog, as well, for more creative spaces.

tiny crochet ball pattern

tiny crochet ball pattern

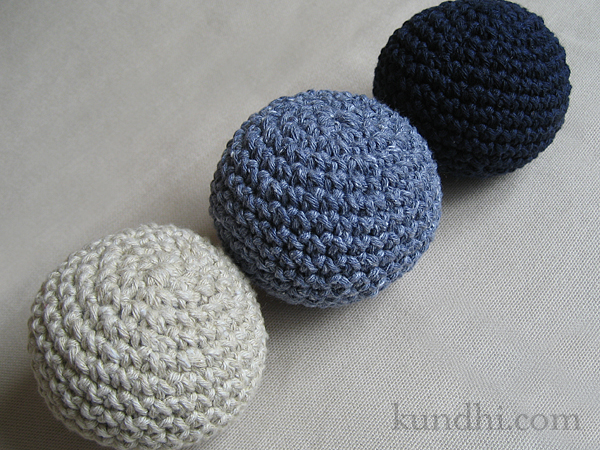
It took a few tries until I was satisfied with this pattern. At first, they were coming out too hexagon shaped, so I decided to alternate the increase/decrease placement every other row. That gives the ball a more round shape.

I also wasn’t happy with the gaps that the decreases made, especially on the navy ball. You could see the white stuffing! Then I remembered this invisible decrease from Planet June. Problem solved!

Have fun with this one. On Friday I’ll show you a little variation. Stay tuned!

Tiny Crochet Ball Pattern
worsted weight yarn (I used Aunt Lydia’s cotton)
size G/6 (4.25mm) crochet hook
polyfil for stuffing
tapestry needle for weaving ends

sc: single crochet
inc: 2 sc in one stitch
dec: 1 sc over two stitches through the front loops only

gauge: not important, but mine are about 2 1/2 inches wide

Make a magic ring.
R1: 6 sc into ring
Ball worked as a spiral. Place marker to keep track of rounds.
R2: inc in each stitch around
R3: *inc, sc* around
R4: *2 sc, inc* around
R5: *inc, 3 sc* around
R6: *4 sc, inc* around
R7-11: sc around
R12: *dec, 4 sc* around
R13: *3 sc, dec* around
R14: *dec, 2 sc* around
R15: *1 sc, dec* around
Stuff with polyfil
R16: dec around

my creative space

cotton crochet bottle

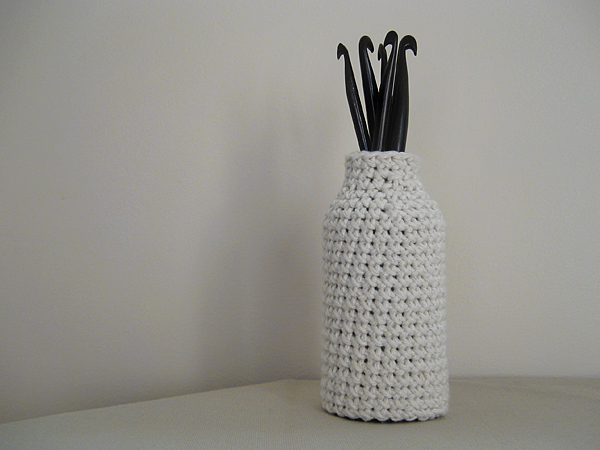
The day before our vacation the little crochet bottles sold. When I got back home, I started to miss having them around. So I’ve decided to make a few more—some for the shop, some for gifts and some just for me. I’m also experimenting with different sizes, shapes and types of yarn. I love how a little re-purposing can transform a castaway into something beautiful.

Speaking of beautiful, don’t miss the lovely spaces over at Kirsty’s blog.

kyuuto! lacy crochet doily

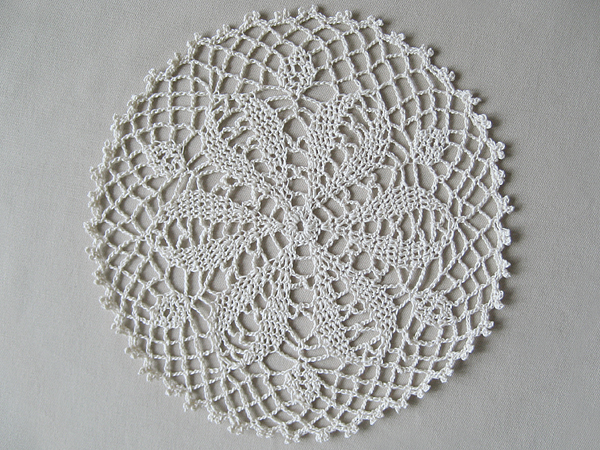
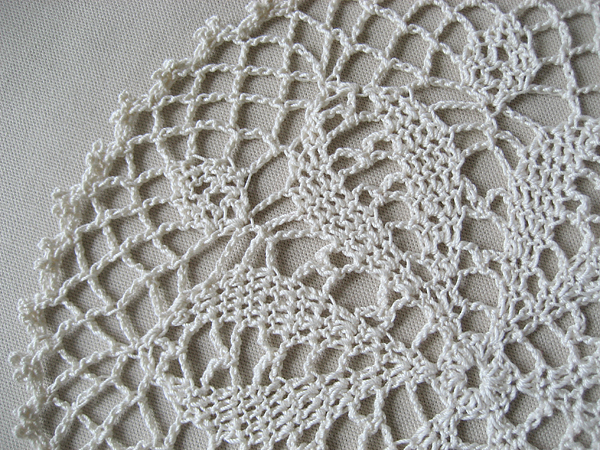
Remember the sneak peek I shared of my doily project awhile back? Here it is completed and blocked.

crochet doily kyuuto lacy crochet

I was really surprised how fast and easy this pattern worked up. It didn’t take long to get the hang of the small hook and working from a chart.

crochet doily kyuuto lacy crochet

I don’t have any doily plans for the future, but I’m not against doing another one. It was even kind of fun (if you don’t count that crazy picot edge.)

project notes: Thrifted thread and clearance hook. (I don’t think I would have purchased a hook that small if it wasn’t on sale!) Pattern from Kyuuto! Lacy Crochet.

how to: crochet jar cover in 3 easy steps

quick jar cover

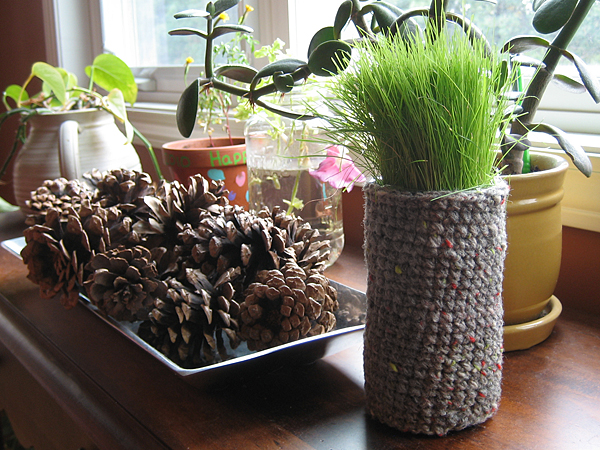
This is what’s left of my outdoor garden. We did not have very good luck this year: no tomatoes and only one cucumber. My petunias were doing great until a big storm almost blew them out of the pot. Sadly, I didn’t notice the roots were above the soil until the whole thing was turning brown.

You know what is growing? My daughter’s little grass pot. She made this in summer camp and it’s the greenest, healthiest plant of the summer. The container is just a recycled plastic jar and I figured after almost two months, it finally deserved a proper cover.

How to Crochet a Jar Cover in 3 Easy Steps

Materials
worsted weight yarn
size G hook

Gauge is not important for this project.
Adjust your hook size for different yarn weight.

Step 1
Chain enough stitches so that the chain fits snugly around the jar. Join to make a circle.

Step 2
Single crochet around and around until you’ve got the height you want.

Step 3
You’re going to want an even top edge, so we’re going to pick a spot to start the top row. (You can use the tail as a guide and follow the line of stitches up if you want to be precise.) Slip stitch, chain one and single crochet around until you reach the chain one. Slip stitch into the chain one and finish off.

When you weave in your ends, use the tails to even up the bottom and top edges. You can see in the picture that my bottom edge isn’t perfect. Oh, well.

stash: This is a great project for using up leftover yarn. Because the rows spiral up, it’s not great for stripes. You’ll get a “jog” when you change colors.

my creative space

crochet bath mitt

Remember this sweater yarn? I finished my first square. I know this is supposed to be my vacation project, but the pattern is so addicting. Maybe just one more? It’s not like I don’t have plenty of other things on my to-do list. Ha!

pattern info: This is Wagon Wheel #2 from Granny Crochet Favorites. I modified the last round to be hdc instead of dc stitches. The colors in the book are seriously dated, but the patterns are really quite lovely.