once a refashioner…

20140409-214703.jpg

After you’ve been taking apart clothing for a few years, you start to deconstruct items before you even buy them. I found this cute dress for my daughter’s First Communion, but it was sleeveless and she’d have to wear a shrug, which covered up the cute flower on the front. I immediately looked at the stitches and tried to figure out how easy it would be to remove. Then I thought, I could buy a simple veil and stitch it on to match the dress. It turned out pretty perfect. I love when that happens.

20140409-214721.jpg

pattern: crochet troll doll dress

I’ve had this little troll for almost 20 years. She’s worn a Tae Kwon Do uniform for most of that time. I’m not sure exactly when my daughter decided the troll was hers. Isn’t it funny how kids kind of take over your things without you realizing it?

troll dress crochet pattern

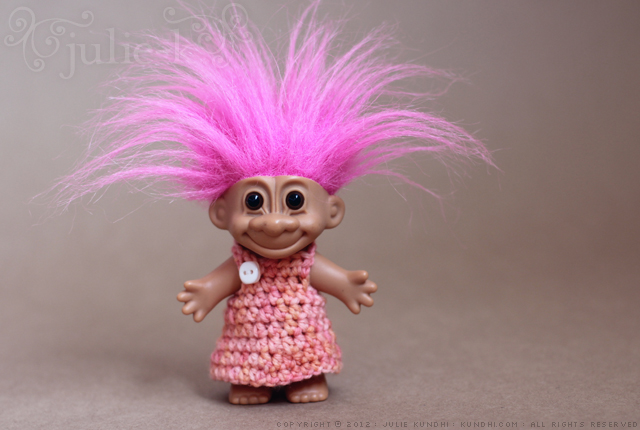
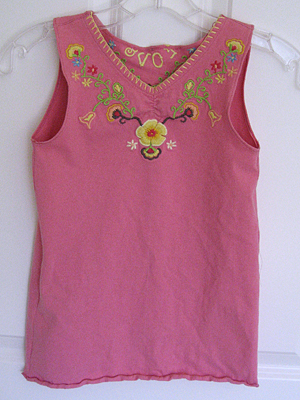
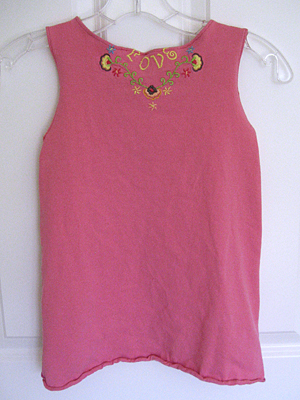
The other night my daughter announced that she was naming the troll Isabel. Apparently, Isabel has grown tired of her Tae Kwon Do uniform and asked for a dress. Could I make one?

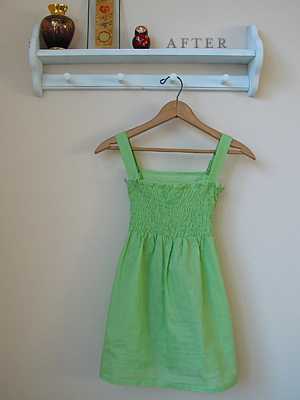
I thought there might be some other trolls out there who’d like a dress, so I’m sharing the pattern. It may seem big while you are making it, but remember it has to fit over those cute, chubby feet.

Pattern is written for the four-inch size troll doll.

Materials
sport or dk weight yarn (yarn was from my stash and is 12 wpi)
size F/5 (3.75 mm) crochet hook
small button
needle and thread for sewing button
tapestry needle for weaving ends

gauge: 4 stitches per inch

ch: chain
hdc: half double crochet
hdcDecrease: half double crochet decrease
sl st: slip stitch

half double crochet decrease: yarn over, hook through stitch, yarn over, pull through stitch, yarn over again, hook through next stitch, yarn over, pull through stitch, yarn over one more time, pull through all five loops

  • ch 32, join with sl st in back loop* of first chain to make a circle
  • ch 2, skip next stitch, hdc around in back loops* of chain, join in the round with a sl st in the top chain – 32 stitches
  • ch 2, skip next stitch, [hdc 6, hdcDecrease] around, join in the round with a sl st in the top chain – 28 stitches
  • ch 2, skip next stitch, [hdc 5, hdcDecrease] around, join in the round with a sl st in the top chain – 24 stitches
  • ch 2, skip next stitch, [hdc 4, hdcDecrease] around, join in the round with a sl st in the top chain, break yarn – 20 stitches
  • find the front six stitches of the dress, join yarn, chain 2, hdc next five stitches, turn work
  • ch 2, hdc next five stitches, do not break yarn
  • sew on the button and put the dress on the troll

troll dress crochet pattern

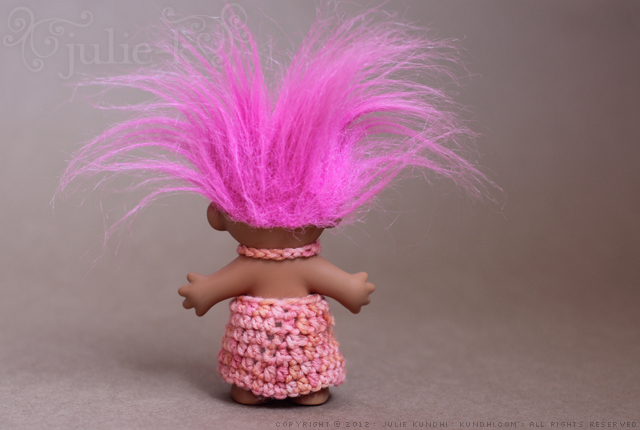
The next step depends on how tightly you chain and the size of your button. Chain 20 stitches or however many you need to make the strap go from one side, around the back of the neck, to the front and around the button. Break yarn and use the tapestry needle to thread the end a few stitches back to make the button loop.

Weave in ends.

*Go into the bumps on the back of the chain, not the stitches on the front of the chain.

the ladybug dress

girl bug fabric

blog flashback: Two years ago I refashioned a woman’s shirred shirt into a dress for my daughter.

A few months ago, I got a message from a friend about some free fabric. I tried to resist. I really don’t need any more fabric. I did need a little quiet time with friends, though. Besides, what if I found something really cool?

girl bug fabric

I have always wanted to make a dress out of pre-shirred (or mock-smock) fabric. This happened to be the perfect amount: just shy of 1 1/2 yards. (It’s hard to tell how much you’ll need with all that elastic. My daughter’s chest is 21 inches, if that gives you some perspective.)

girl bug fabric

I made the dress long, hoping and praying she might be able to wear it next year. I even hid some extra strap length inside the back. I guess I could always turn it into a shirt next year, too.

What do you think about mock smock fabric? Have you ever shirred fabric with elastic thread?

how to: adjust the side seams of a dress in
4 easy steps

how to alter little girl dress

I’ve been waiting for this dress to fit my daughter for two years. When she tried it on this Spring, it was just above her knees, but still too big in the body. The only way she would be able to wear it would be if I took it in at the sides. It was actually very easy. All you need is a seam ripper and some matching thread.

Step 1
Unpick the facing under the arm and the bottom hem a few inches on either side of the seams.

how to alter little girl dress

how to alter little girl dress

how to alter little girl dress

Step 2
Unfold the fabric. Press the facing and hem flat.

how to alter little girl dress

how to alter little girl dress

Step 3
Mark the new seam and stitch. (My daughter is kind of squirmy. I measure in thumbs, not inches. I took this dress in one thumbnail on each side.)

how to alter little girl dress

Step 4
Re-fold the facing and hem. Stitch over the original holes.

how to alter little girl dress

how to alter little girl dress

See? Really easy! I didn’t even trim the new seam allowance. The edges were already finished with a serger, so I just pressed them toward the back of the dress before stitching everything back together.

I have a feeling I’ll be doing this to a lot of my daughter’s dresses this Summer. Let me know if you try it!

my creative space

fairy dress

In my creative space this week, I altered this cute dress to fit my daughter. She hasn’t been that interested in dress up clothes, but there were a few times at the children’s museum that wore a dress almost exactly like this.

I snagged this one at the thrift shop, even though it was a few sizes too big. I took in the shoulders and body, but left the skirt as is.

fairy dress

She was really excited when I brought it home and couldn’t wait until it fit. Now, of course, she doesn’t want to wear it. Maybe I should call it a Fancy Nancy dress instead. If that doesn’t work, it can always be transformed into a twirly skirt.

What’s happening in your creative space this week?
Play along over at Kirsty’s.

wardrobe refashion: beach dress blahs

wardrobe refashion: beach dress

I bought this dress because I thought it would be nice for the beach. After taking it in at the waist (sorry, you can’t really tell in the photos) and shortening the hem to knee length, it’s not really doing anything for me.

wardrobe refashion: beach dress

My husband says it looks good, but it makes me feel kind of blah. I’m still keeping it for vacation, but it will probably get donated after that!

how to refashion a dress into a skirt
in five easy steps

Even though I wrote this tutorial for a kid’s size dress, you can do this with adult sizes, too. This is the same way I turned a shirt into a skirt.

My daughter and I both love this dress. She only wore it a few times last season because it was too big. This year it is too small. It probably would have fit her best when it was 20 degrees outside.

easy kids skirt tutorial

The other day she insisted on wearing it. (Yes, it was still hanging in her closet even though it was too small.) I let her try it on so she would see that the buttons could no longer be buttoned. While she had it on, I realized that it was just the top that was too small. The bottom fit just fine. Hmmm… what if I turned it into a skirt?

easy kids skirt pattern

Step 1
Cut off the bottom of the dress. If your daughter is as tall as mine, use a seam ripper. It takes longer, but she needs every bit of length I can save.

Step 2
Measure your daughter’s waist. Add an inch and then cut a piece of elastic. I used 3/8″ wide elastic.

Step 3
Fold the top edge down 1/4″ and press. Then fold 5/8″ and press.

easy kids skirt tutorial

Step 4
Sew the waist leaving an opening for the elastic. Edge stitch the top to help the elastic stay in place.

Step 5
Thread the elastic through the waist casing, sew elastic ends together with a 1/2″ seam allowance, and close up the waist.

easy kids skirt pattern

My daughter was so excited to see her new skirt. She especially loves the bow. The original dress had a two inch hem. If she’s still in love with it next season, I guess I’ll be letting the hem down, too.

refashion: Sewing clothes is sometimes easier if you don’t start from scratch. Refashioning a favorite piece of clothing can make you happy, your budget happy and the earth happy.

Thanks to whipup.net for linking to my tutorial and welcome new readers! For more crafty updates, visit my Facebook page!

wardrobe refashion: shirt to toddler dress

shirt to easy toddler dress

This shirt turned into the cutest dress, but it’s big! I figure it’s at least a 4T or 5T. Since this season is almost over, I’m going to wait until next year to have my daughter try it on. It will probably need a dart in the back because she’s so tall and thin. The length might actually be ok. Just in case, I didn’t sew the straps on in the front.

shirt to easy toddler dress

My seam ripper was my BFF for this project. I unpicked the stitches from the neckline and used the bias trim to cover the raw edges under the sleeve.

shirt to easy toddler dress

I also unpicked the stitches from the cuffs and used them as the straps. I cut off the button hole end and sewed it to the back. The other half will be sewed to the front. That way I can use the buttons without having to resew the holes.

shirt to easy toddler dress

refashion: This was really easy. Seriously! The hardest part was not poking a hole in the fabric while ripping seams! The shirt was $1 at a garage sale. The best part? My daughter said, “Mom, that dress is beautiful! Is it for me?”

wardrobe refashion: t-shirt toddler dress

I’ve got way too many pictures for this little refashion, especially because it was just a practice project. I bought this shirt because I liked the embroidery on the front and back. You’ve gotta love fabric that comes already embellished!

t shirt toddler dress

It’s loosely based on this Simplicity for Kids pattern. I say loosely because the pattern didn’t really cooperate with the embroidery. Not only that, but the shirt was crooked! There was more pink fabric on one side than the other.

t shirt toddler dress

I used the 3T size, because that’s what Bella is mostly wearing these days. It turned out a little big.

t shirt toddler dress

I’m still trying to work on two skills: sewing knits and using my rolled hemmer foot. My seams are still a little wonky, but they are improving.

t shirt toddler dress

Here’s the awesome thing, though. When I was taking these pictures, Bella asked me what I was doing. When I told her I made her this dress, she grabbed it and said, “Thanks, Mommy! I love this dress! I love it!” Then she rolled it up in a little ball and began to hug it.

t shirt toddler dress

It wasn’t until she tried it on that I realized how big it was. She told me it was fine. I’m hoping she’ll grow into it before the end of the summer. (Please excuse the post-quiet time crazy hair.)

t shirt toddler dress

refashion: I’ve been collecting cute t-shirts to turn into dresses. This one was from a church garage sale. Most of them are from 99 cent days at Goodwill. Pattern was also from Goodwill. It goes up to size 8!