Halloween is in just a few days. Do you need a quick, fun and spooky crochet project? Here are some of my favorites.


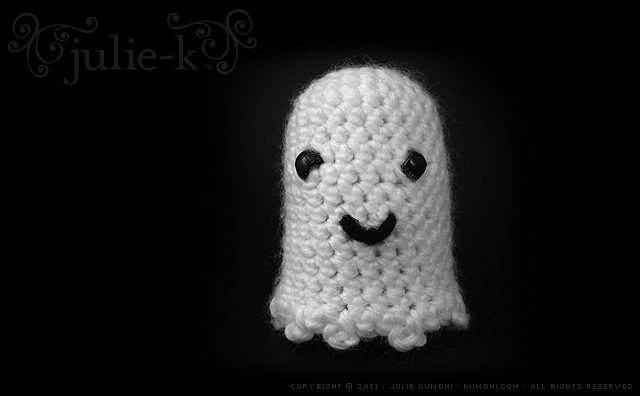
julie-k glow-in-the-dark ghost

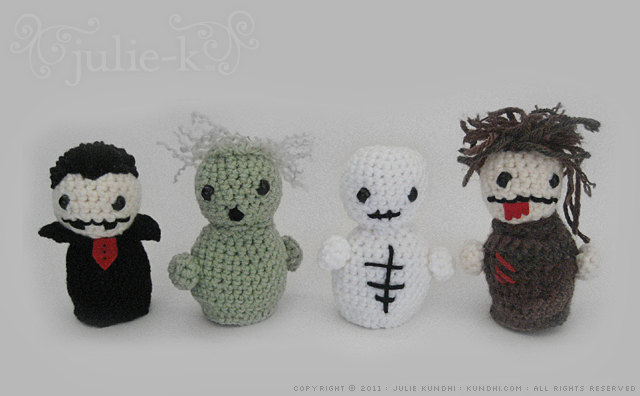
undead gang from Creepy Cute Crochet
Are you making anything for Halloween? Share in the comments!
Halloween is in just a few days. Do you need a quick, fun and spooky crochet project? Here are some of my favorites.


julie-k glow-in-the-dark ghost

undead gang from Creepy Cute Crochet
Are you making anything for Halloween? Share in the comments!

I spent the last few days crocheting up a spooky storm. I think I am finished with Halloween-themed crafts and ready to just sit and eat some candy. Phew!
I stayed up late last night putting the finish touches on these cuties, packaged them up for the mail, and then headed out to the pumpkin patch. It was a beautiful day to be outside with good friends, creepy amusements and funnel cake for lunch.

On the schedule for tomorrow: my daughter’s Halloween party at school in the morning and trick-or-treating at the zoo in the evening. When did Halloween become so darn busy?
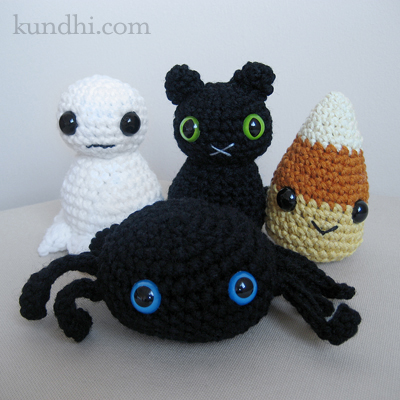
pattern info: The ghost and cat are loosely based on the Skeleton Bride and Devil patterns from Creepy Cute Crochet. The candy corn began as a free pattern from Lion Brand with added rows and a rounded bottom to match the others. The spider is over here.

Tomorrow is the first day of October. Are you ready for Halloween? I posted this pattern on my personal website last year, but I have so many new readers over here, that I thought I’d share it again. I think it would be fun to make a big pile of these and string them on a garland!
Glow in the Dark Ghost with Picot Ruffles
Materials
glow in the dark yarn or any worsted weight white yarn
size G/6 (4mm) crochet hook
two black beads for eyes
black yarn for smile
tapestry needle for beads and weaving ends
optional: polyester fiberfil
sc: single crochet
sl st: slip stitch
R1: chain 2, sc 6 in second chain from hook
mark the beginning of your row, move your marker up on each completed row
R2: 2 sc in each stitch around (12 stitches)
R3: *sc 1, sc 2 in next stitch* around (18 stitches)
R4: *sc 2, sc 2 in next stitch* around (24 stitches)
R5-7: sc around
R8 : sc 9, sc with bead, sc 3, sc with bead, sc 10
R9-15: sc around
R16: *[sl st, chain 3, sl into same st] sc* around for picot edging
Tie off, sew on a little smile, and weave in your ends.
I didn’t crochet a base because of the picot ruffle. Not to say that it couldn’t be done. This is more decoration than a toy, so I stuffed it with fiberfil to give it shape, but it’s open on the bottom.
A few weeks ago I totally got sucked in by Halloween marketing. “We’ve got glow in the dark yarn!” screamed the ad. “Wow! That would make a cool amigurumi ghost!” I thought. I marched off with my 40% of coupon, got my yarn, and then came home to look for a pattern. But I couldn’t find any I really liked, so I just improvised. You’ve already seen the first one.* I like this one a little better, especially with the picot ruffles at the base. This little ghost is for sale in my etsy shop, but if you know how to crochet, don’t buy it from me unless you’re really busy saving lives or something because it takes no time at all to whip one up. Heck, crochet a whole pile of them and string them together to make a Halloween garland!
*By the way, when T turned out the light and the little ghost started to glow, M handed it right back to him. It’s sitting on my windowsill now keeping my pumpkin and apple company.
Glow in the Dark Ghost with Picot Ruffles
materials:
glow in the dark yarn or any worsted weight white yarn
size G/6 (4mm) crochet hook
two black beads for eyes
black yarn for smile
tapestry needle for beads and weaving ends
optional: polyester fiberfil
sc: single crochet
sl st: slip stitch
R1: chain 2, sc 6 in second chain from hook
mark the beginning of your row, move your marker up on each completed row
R2: 2 sc in each stitch around (12 stitches)
R3: *sc 1, sc 2 in next stitch* around (18 stitches)
R4: *sc 2, sc 2 in next stitch* around (24 stitches)
R5-7: sc around
R8 : sc 9, sc with bead, sc 3, sc with bead, sc 10
R9-15: sc around
R16: *[sl st, chain 3, sl into same st] sc* around for picot edging
Tie off, sew on a little smile, and weave in your ends.
I didn’t crochet a base because of the picot ruffle. Not to say that it couldn’t be done. This is more decoration than a toy, so I stuffed it with fiberfil to give it shape, but it’s open on the bottom.