how to create silhouette clip art in 3 easy steps

20121113-084307.jpg

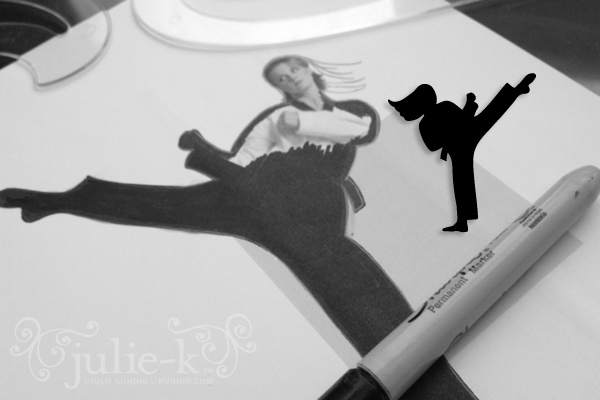
When I was playing around with my TKD Girl idea, I grabbed an image off the Internet to mock up some ideas. Once I realized I was actually going to do something with it, I needed to create artwork of my own.

Making silhouettes isn’t hard. In fact, technology has made it much easier than when I first started my career in graphic design.

1. Find an image.
That used to mean heading to the library and photocopying something out of a book. Now you can just print something off of the Internet.

2. Trace the image.

I like to start with pencil. I trace around the important details while adding some of my own (see the long hair above). Then I outline the edges with a fine point sharpie and fill in the rest with a regular sharpie.

3. Scan and clean up the image.

Before programs like Illustrator, I used to fine tune my images with opaque paint. The elbow that looks awkward? Paint over it with white, let dry, try again with black. Now I just scan my drawing into the computer and edit the vector artwork.

The upside of silhouettes is that you don’t have to worry about details like drawing a face. Without the context of clothing, however, the shape might look lumpy in the wrong places. I had to fiddle around with the outline of TKD Girl’s jacket so her shoulders, elbow and waist looked more balanced and natural.

See? Easy peasy lemon squeezy. Now go make some art!
recycle: how to make felted beads from yarn scraps

I’m going to say something silly, but I’m sure there are others out there feel the same. I have a hard time throwing out wool scraps. I don’t feel the same about cotton or acrylic yarn and I’m not sure why. There’s just something about the wooly ends. It pains me to toss them.

One night after amassing a large pile of granny square ends, I had an idea. I pulled the plies apart, walked over to the sink where my husband was doing dishes, and doused them with hot water. I added a tiny drop of soap and started rolling them in my hands. Within seconds I had the most adorable little felted bead! Just recently, I made some while the camera was out, and decided to take a few pics for the blog.

How to Make Felted Beads

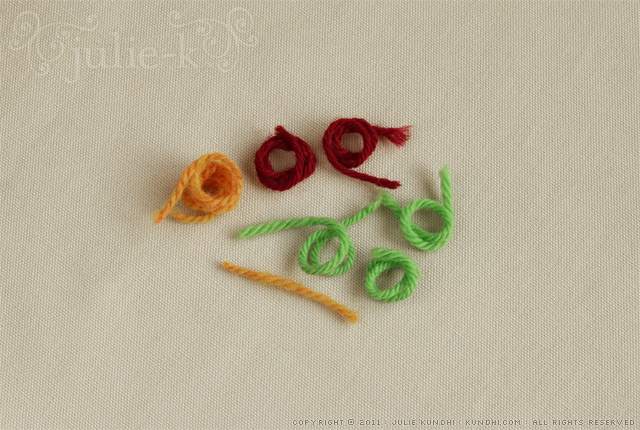
1. Collect your wool ends. Here are a few from recent projects.

how to make felted beads from leftover wool yarn

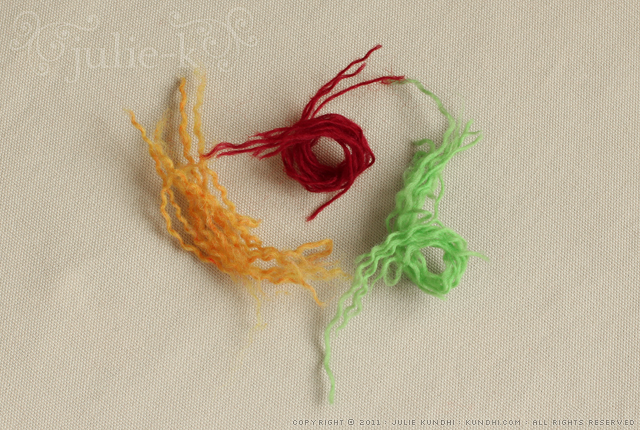
2. Separate the plies. Skip this step with single ply yarn.

how to make felted beads from leftover wool yarn

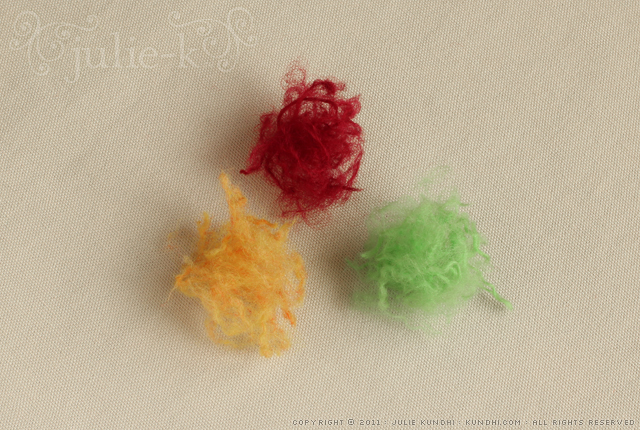
3. Pull apart the individual plies until you’ve got a fluffy ball of wool. The fluffier the ball, the more even it will felt.

how to make felted beads from leftover wool yarn

4. Felt them by hand. Sometimes I use hot water from the tap. Other times I heat a small mug of water in the microwave. Get the wool wet and then squeeze out the excess water. Roll the wool between your palms until it starts to felt. Sometimes a little bit of soap helps get the process going.

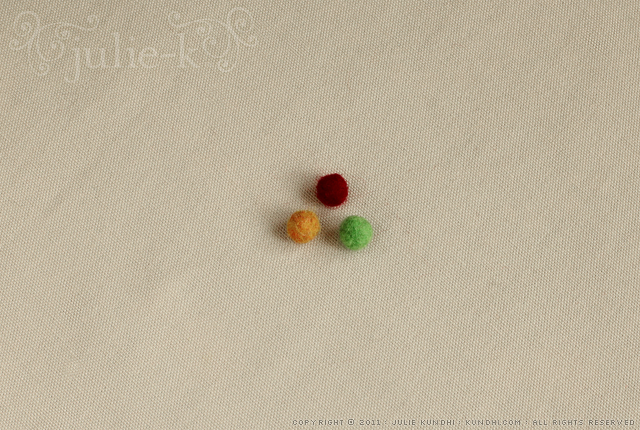
Rinse out the soap and you’re left with these little cuties:

how to make felted beads from leftover wool yarn

I have great ideas for these, but I must admit that they are currently in a jar with a rainbow of other colors. I’d like to make a bracelet or necklace with them. I’d also like to use one as a center for a crochet flower hair tie. In the meantime, I just keep felting and collecting, happy that I’ve found a use for my wooly ends.

What do you do with your yarn scraps?

how to: crochet jar cover in 3 easy steps

quick jar cover

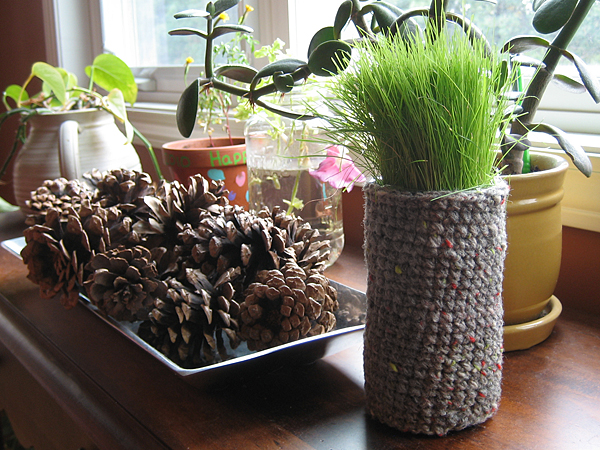
This is what’s left of my outdoor garden. We did not have very good luck this year: no tomatoes and only one cucumber. My petunias were doing great until a big storm almost blew them out of the pot. Sadly, I didn’t notice the roots were above the soil until the whole thing was turning brown.

You know what is growing? My daughter’s little grass pot. She made this in summer camp and it’s the greenest, healthiest plant of the summer. The container is just a recycled plastic jar and I figured after almost two months, it finally deserved a proper cover.

How to Crochet a Jar Cover in 3 Easy Steps

Materials
worsted weight yarn
size G hook

Gauge is not important for this project.
Adjust your hook size for different yarn weight.

Step 1
Chain enough stitches so that the chain fits snugly around the jar. Join to make a circle.

Step 2
Single crochet around and around until you’ve got the height you want.

Step 3
You’re going to want an even top edge, so we’re going to pick a spot to start the top row. (You can use the tail as a guide and follow the line of stitches up if you want to be precise.) Slip stitch, chain one and single crochet around until you reach the chain one. Slip stitch into the chain one and finish off.

When you weave in your ends, use the tails to even up the bottom and top edges. You can see in the picture that my bottom edge isn’t perfect. Oh, well.

stash: This is a great project for using up leftover yarn. Because the rows spiral up, it’s not great for stripes. You’ll get a “jog” when you change colors.

how to: turtleneck sweater turns cardigan in
5 easy steps

So many knitters are scared of the s-word.* It’s really not that terrible. In fact, I’ve been cutting into sweaters for years to make pillows, scarves and tote bags. You just need to get over the fear that all of the stitches will immediately unravel. Take it from someone who unravels sweaters a lot. It’s not that easy for a sweater to fall apart.

how to: turtleneck sweater turns cardigan in 5 easy steps
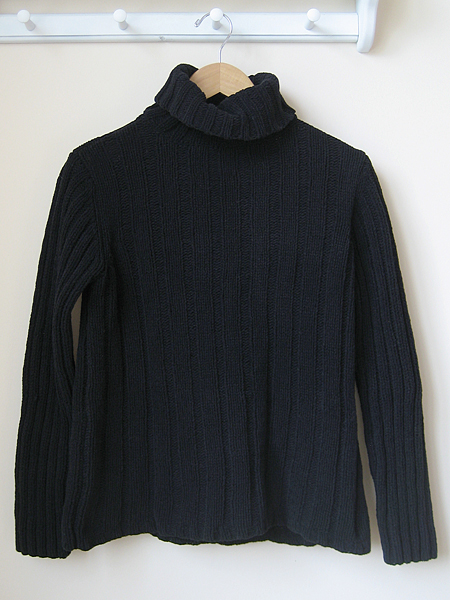
original turtleneck

I’ve been cleaning out my closet and have a lot of beautiful pullover sweaters that I don’t wear anymore. I keep them because the wool is so nice. Sometimes I think I will knit them into something else. I don’t know where I think I’m going to find the time. After my Fair Isle class at knitting retreat, I decided to turn my pullovers into cardigans.

how to: turtleneck sweater turns cardigan in 5 easy steps
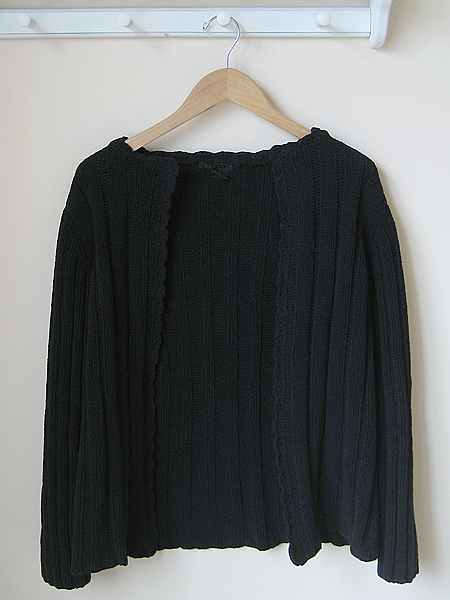
new cardigan

I decided to practice on a thrifted sweater first. I picked a cotton/acrylic blend that was in the donation pile. It had a weird texture — kind of like chenille. Man, was that collar hard to unravel. If you want to practice first, I recommend trying a sweater made out of a nice, simple, plain yarn.

This is a short and sweet tutorial. I assume you understand the anatomy of a knit stitch, know how to pick up stitches and crochet a decorative trim.

Materials:
seam ripper
sharp scissors
sewing machine
crochet hook

Step 1
Remove the seam that attaches the collar to the sweater. Unravel collar yarn and save for later.

Step 2
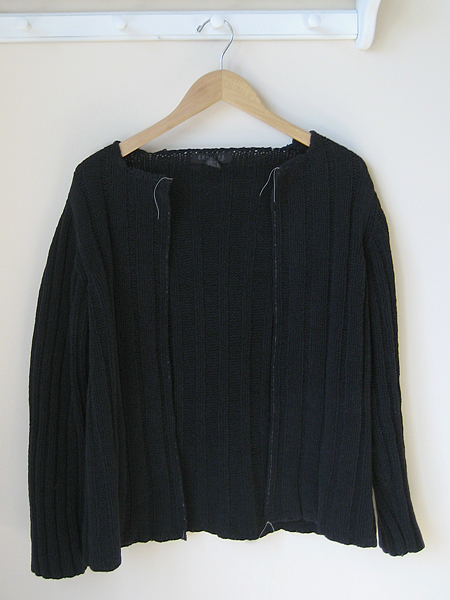
Find the middle column of stitches. Using a sewing machine, sew a line of stitches two columns to the right and two columns to the left.

Step 3
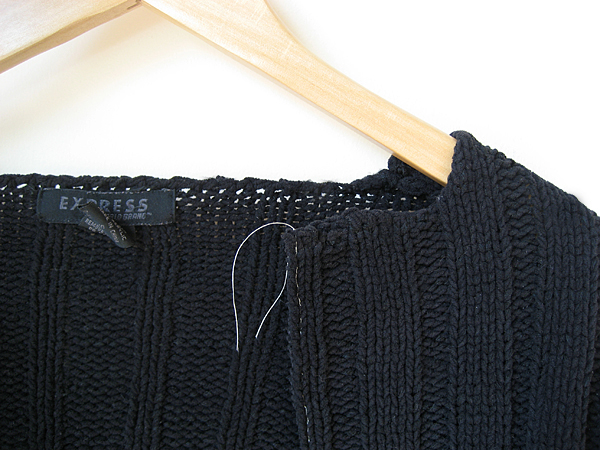
Carefully cut up the middle column of stitches.

how to: turtleneck sweater turns cardigan in 5 easy steps
collar removed, stitches sewn and cut

how to: turtleneck sweater turns cardigan in 5 easy steps
close up of sewn stitches

Step 4
Using the unraveled collar yarn, pick up and single crochet a stitch for each row of stitches. I started at the bottom, worked my way up and around the neck and back down the other side. (Some will tell you to pick up three stitches for every four rows. I say do what feels right, looks good and doesn’t pucker.)

Step 5
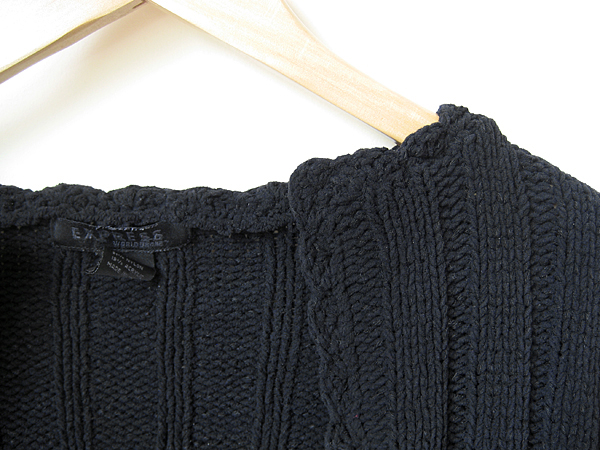
Depending on how much yarn you have left, crochet a decorative border. I chose a simple shell edging.

how to: turtleneck sweater turns cardigan in 5 easy steps
close up of crochet edge

Options
If you want to try this with a crew neck and don’t have enough matching yarn, use a different color or texture to jazz things up. You could also add buttons using chain stitch button holes.

This project is easy once you get over the fear of cutting into knitted stitches. I finished this in two afternoons.

refashion: I’m excited to start wearing some of my favorite wool sweaters again. I’ll be posting my progress as I go. A special thanks to Lynn Anne for giving me the courage to cut!

*s-word is steek!

how to make a ruffle scarf in 3 easy steps

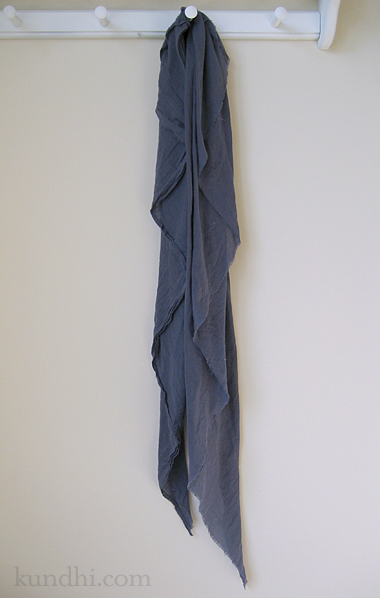
The other day I saw a woman wearing a cotton scarf that was layered and unfinished in the most beautiful way. She looked like she just walked off a catalog shoot. I’ve never been able to pull off that “I just threw it on and it looks perfectly ruffled” look, so I decided to design one that made it easy.

ruffle scarf tutorial

Step 1
Cut a large triangle of fabric on the bias. I chose a lightweight cotton, but anything with a nice drape would work. (Flannel would be nice for Fall.) My piece measured 80 inches across the base and 32 inches high. Run it through the washer and dryer to fray the edges.

Step 2
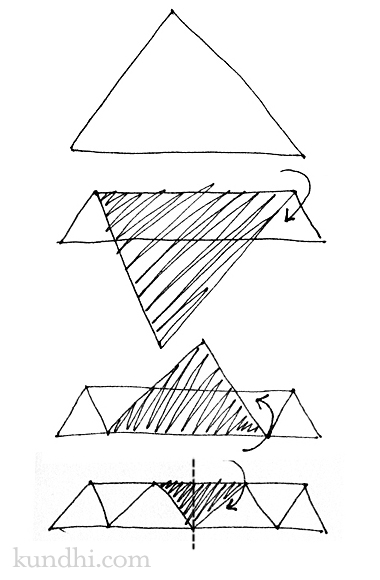
Fold the ruffles. I figured a diagram would be easiest to understand. I folded mine 8 times, but you don’t need to see that many steps to get the idea.

ruffle scarf tutorial

Step 3
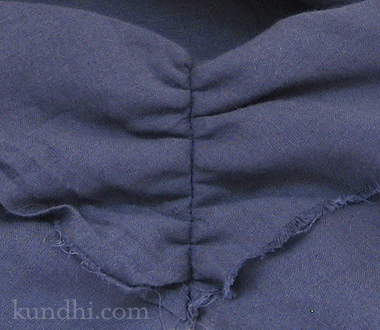
Stitch the ruffles in place. I didn’t back tack and pulled on the threads to create a little gather before I tied them off.

ruffle scarf tutorial

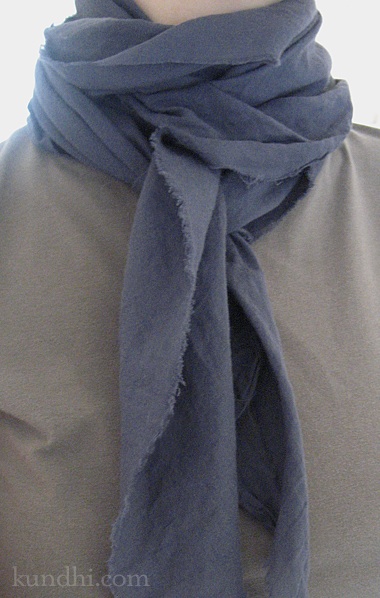
That’s it! You can wear it with the ruffles hanging down or wrap it around a few times with the ruffles facing out for that perfectly unfinished look.

ruffle scarf tutorial

easy backpack with bias tape straps

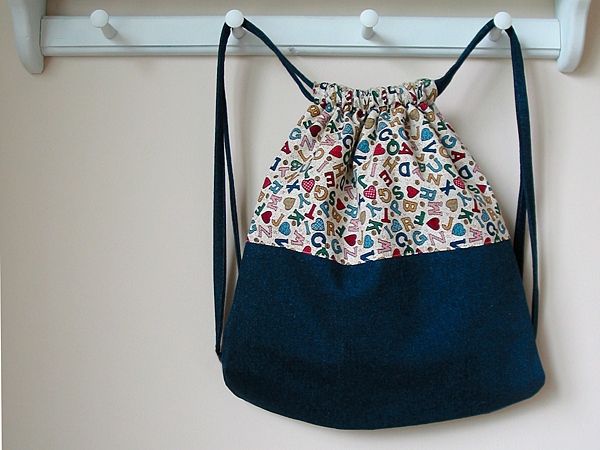
My daughter starts preschool next week and she needed a backpack. I asked her if she’d like me to make one for her and she said YES!

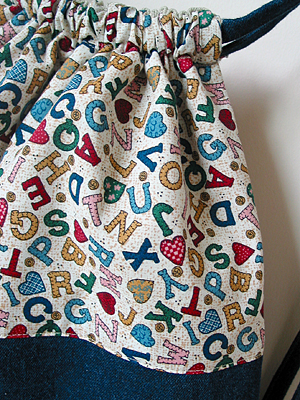
I let her choose fabric from my stash and helped her with coordinating the colors. I really like how it turned out and she loves it. My only problem is getting her to wear it. Right now, she just wants to carry it by the straps.

martha stewart easy beach bag

I used Martha’s Easy Beach Bag pattern with a few modifications:
• inside is canvas instead of nylon
• inside has two pockets
• used fabric instead of cord for the straps
• serged the raw edges inside

drawstring back pack with lining

Drawstring Strap How-to:
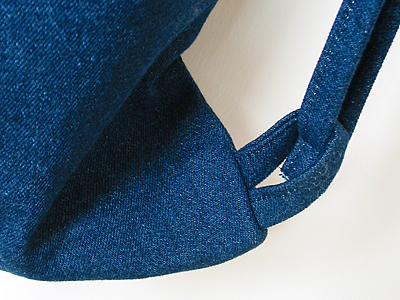
Feed strips of denim through a 1-inch bias tape maker, fold the tape in half and stitch it together. Once threaded through the loops, sew the ends together because they’ll be too thick to knot.

drawstring back pack with lining

stash: This is one of those occasions that I love having a stash of fabric. It’s so easy to dive right into a project when the motivation strikes! Plus, using a thrifty stash is so affordable. I’m guessing this cost less than $2 to make. Sweet!

wardrobe refashion: t-shirt to cardigan

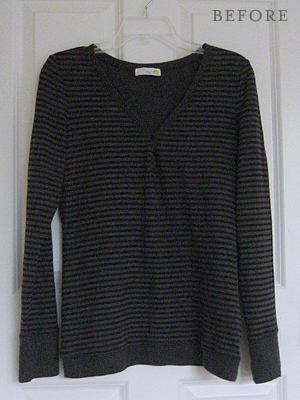
A few days ago I went to straighten up downstairs for house guests and I found this shirt in the closet. I forgot that my mom had left it for me after her last visit. She wasn’t happy with how the v-neck looked. When I tried it on, I thought the same thing. It didn’t look bad; it just didn’t look great. It was a nice size on me, though. I liked the colors and it’s really soft.

t-shirt to cardigan

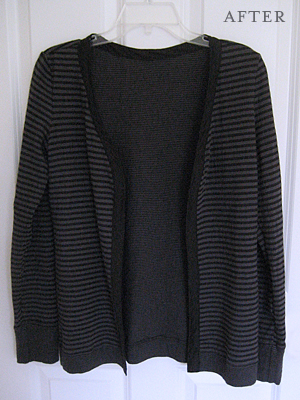
I decided to turn it into a cardigan. I’m always chilly in the summer when I’m inside in the air conditioning. I think this will be perfect to throw over a tank top or short sleeve shirt.

t-shirt to cardigan

How I Did It
• Made the bias tape out of some black cotton from my stash.
• Removed the buttons.
• Cut a straight line from the v-neck to the bottom.
• Sandwiched the raw edge in the bias tape and pinned.
• Sewed all the way around 1/8 inch from the inside edge of the tape.
• Sewed all the way around 1/8 inch from the outside edge of the tape.

I really like how it turned out. I did an ok job sandwiching the edges in the bias tape. I may fiddle with how I do that in the future. Overall, I think my first wardrobe refashion was a success!

refashion: If you have a shirt that you really like, but it doesn’t fit well, turn it into a cardigan. Cotton for bias tape from my stash, shirt from my mom.