Making another nature bag. Forgot how much fun it is to take things apart.
Also, I’m excited to be sewing again. It’s been way too long.
Making another nature bag. Forgot how much fun it is to take things apart.
Also, I’m excited to be sewing again. It’s been way too long.
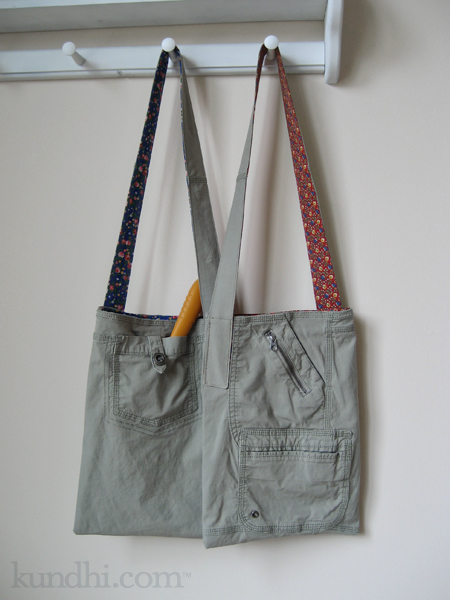
You knew I was going to turn those capri pants into tote bags, didn’t you? Not just any bags, however, but bags with a purpose: keeping nature out of my pockets and my purse.
I’m sure many of you can relate to this: Mama, can you hold this rock? Here’s a present for you, Mama. It’s a leaf! I’m just going to put this stick in your purse for later. Did you put my feather in your pocket? Later, as you are digging around for latte money, the barista gives you a funny look as random bits of nature fall on to the counter.
I made two of these: one for my daughter and one for her friend. They’re the same except for the lining. Now when we go on walks together, the girls can carry their own bits of nature. There are all kinds of pockets perfect for acorns, rocks, twigs and leaves. The buttoned back pocket is perfect for storing a shovel. You never know when you’ll need to dig for treasure!
I love how these turned out and will be making more. How perfect would they be for a day of garage sailing or thrifting with different compartments for cash, phone, water and a snack! They would also make a cool craft project bag with pockets for all of your notions.
project details: Pants from my closet, lining fabric from my thrifted stash.
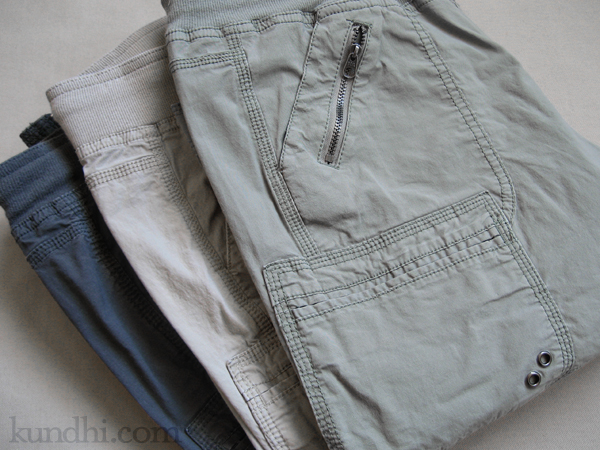
In my creative space today, I’m cooking up some ideas for some old capri pants. Can’t say much more because the end result may be a surprise.
stash: Pants saved from a clean sweep of my closet.
More creative spaces over at Kirsty’s.
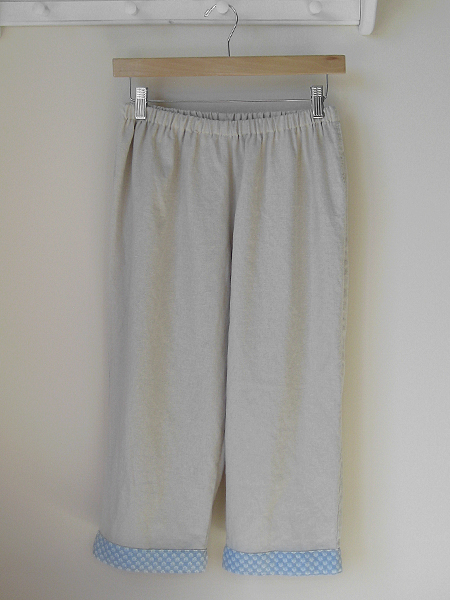
The summer of skirts has been a success. I’ve been wearing my red, white, linen and denim skirts regularly all season. But ever since I found that perfect pattern for lounge pants, I’ve been thinking about capris. How easy would it be to refashion a pair of existing pants?
I found a couple pairs at the last 99 cent sale (hey, I told you I had good luck that day!) and decided give it a try. Here’s how I did it:
The whole process was fast and easy. Most of my shirts come down past the waistband, so they actually look pretty good. I’m sorry I forgot to take a before picture. I had a few free hours for this project and just dove in!
refashion: This pants thing is really increasing my options for clothes. After a few more tries, I might tackle a fitted waist!
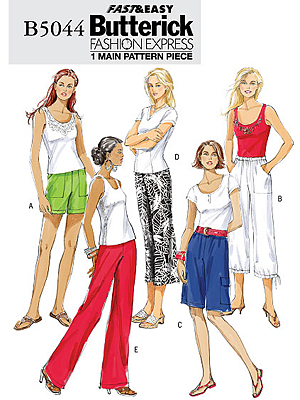
In addition to the perfect t-shirt, I’m also trying to find the perfect lounge pants. I know it’s hard with elastic waistbands — the fabric always seems to bunch up in the front when you sit down — but I would like to minimize the amount of bunching!
Remember these pajamas? They are from Simplicity 3935. I’m pretty sure I made them a size too big, but even still, they’re kind of baggy around the tummy. I’m hoping to give them a little makeover soon.
Next are the lounge pants from Sewing Green. I love these pants, especially the little curve in the leg and the small boot cut flare. I was so excited to make a muslin and so disappointed when they didn’t work out. Great pattern, just not the right pattern for me.
Just as I was about to give up, I was looking around online and found an easy straight leg pattern — a style that works well for me. Better yet, Hancock was having a 99 cent pattern sale over the weekend. I drove up Saturday and purchased it on the spot. Success! Finally!
Now I’m planning an assembly line of production. I’ve been squirreling away thrifted sheets for jammies. I’ve also got some thrifted pants that I’ve been dying to refashion. They’re the real reason I wanted to find a non-bunchy pattern. I’d like to actually wear them outside of the house!
sales: Have you ever paid full price for a pattern? Whenever I find something I like, I stalk the fabric store flyers until 99 cent pattern day. Such a bargain!
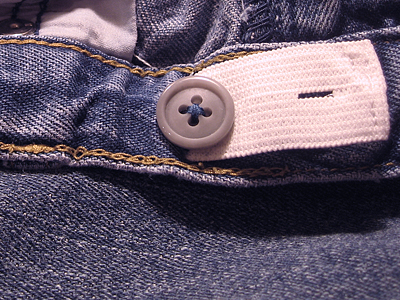
My daughter is growing like a weed, except she’s only growing up, not out. She’s got 4-5T legs and a 3T waist. That means that most of the pants we find that are long enough won’t stay up.
I try to only buy pants with an adjustable waist, but sometimes I come across a great deal or something super cute that I just can’t pass up. I decided to try adding elastic myself, and you know what? It’s super easy!
You can even do this without a sewing machine as long as you don’t mind a little hand stitching.
Materials
button hole elastic
small, sharp pair of scissors
two buttons that fit through your elastic
Fray Check
needle and thread
Step 1
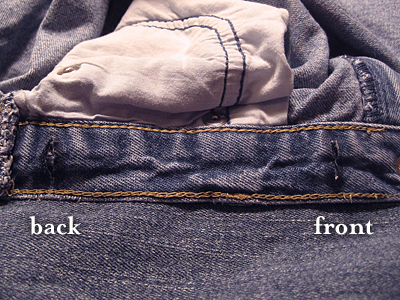
Starting on the right inside of the waist, snip two holes to create a casing for the elastic. Make sure your scissors don’t go through to the other side! Apply Fray Check to the raw edges.
Step 2
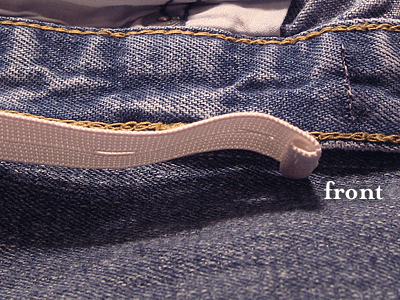
Cut a piece of elastic that’s about one inch longer than between your holes. Fold one edge over and sew. This is the edge you’ll be using to adjust the pants.
Step 3
Sew a button in front of the casing you’ve created.
Step 4
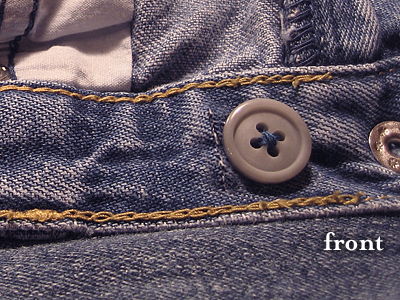
Thread the elastic through the waist casing with the finished edge going through the front. You can tuck the unfinished edge into the back.
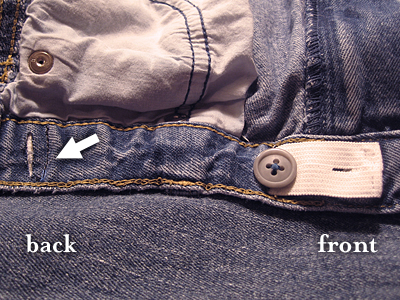
Step 5
Sew a line of stitches to secure the elastic. See arrow.
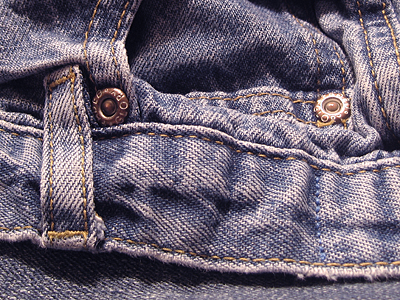
Here’s what you’ll see on the outside of the pants.
Repeat on left inside of the waist.
refashion: The only thing worse than sizing for women’s pants is sizing for kids’ clothes. At least with this little trick, I can just make sure pants look long enough when I buy them. It’s nice knowing how easy it is to adjust the waist. Maybe I should try this on my jeans!

In my creative space today is an unfinished tutorial. I was hoping to have it posted this week.
If you follow me on Facebook, you know that was feeling a bit like a mending rock star last week when I figured out how easy it is to add adjustable elastic to kids’ pants.
I took all of the pics—just need to get them in order and write it up. Stay tuned!
In the meantime, head on over to Kirsty’s blog for more creative spaces.
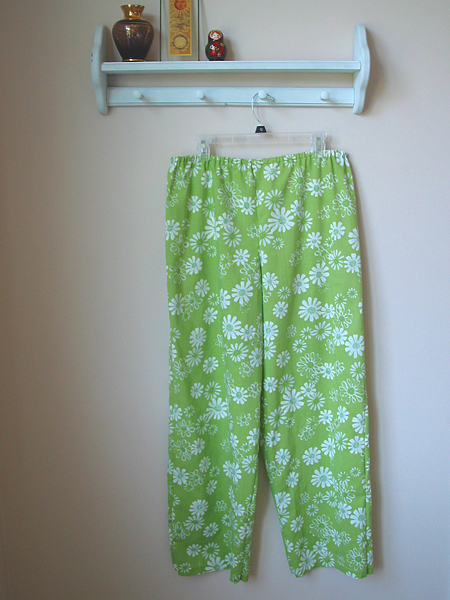
It seems like everyone in blogland is making comfy pants out of vintage sheets. I don’t think mine are that old, but I still love them. They turned out a little big, but after my too-small skirts, I wanted to make sure they were wearable! I’ve adjusted the pattern a little for next time and can’t wait to make another pair. I’m also thinking of making a matching pair for my daughter with the leftovers.
refashion: Thrifted sheets are a great alternative to buying new fabric. You have a lot to work with and you don’t feel bad if you mess up! This sheet was one of my $2 deals and the pattern is Simplicity 3935 from a 99 cent sale.
Looking for the Sew, Mama, Sew giveaway? Click here!
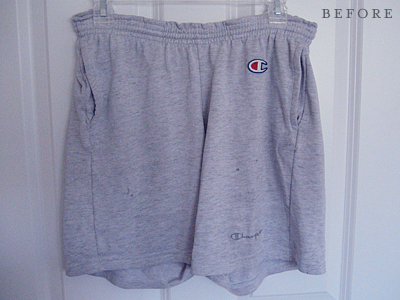
Does every guy have a pair of these? These are T’s comfy shorts. He has literally worn them threadbare. My attempts to replace them didn’t really work. They either didn’t fit right or didn’t have pockets. I think he bought these when we were dating. It is past time for letting them go.
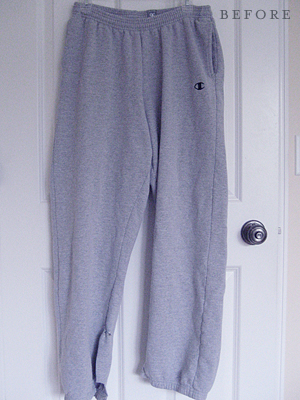
I found this pair of really big sweatpants at a local church sale, and now that I’m refashioning, I figured I can make new comfy shorts! I tried to just trace around them, but the front and back panels were two very different sizes, so I had to deconstruct them. It was a very delicate operation.
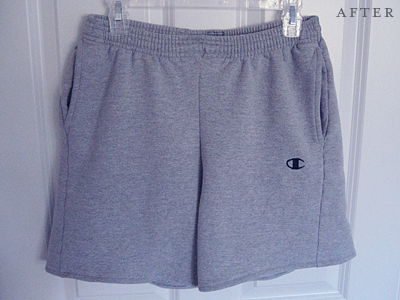
I am really impressed with the results, if I do say so myself. They turned out much more professional looking that I would have thought. (Pat myself on the back!) They also fit well and T approves!
Sewing knits has always frustrated me, so to prepare for this project, I got Wendy Mullin’s Sew U Home Stretch from the library. I used an overlock foot for the inside seams and a walking foot for the hem. Both worked really well.
I think with the small amount of sewing with knits that I do, I really don’t need a serger. It’s not like I’m going to be making t-shirts and comfy shorts for the whole family. I am planning to make some sweats for Bella with the leftover pants legs, but will wait until closer to Fall to measure her.
I finished the refashion of those denim pants that made me look like I was waiting for a flood. It was much easier than I thought. I have a pair of khakis that are the same style. I think I’m going to to take some pics next time and write up a tutorial.
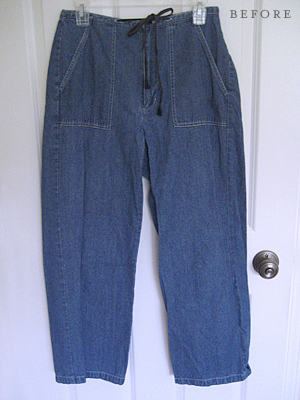
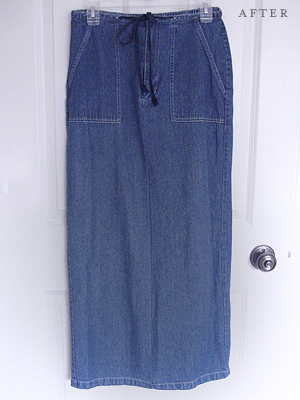
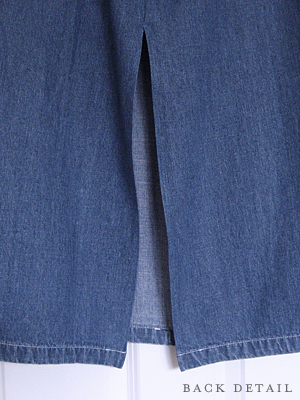
refashion: sewing a cute skirt is a great way to transform out-dated pants so you can continue to wear and enjoy them.