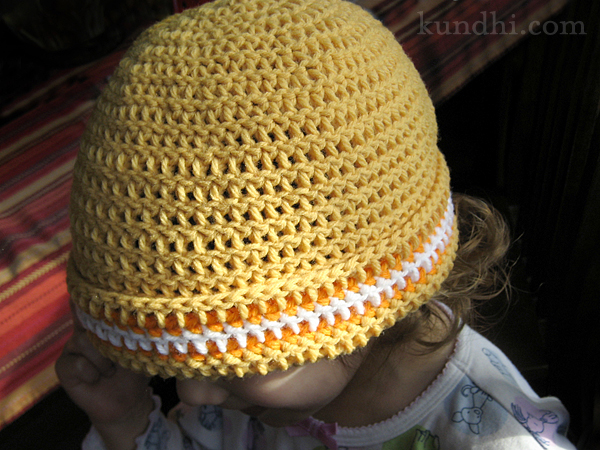
crochet hat no.2
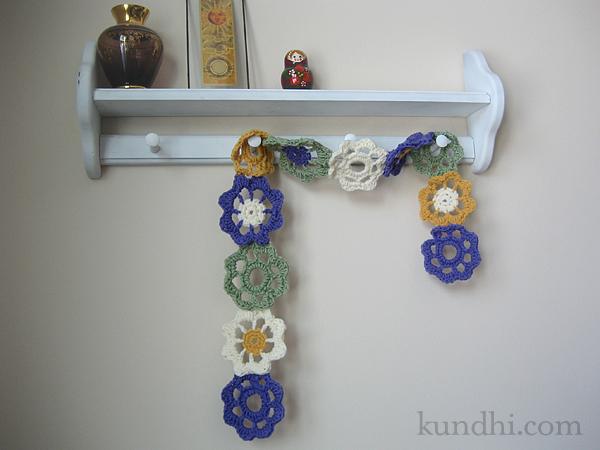
Have I mentioned that I’m addicted to crochet flowers? I made this as a gift for a friend’s daughter and it was so much fun. What a perfect pattern for little girls. My daughter loves it! I think I’ll be making a lot of these this year.
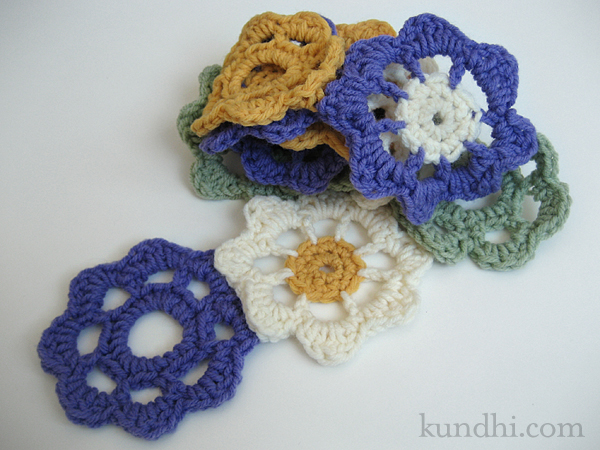
I love these colors together, but I think it’s time to add some new colors to my stash of acrylic yarns.
project notes: Pattern is the Garden Scarf from The Happy Hooker. This book is a really great resource for crocheters, especially beginners. Thrifted yarn from my stash.
While I was trying to wrap up my holiday knitting, I thought it would be cool to teach my daughter how to crochet. We tried finger knitting in the past with no success, but she loves my crochet hooks. I figured if I could get her busy making chains or something, I would have better luck getting my projects finished.
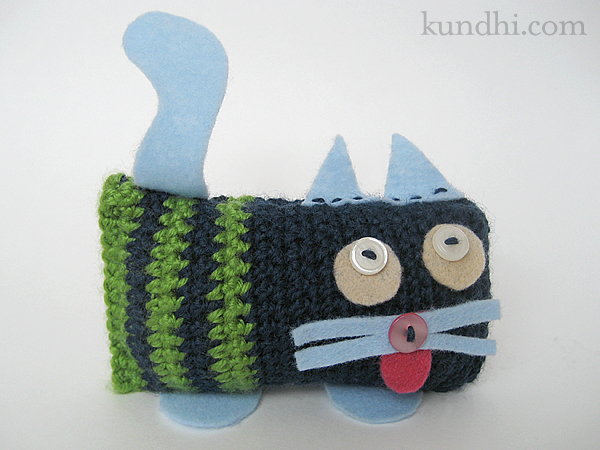
I checked out Kids Learn to Crochet from the library. Have you seen this book? The instructions are labeled with big numbers in circles. My daughter loves numbers almost as much as she loves letters. She sat and counted off the steps for each pattern in the book. Then she asked me to make her a blue Stripey Stu.
What can you do? I made her a Stu for her stocking and took the book back to the library. We’ll try again in a few months.
stash: Thrifted tapestry wool, felt and vintage buttons. Oh, and if you get technical, this is really Big Bert. My daughter just likes the name Stu better.
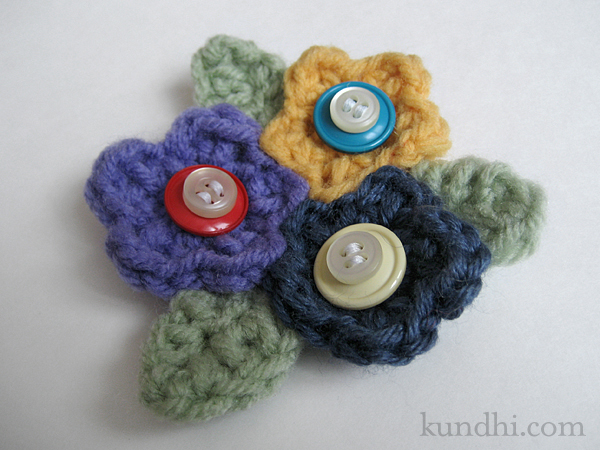
Yep, I’m still crafting over here. Now that the holiday pressure is off, I’m doing some fun small projects. Last Spring I became a little obsessed with crochet flowers and I’m at it again. They are so quick to whip up and are a great way to use up odd bits of yarn. I’m thinking these would be nice to send to someone instead of sending actual flowers. They’d last longer and can be pinned to almost anything. They definitely bring good cheer!
stash: Thrifted yarn from my amigurumi stash. Brooch pattern from Attic24.
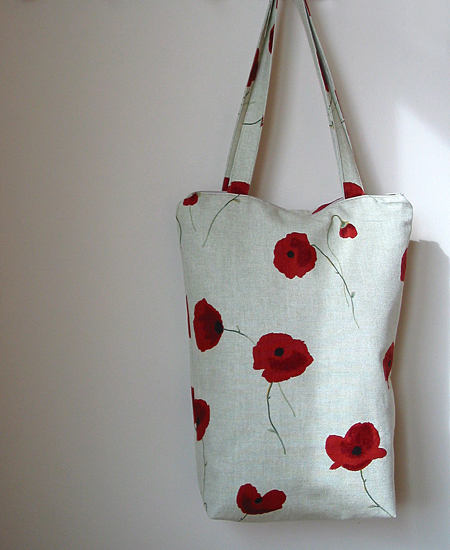
During the past week, this bag has carried my laptop through the airport, been my purse to a wedding, and toted stuff to the beach. That’s a lot of jobs for one bag. I’m happy to say it performed all of its required duties wonderfully. And it looked pretty darn cute, too. Here’s how I planned the design:
Size
Most importantly, this bag needed to be large enough to fit my laptop, but small enough to meet airline carry-on luggage guidelines. I checked the FAA and NWA website and both set my limit at 45 linear inches. Mine turned out to be 13.5 x 16.5 x 4 inches, or 34 linear inches. Part of me wished I had made it a little bigger, but there’s less room for your bag under an aisle seat, so in the end, this size worked great.
Inside
I wanted a separate sections for my laptop and my other things. I created two pockets and added a tie to the laptop side. When I used this as a purse, the laptop side was filled with fun things for distracting my daughter, like coloring books, story books, stickers, etc. At the beach, it held my book and knitting project.
Outside
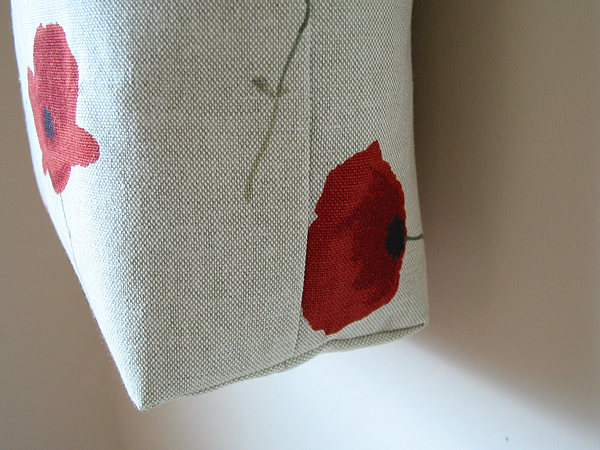
A zipper closure was essential. I didn’t want anything to fall out during airport screening and I didn’t want any sand getting inside. Durability was important, also. The outside is an upholstery fabric and the inside is a cotton canvas.
How-to
This bag is basically an oversized zipper pouch with handles and two inside large pockets. It seems silly to write up a tutorial when there are so many great ones already out there. For this project, I referenced the following:
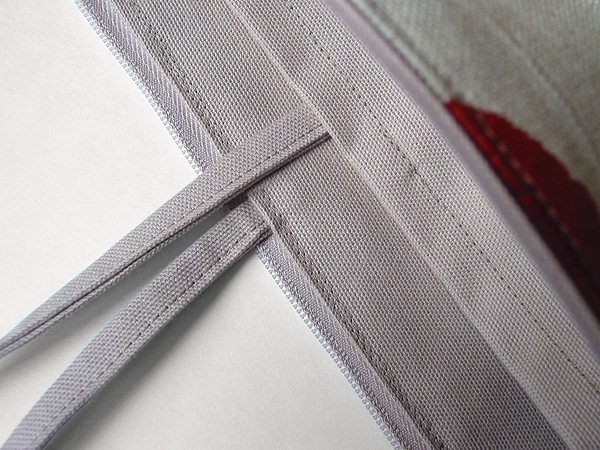
Adding the handles was easy. I just sandwiched them between the outside fabric and zipper when I was sewing it all together. I reinforced the handles with a few rows of extra stitching.
stash: Fabric came from this remnant sale. Zipper was thrifted.

Here’s the third shirt from last week’s garage sale purchases. These big, flouncy shirts came in style right after I had my daughter and I refused to buy any. I had just gotten out of maternity clothes. I didn’t want to buy shirts that made me look pregnant!
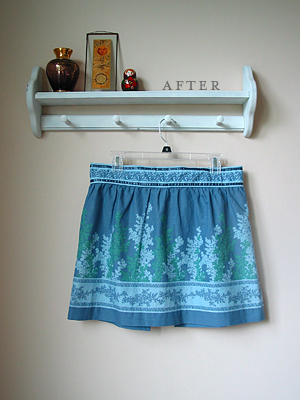
I really liked the band around the middle and thought it would make a nice apron. I love how this already had the ribbon and trim details. All I had to do was cut it up and add the sashes!
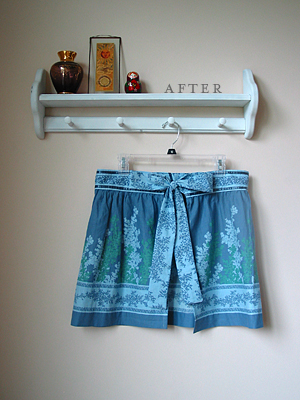
I’m not really an apron girl, but this just might make me change my mind. I just need to get over worrying about getting it dirty. I know, it’s an apron, but it’s so darn cute!
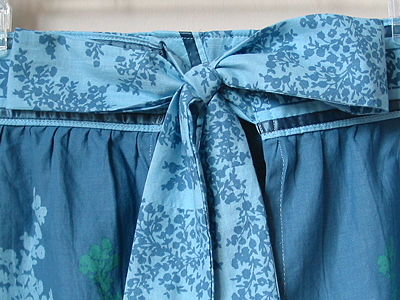
refashion: Shirt from garage sale cost $1. Sash made from the sleeves. Cute ribbon trim conveniently part of the original shirt. Love when that happens!
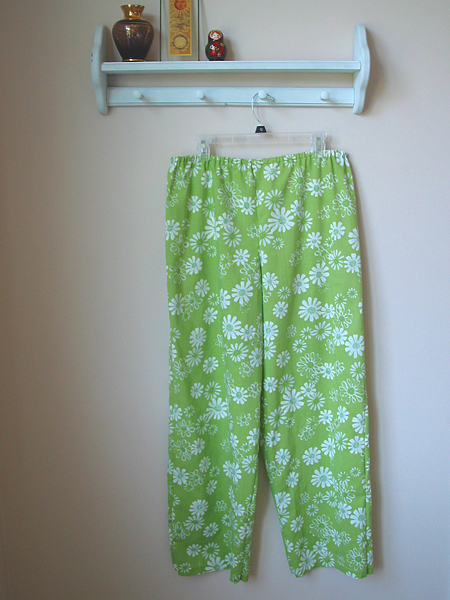
It seems like everyone in blogland is making comfy pants out of vintage sheets. I don’t think mine are that old, but I still love them. They turned out a little big, but after my too-small skirts, I wanted to make sure they were wearable! I’ve adjusted the pattern a little for next time and can’t wait to make another pair. I’m also thinking of making a matching pair for my daughter with the leftovers.
refashion: Thrifted sheets are a great alternative to buying new fabric. You have a lot to work with and you don’t feel bad if you mess up! This sheet was one of my $2 deals and the pattern is Simplicity 3935 from a 99 cent sale.