wardrobe refasion: adding long sleeves to a t-shirt

long sleeves on t shirt

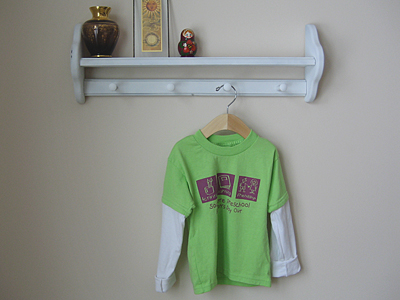
I was putting away laundry in my daughter’s dresser and found her preschool t-shirt. I can’t remember the last time it was warm enough to wear short sleeves. I don’t think it’s even been worn once. I decided to add some long sleeves so she can wear it before she outgrows it.

(I know what you are thinking. Why not just layer it over a long sleeve shirt and save yourself the trouble? Well, not only does my daughter dislike wearing sweaters, she doesn’t like to layer shirts, either.)

I used a size 4-5 T sleeve to make the pattern and figured I’ll just roll them up for now. Maybe next fall, I can use them on a different shirt. Look at that beautifully serged seam. Don’t you just love it?
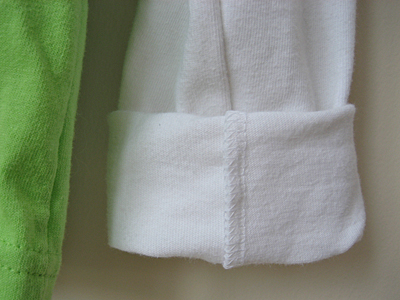
long sleeves on t shirt

recycle: I used the body of one of my old t-shirts to make the sleeves. I was going to post a tutorial, but this seems easy enough. What do you think?
thrifty finds: advent calendar

I’ve also been kicking it into high gear for the holidays. Unfortunately, that means it’s hard to show you work-in-progress pictures. I’ve knitted quite a few gifts over the past year and spent yesterday weaving in ends, soaking them in wool wash and blocking.

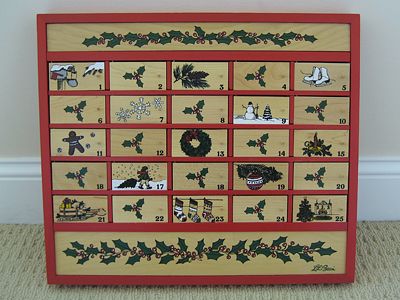
I’m also trying to play catch-up for Advent. Two summers ago I found this wooden L.L. Bean Advent calendar at Goodwill. I couldn’t help noticing how cute it was—especially for $4.99. Then the Goodwill lady told me everything in housewares was 50% off, so I bought it.

wooden advent calendar ll bean

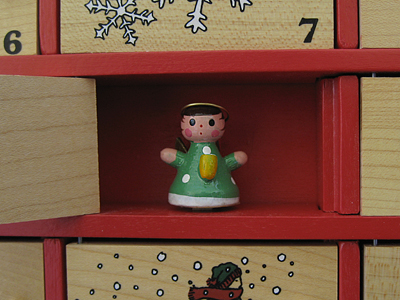
It’s pretty much in mint condition except for a bit of double-sticky foam tape in a few boxes that needs to be removed. Here’s what it looks like when you open the little door.

wooden advent calendar l.l. bean

It came with a little bag of holiday trinkets. Most of them are ornaments with the strings removed. I guess they stuck them in the boxes with the sticky tape.

wooden advent calendar l.l. bean

I’m going to re-glue the thread loops and turn them back into ornaments. My daughter has a little tree in the kitchen and each day we’ll take an ornament out to decorate her tree. We even have a Joseph, Mary and little baby Jesus for December 25th!

wooden advent calendar l.l. bean

I know I am late getting started, so I’d really like to get it finished this weekend. It will be my second project using hot glue. Wish me luck!

thrifting: Sometimes I can’t believe the little gems I find at the thrift store. I think I even like it better than the one they sell now.

how to add adjustable elastic to kids’ pants in 5 easy steps

adjustable elastic kids pants

My daughter is growing like a weed, except she’s only growing up, not out. She’s got 4-5T legs and a 3T waist. That means that most of the pants we find that are long enough won’t stay up.

I try to only buy pants with an adjustable waist, but sometimes I come across a great deal or something super cute that I just can’t pass up. I decided to try adding elastic myself, and you know what? It’s super easy!

You can even do this without a sewing machine as long as you don’t mind a little hand stitching.

Materials
button hole elastic
small, sharp pair of scissors
two buttons that fit through your elastic
Fray Check
needle and thread

Step 1
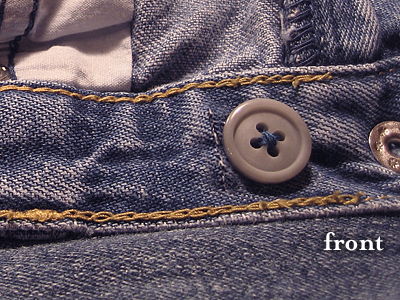
Starting on the right inside of the waist, snip two holes to create a casing for the elastic. Make sure your scissors don’t go through to the other side! Apply Fray Check to the raw edges.

adjustable elastic kids pants

Step 2
Cut a piece of elastic that’s about one inch longer than between your holes. Fold one edge over and sew. This is the edge you’ll be using to adjust the pants.

adjustable elastic kids jeans

Step 3
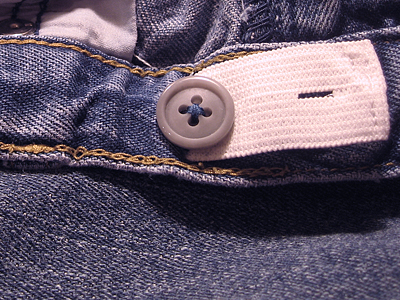
Sew a button in front of the casing you’ve created.

button hole elastic

Step 4
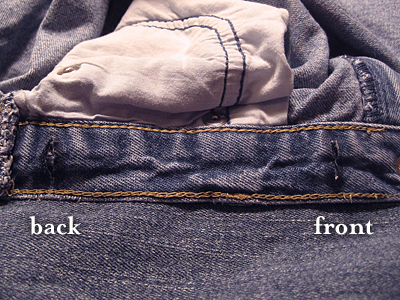
Thread the elastic through the waist casing with the finished edge going through the front. You can tuck the unfinished edge into the back.

adjustable elastic kids jeans

Step 5
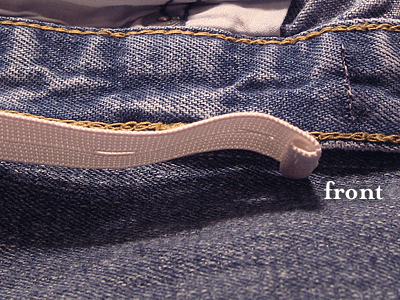
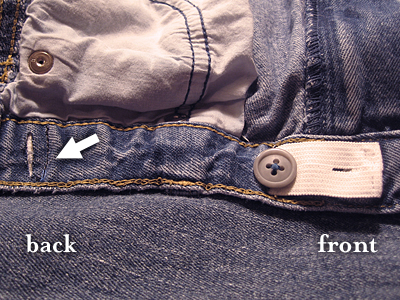
Sew a line of stitches to secure the elastic. See arrow.

adjustable elastic kids pants

Here’s what you’ll see on the outside of the pants.

Repeat on left inside of the waist.

refashion: The only thing worse than sizing for women’s pants is sizing for kids’ clothes. At least with this little trick, I can just make sure pants look long enough when I buy them. It’s nice knowing how easy it is to adjust the waist. Maybe I should try this on my jeans!

my creative space

adjustable elastic kids pants

In my creative space today is an unfinished tutorial. I was hoping to have it posted this week.

If you follow me on Facebook, you know that was feeling a bit like a mending rock star last week when I figured out how easy it is to add adjustable elastic to kids’ pants.

I took all of the pics—just need to get them in order and write it up. Stay tuned!

In the meantime, head on over to Kirsty’s blog for more creative spaces.

a little bicycle mending

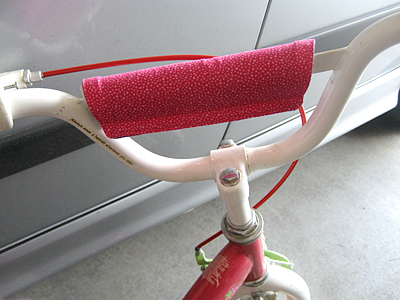
This summer we bought our daughter a cute bike from our neighbor’s garage sale. My husband is planning to take the pedals off and make it a balance bike. My job was to mend the handle bar cover, which was torn.

Using my trusty seam ripper, I picked out the hem and removed the velcro. With a cloth on top and low heat, I pressed it flat and used this as my pattern.

handle bar cover

The cotton I chose was too lightweight on its own, so I backed it with some denim. Here’s how I did it:

  1. Traced around the pattern on both fabrics adding 1/4 inch seam allowance.
  2. With right sides together, I stitched around leaving a gap for turning.
  3. Clipped my corners, turned right side out, and top stitched around, closing up the gap along the way.
  4. Reattached the velcro.

I think it looks better than the original, especially since my daughter doesn’t even know about Strawberry Shortcake.

handle bar cover

mend: Simple sewing projects can make me so happy. I love being able to say, “I can fix that!” Cotton fat quarter from my stash, denim from thrifted jeans.