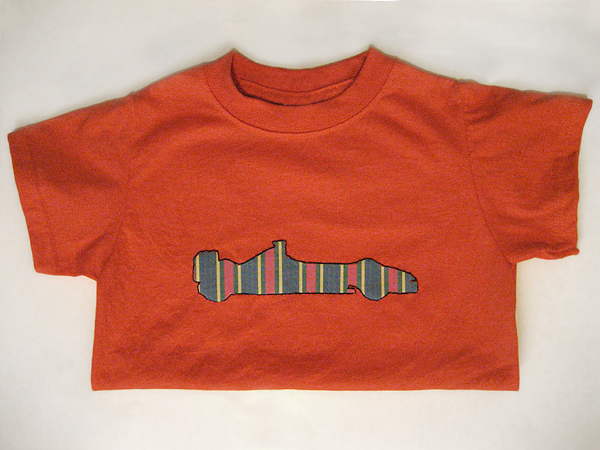
formula one applique

Usually those words don’t go together. Most Formula One gear isn’t on the crafty side, but when has that ever stopped me? This shirt was a birthday gift for our dear friends’ son Wyatt. I was a little worried about whether or not it looked like a car when I was finished. I asked my daughter if she could tell what it was and she said, “A car! A race car! A Ferrari!” Mission accomplished.

ferrari applique

refashion: The t-shirt was new* from the craft store. The fabric, Heat-n-Bond, and embroidery floss were from my stash. The fabric matched the t-shirt a little too well. Adding the black embroidery floss outline really helped!

*Purchased before my pledge.

wardrobe refashion: the pledge

I, julie k, pledge that I shall abstain from the purchase of “new” manufactured items of clothing, for the period of 2 months. I pledge that I shall refashion, renovate, recycle preloved items for myself with my own hands in fabric, yarn or other medium for the term of my contract. I pledge that I will share the love and post a photo of my refashioned, renovated, recycled, crafted or created item of clothing on the Wardrobe Refashion blog, so that others may share the joy that thy thriftiness brings!

The pledge officially starts on May 1st. I’ve got a lot of projects already in mind. I hope to go more than two months. We’ll see!

coffee sleeve of the month: oops!

Yesterday I really wanted to sew, but I had so many things to do! I tried really hard to fit it in, but didn’t get a break until after Bella went to bed. By then I was really tired, but I wanted to work on this month’s coffee sleeve for a weekend giveaway.

I planned to use a blue sleeve that was already cut at the seams. I figured I could just resew the cuff, which worked fine. Then I went to trim my threads. Oops! Accidentally cut the sweater. Then I thought I could stitch up the hole, but I must have been really tired because it just wouldn’t close. Finally, I just gave up.

Some days are just not meant for sewing, I guess. Instead, I’ll share this great Whip Up article  by Betz White on applique techniques. Appliques are great for refashioning clothes. They cover holes and stains. (Hmmm… maybe that’s just what my coffee sleeve needs!) They also can transform toddler clothes for reuse. Cover that little boy decal with a  flower; hide the princess with a puppy.

In the meantime, I’ll get to work on the coffee sleeve giveaway for next week. Just gives you something to look forward to, right?

wardrobe refashion preparations

I’m getting ready for a two month pledge of not buying any new clothes. Starting May 1, I’m pledging to refashion what I already own. I can’t remember how I found Wardrobe Refashion, but I’m so glad I did. The projects are really inspiring!

I cleaned out my closet a few weeks ago and realized I have plenty of spring and summer clothes, but I’m not in love with a lot of them. Part of the reason is because what I really like I can’t seem to find in stores. I guess that’s the problem with reading all of the cool sewing books and blogs out there. I buy things that are practical. Things that look “fine.”

I want to love my clothes, though. I want them to fit well. Store bought always misses the mark for me with that. I want to take what I have and fix them so they are more than just “fine.”

I don’t think it will be hard to keep the pledge because I don’t really like clothes shopping. Thankfully, patterns aren’t on the “don’t” list. I’ve got a list of tops that I can’t wait to make. I’m just waiting for the next 99 cent Simpllicity sale so I can get started.

Anyone want to join me?

how to refashion an ’80s sweater
in five easy steps

UPDATE: Thanks to the Craft Magazine blog for their link to my tutorial!

March is Mending Month over at Craftzine. I’ve been doing a lot of mending lately. I keep a bag next to my desk for whenever I have a little time for sewing a button or fixing a hem. Mending is good for the soul, at least mine anyway.

Last week I posted a scarf I made out of sweater scraps from resizing my brother-in-law’s ’80s style sweaters. It was super easy. I probably wouldn’t try this with an heirloom sweater, but it’s great for all those oversized sweaters you may have collecting dust in the back of your closet.

Step 1
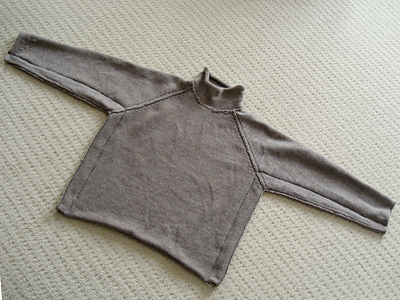
Try on the sweater inside out and pin along the sides and under the arms for a more fitted shape. (I used safety pins for this step.)

Step 2
Lay the sweater flat and adjust the pins make sure your seams are straight and equal in size. (I changed to straight pins at this point.)
sweater tutorial

Step 3
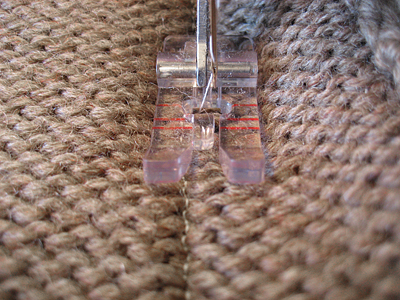
Machine stitch the new side seams with a straight stitch. Then repeat with zigzag stitch to catch the frayed ends. (A serger would be perfect for this.)
sweater tutorial

Step 4
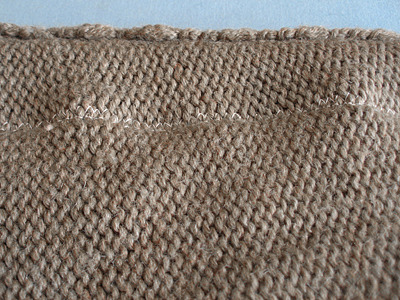
Your seams might be a little wobbly after stitching. Press with a warm steam iron. Use a press cloth if your sweater isn’t 100% wool. Trim excess.
sweater tutorial

Step 5
Turn sweater right side out and press open the seams. That’s it!
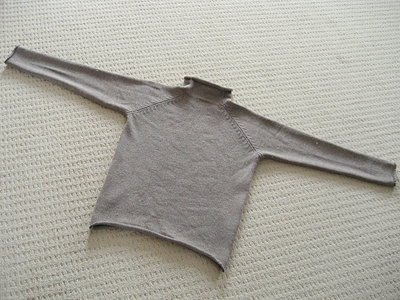
sweater tutorial

refashion: Extend the life of your clothes by resizing baggy pieces with a more modern fit.