project to do: rugs

We have a sisal rug as a door mat that we bought from Restoration Hardware more than 10 years ago. I love the look of sisal, but it’s a little expensive. I thought it would be easy to reproduce by knitting with sisal. I got a ball of it at the hardware store a few years ago. It’s still sitting in my stash. I’m just not motivated to knit a big rectangle with scratchy twine.

In the meantime, I found a natural colored rag rug at Target a few years ago on clearance for $5. They only had one. We’ve been using it by our garage door and it works fine, but I don’t really like the look of the tassels. I do like that it is softer than the sisal. It feels a little nicer in our kitchen area.

rugs

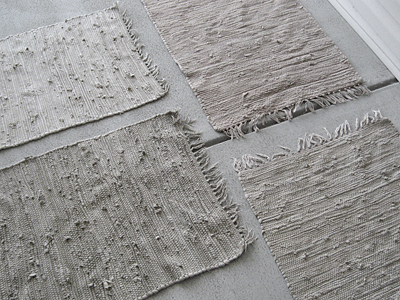
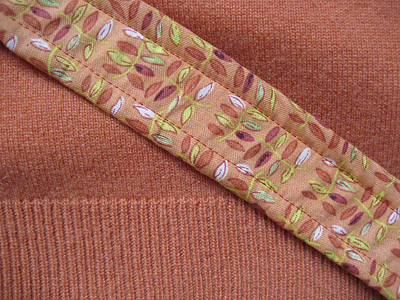
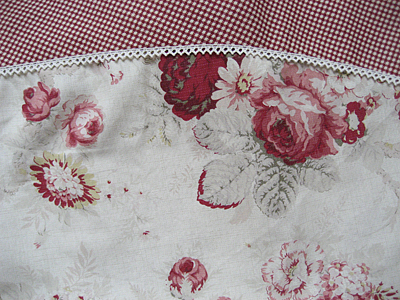
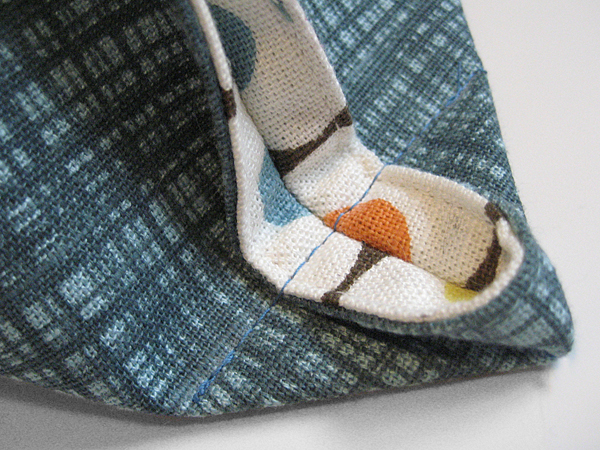
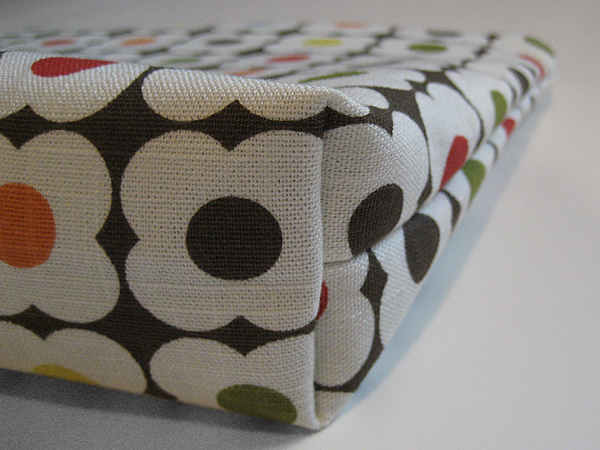
Then one day at a church sale (have I mentioned how much I love church sales?) I found three more rag rugs that matched ours. The colors are all slightly different, but they are in the same family. I got an idea. What if I cut the tassels off and added fabric trim. I get the look of my favorite rug, but softer and cheaper. (I got all three rugs for $1.)

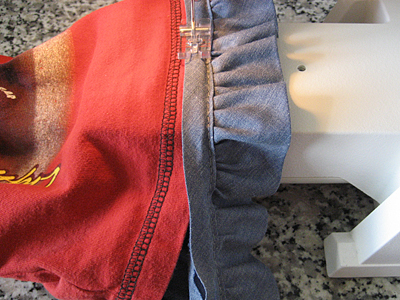
I’ve washed all of them and I’m just waiting for a little bit of free time to dive into this project. I don’t expect it will take long, but I think there will be some hand sewing involved. I don’t know about putting these under my presser foot, even if they do fit.

refashion: Refashioning isn’t just about making over your clothes. Try refashioning items for your home, too. Sometimes the best way to find the perfect accessory is to make one yourself.

wardrobe refashion: green cardigan

green cardigan refashion

These flowers and buttons make me so happy! I am just in love with this cardigan refashion.

I found this Talbot’s sweater at a church garage sale. It was in really nice condition. The button bands were even backed with grosgrain ribbon! I knew right away this would be be a summer cardigan and I had everything I needed in my stash.

green cardigan refashion

The original sweater looked kind of sad. The buttons were nice, just too heavy for the knit fabric. (I’ve saved them for another project.)

green cardigan refashion

The tabbed sleeves were a bit much. They needed some brightening and lightening up. This is definitely a case of less is more. Here’s what I did:

  1. Removed all of the buttons and threw it in the wash. Let it dry flat.
  2. Cut off the tabbed cuffs and made 3/4 length sleeves. (Note: I sewed two zigzag seams above and below my cut to keep the pieces from unraveling.)
  3. Made some trim with my bias tape maker and stitched it over the raw sleeve edges.
  4. Sewed on new buttons.

green cardigan refashion

This is a fast and easy way to update outdated sweaters. I may even take a look at the sweaters in my closet and see what I can do to brighten them up, too!

refashion: Sweater came from church garage sale. Floral fabric was from my “free” stash. Buttons from a thrift store score.

wardrobe refashion: comfy shorts

Looking for the Sew, Mama, Sew giveaway? Click here!

comfy shorts refashion

Does every guy have a pair of these? These are T’s comfy shorts. He has literally worn them threadbare. My attempts to replace them didn’t really work. They either didn’t fit right or didn’t have pockets. I think he bought these when we were dating. It is past time for letting them go.

comfy shorts refashion

I found this pair of really big sweatpants at a local church sale, and now that I’m refashioning, I figured I can make new comfy shorts! I tried to just trace around them, but the front and back panels were two very different sizes, so I had to deconstruct them. It was a very delicate operation.

comfy shorts refashion

I am really impressed with the results, if I do say so myself. They turned out much more professional looking that I would have thought. (Pat myself on the back!) They also fit well and T approves!

Sewing knits has always frustrated me, so to prepare for this project, I got Wendy Mullin’s Sew U Home Stretch from the library. I used an overlock foot for the inside seams and a walking foot for the hem. Both worked really well.

I think with the small amount of sewing with knits that I do, I really don’t need a serger. It’s not like I’m going to be making t-shirts and comfy shorts for the whole family. I am planning to make some sweats for Bella with the leftover pants legs, but will wait until closer to Fall to measure her.

wardrobe refashion: pants to skirt

I finished the refashion of those denim pants that made me look like I was waiting for a flood. It was much easier than I thought. I have a pair of khakis that are the same style. I think I’m going to to take some pics next time and write up a tutorial.

jeans

jeans

jeans

refashion: sewing a cute skirt is a great way to transform out-dated pants so you can continue to wear and enjoy them.

custom cashmere sweater bag

Remember the little peek I gave you of the custom cashmere bag? It’s finished!

drawstring sweater bag

It’s based off of Simplicity 3531. My friend gave me the pattern to let me know what she wanted. Problem with working with sweaters, though, is that the sweater dictates the pattern, not the other way around. I was worried that it might not turn out exactly how she wanted.

cashmere sweater tote

I think it looks better than ones pictured on the envelope. I was most concerned about the drawstring, but the cashmere ruffles up nicely.

sweater purse

I like it so much, I’m thinking about making a few more.

refashion: custom bag for a friend, sweater was thrifted, she provided the coordinating fabric

wardrobe refashion: t-shirt to cardigan

A few days ago I went to straighten up downstairs for house guests and I found this shirt in the closet. I forgot that my mom had left it for me after her last visit. She wasn’t happy with how the v-neck looked. When I tried it on, I thought the same thing. It didn’t look bad; it just didn’t look great. It was a nice size on me, though. I liked the colors and it’s really soft.

t-shirt to cardigan

I decided to turn it into a cardigan. I’m always chilly in the summer when I’m inside in the air conditioning. I think this will be perfect to throw over a tank top or short sleeve shirt.

t-shirt to cardigan

How I Did It
• Made the bias tape out of some black cotton from my stash.
• Removed the buttons.
• Cut a straight line from the v-neck to the bottom.
• Sandwiched the raw edge in the bias tape and pinned.
• Sewed all the way around 1/8 inch from the inside edge of the tape.
• Sewed all the way around 1/8 inch from the outside edge of the tape.

I really like how it turned out. I did an ok job sandwiching the edges in the bias tape. I may fiddle with how I do that in the future. Overall, I think my first wardrobe refashion was a success!

refashion: If you have a shirt that you really like, but it doesn’t fit well, turn it into a cardigan. Cotton for bias tape from my stash, shirt from my mom.

too many projects started…

…not enough finished.

I’ve been really busy lately, but don’t have many pictures to post. How does that happen? This week I worked on a custom sweater bag with coordinating box bag. It’s almost ready for pics. Here’s a peek.

cathy bag

Doesn’t it look soft? It’s cashmere and sewing up beautifully.

I also finished up a gift for a friend who is moving at the end of the month. She brought some yarn to knitting group to destash because she didn’t want to move it all back to NYC with her. The yarn was so pretty and soft I decided to knit a cowl for her. You can check out pics on her blog. I’ve been really bad with pics this week. I just realized I didn’t take one of another box bag I finished and mailed off. Oh, well.

I’ve also started some refashioning projects. The denim pants are halfway to becoming a skirt. The striped shirt is going to become a cardigan. The floral shirt and jacket were from my neighbor’s garage sale.* I wasn’t planning to buy anything at the neighborhood sales this weekend, but felt I should at least stop by and say hello. I’m not sure how these made it home with me. Oops! The jacket has a removable quilted lining! Both are a little too big, but should be easy to resize.

refashion

A tablecloth sort of kind of came home with me as well. I’m thinking it will make some really beautiful tote bags.

table cloth for tote bags

All right. Better stop writing and start sewing so I have something to post tomorrow!

*If you are looking for kids clothes and toys, come to our neighborhood this weekend. The garage sales are kid central around here!

recycle and refashion: sweater was thrifted, client provided coordinating fabric, box bags made from stash fabric, clothes are from my closet, my mom, and garage sales, tablecloth from garage sale

how to sew a placemat zipper pouch with only four seams

zipper pouch tutorial

I found this cute Orla Kiely placemat at Target a few weeks ago and wanted to make something quick and easy for my knitting. Because the edges are already finished, I only needed to sew four seams. If you want a gusseted pouch, you can sew two more seams. Either way, it’s a very fast and easy project.

zipper pouch tutorial

Materials
a placemat (mine was 14 x 17 inches)
a zipper that’s at least 14 inches
coordinating thread
heavy duty sewing needle
zipper foot

zipper pouch tutorial

Using your zipper foot, stitch each 14 inch side to the zipper, beginning and ending 1/2 inch from each side.

zipper pouch tutorial

With the zipper halfway open, turn the placemat inside out. Sew your side seams while holding the zipper out of the way. (This is why you left 1/2 inch unsewn on each side.)

zipper pouch tutorial

Turn the placemat right side out and you’re done! If your zipper was longer than 14 inches, you can trim the extra.

Optional Gussets

zipper pouch tutorial

Box your corners, but don’t trim. The triangles are small and won’t take up much room. Plus, you’ll have no raw edges that might unravel.

zipper pouch tutorial

Want to see more projects using Orla Kiely placemats? Thimbly Things made a cute purse with hers and linked to a bunch more adorable bags.

refashion: Using finished items like placemats make your projects fast and easy because your edges are already finished.

Thanks to Whip Up, Craft Gossip and One Pretty Thing for linking to my tutorial. Subscribe to my RSS for more crafty goodness!

ruffling up some boys t-shirts

When I go to Neat Repeatz, I check the girls clothing first, then head over to the boys clothing. Why? Most of the time the boys stuff is a lot cooler. A girl can only have so many pink shirts with flowers and hearts. What about dinosaurs? Cars? Trains? I never see those in the girls section. It’s always Dora, Dora, Dora. My daughter doesn’t even watch Dora. She likes Thomas the Tank Engine, Lightening McQueen and Mickey Mouse.

On my last trip, I found two shirts I knew Bella would love. They were 3T, but a little too short for my tall toddler. I was afraid they wouldn’t last until the end of the season. Inspired by Rachel’s tutorial for lengthening pants, I added a few inches to the shirts with some ruffle trim.

ruffle shirt

Both were iTalk shirts, so I removed the big patch on the front and tossed the little computer chip thingie, which didn’t work in either shirt. Then I washed them so the holes from the patch stitches would close up a bit.

ruffle shirt

I used about a yard of ruffle trim for each shirt. After a few attempts to pin the ruffle to the hem, I just put it in the machine and aligned it as I went.

ruffle trim

I’m really happy with how these turned out. Both shirts took less than an hour to sew up. Bella was a little worried when she saw them in the machine. “What are you doing with my Lightening McQueen shirt, mom?” When I showed her the finished shirt, she loved it.

refashion: Adding trim is a great way to freshen up an old t-shirt, especially one that’s too short.

my faux burberry scarf

flannel

Remember when I mentioned that some of that stash flannel was going to become a faux Burberry scarf? It was a really easy project and great for some instant sewing gratification.

  • The original piece was about 14 x 43 inches. I cut it in half and joined the 7 inch ends with a french seam.
  • I sewed the edges just as you would for a napkin or tea towel: fold all four sides 1/4 inch and press, then fold over again, press and pin.
  • Then I top-stitched the edges down. I mitered my corners, but don’t think it was necessary.

That’s it! Here are some online tutorials for a french seam (via Hoppo Bumpo) and mitered corners (via CraftStylish).

recycle: This would be a great way to save a flannel shirt from the landfill. If you have smaller scraps of flannel, just add a few more french seams.