how to: crochet jar cover in 3 easy steps

quick jar cover

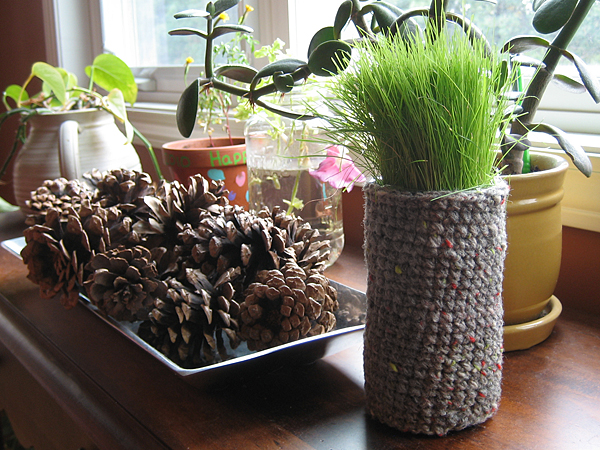
This is what’s left of my outdoor garden. We did not have very good luck this year: no tomatoes and only one cucumber. My petunias were doing great until a big storm almost blew them out of the pot. Sadly, I didn’t notice the roots were above the soil until the whole thing was turning brown.

You know what is growing? My daughter’s little grass pot. She made this in summer camp and it’s the greenest, healthiest plant of the summer. The container is just a recycled plastic jar and I figured after almost two months, it finally deserved a proper cover.

How to Crochet a Jar Cover in 3 Easy Steps

Materials
worsted weight yarn
size G hook

Gauge is not important for this project.
Adjust your hook size for different yarn weight.

Step 1
Chain enough stitches so that the chain fits snugly around the jar. Join to make a circle.

Step 2
Single crochet around and around until you’ve got the height you want.

Step 3
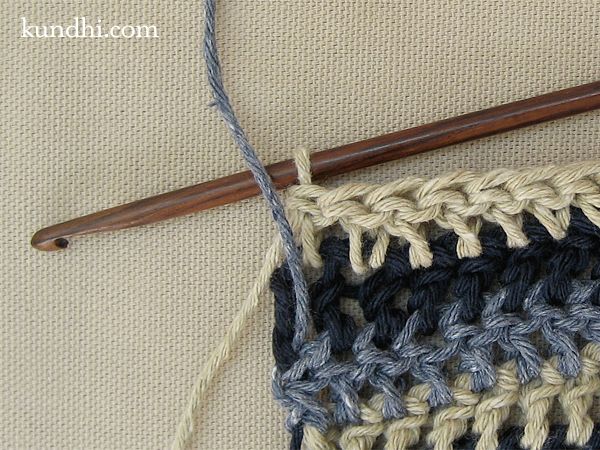
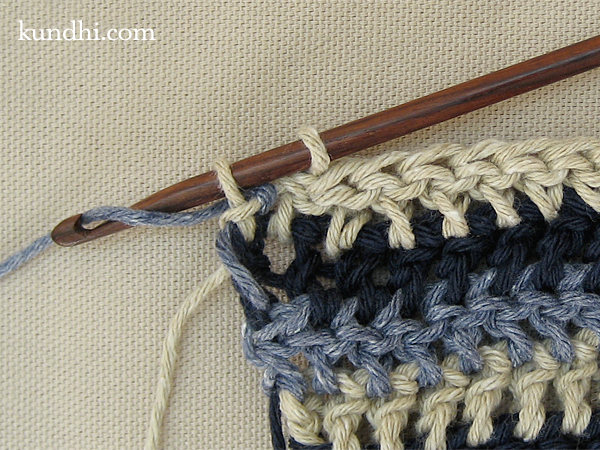
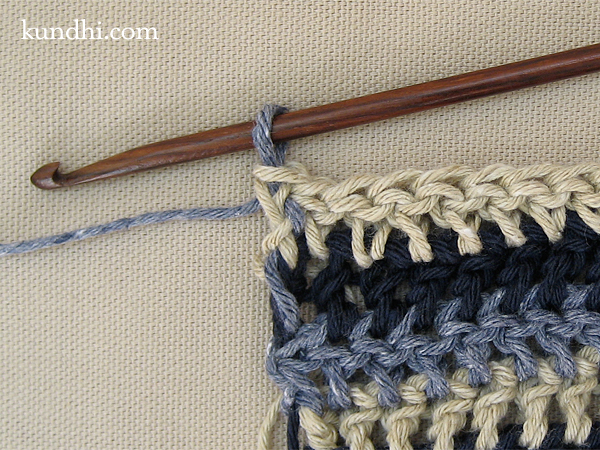
You’re going to want an even top edge, so we’re going to pick a spot to start the top row. (You can use the tail as a guide and follow the line of stitches up if you want to be precise.) Slip stitch, chain one and single crochet around until you reach the chain one. Slip stitch into the chain one and finish off.

When you weave in your ends, use the tails to even up the bottom and top edges. You can see in the picture that my bottom edge isn’t perfect. Oh, well.

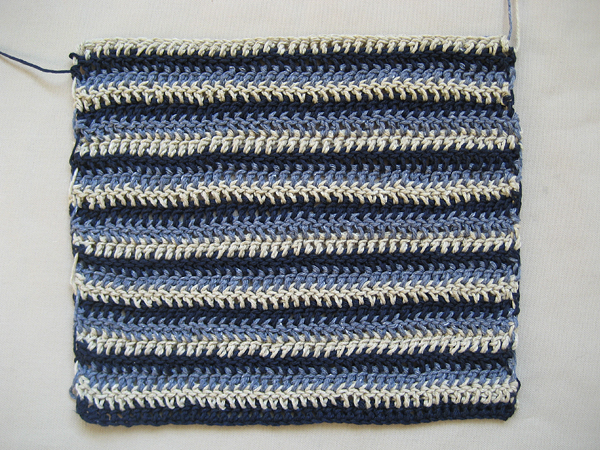
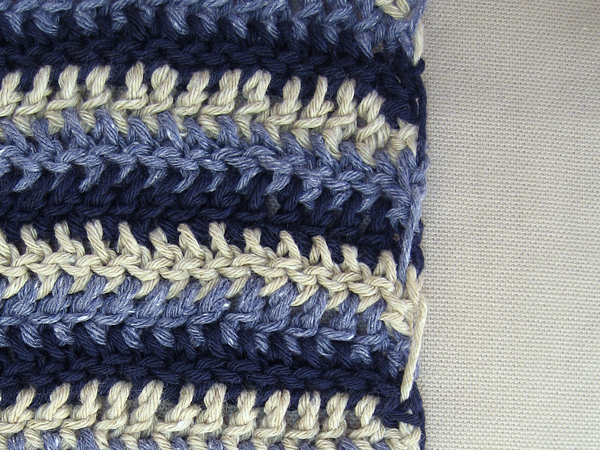
stash: This is a great project for using up leftover yarn. Because the rows spiral up, it’s not great for stripes. You’ll get a “jog” when you change colors.

how to: crochet or knit single row stripes

I first heard about this at knitting retreat. It’s a really simple idea and I can’t believe it has never occurred to me on my own. I love skinny stripes, but breaking yarn at each row leaves too many ends to weave. I always figured that I’d have to do two rows of each color in order to carry the yarn. But, if you do three colors, there’s yarn at the end of every row just waiting to be carried up. So simple! So cool!

how to: crochet or knit single row stripes

This works for both knitting and crochet. I’ll show you what I mean on my dishcloth in progress, which happens to be crochet. (Knitters, ignore the chain row and cast on with Color A. Row 1 begins with Color B, etc.)

how to: crochet or knit single row stripes

Chain your number of stitches in Color A (navy).
R1: DC across in Color A (navy).
R2: Join in Color B (tan) and DC across.
R3: Join in Color C (light blue) and DC across.
R4: Carry up Color A and DC across.
R5: Carry up Color B and DC across.
R6: Carry up Color C and DC across.
repeat rows 4-6 until finished.

When you carry up the yarn, your edges will look like this.

how to: crochet or knit single row stripes

I know some crocheters like to incorporate the transition from one yarn to the other in their chain stitches, but I prefer to start my rows with the faux double crochet, so here’s how I catch the yarn on the way up. I assume you know how to do a double crochet, so I’m not including pics of all the stitch steps, just the ones that are different.

how to: crochet or knit single row stripes

Work across until you have one stitch left. Bring the next yarn up and over your working yarn.

how to: crochet or knit single row stripes

Continue on as usual with the working yarn. See how the carried yarn is getting tucked neatly in the work?

how to: crochet or knit single row stripes

When you have two loops left on your hook, drop the working yarn and pick up the new yarn. Yarn over and pull through the last too loops.

how to: crochet or knit single row stripes

Look at that! Now you are ready to turn your work and start the next row with the new yarn!

stash: This is an awesome stash busting idea. Imagine how many more odds and ends you can use up with this method!

my farmers’ market tote is featuered in greencraft magazine!

Sorry about missing Thrifty Thursday yesterday. I was planning to take photos and write my post in the evening, and right before dinner I found a copy of GreenCraft in my mailbox. I knew something was up because I don’t subscribe to the magazine, but I did submit one of my patterns and a sample to the publication many months ago. I was so excited, I completely forgot about my thrifty pictures and post until after dark. Whoops!

green craft magazine farmers market tote

I am so thrilled to see my Farmers’ Market tote in GreenCraft magazine! I designed this bag using men’s dress shirts and a terry cloth towel for interfacing. It’s reversible because our Farmers’ Market runs from May to October: one side has Spring colors and the other has Fall colors. If you get a chance, check out the design and instructions in the Autumn 2010 issue!

how to: messenger bag refashion

messenger bag refashion

It’s taken me awhile to write about this project because it’s not just a set of simple instructions. It’s more of a guide to what is possible. Before you rip one seam or sew one stitch, I recommend you sit down in a quiet place with pen and paper to plan. I know this is hard for some — it’s hard for me! I don’t even really like following patterns. When you are working with an existing bag, once you cut you can’t go back. You can’t buy more fabric and start over.

So that’s how I started this project — with paper and pen. Below are before and after pics with my thoughts and ideas. I hope you give this a try. There are so many “almost perfect” bags out there. Visit your local thrift store or garage sale and give them an “absolutely perfect” life outside of the landfill.

Materials
seam ripper
good scissors
heavy duty needle
matching thread

messenger bag refashion

Here is the original bag. Carrie didn’t want the fold over flap. She asked me to replace it with a zipper.

messenger bag refashion

Because she didn’t want the flap, she didn’t need the big plastic clips either. I carefully removed them with a seam ripper. The ones on the flap were easy.

messenger bag refashion

The ones on the bottom were sewn into the seams of the bag so I had to carefully pick them out and resew the bottom seam.

messenger bag refashion

She was happy with the pockets on the outside, but she wanted more pockets on the inside. Most important was having a big pocket to keep her knitting projects safe.

messenger bag refashion

When I opened up the seam to take out the flap I got a nice surprise: another pocket! The only issue was the unfinished edges. I decided I could cover them with the trim from the flap.

messenger bag refashion

Here is the new pocket finished with the trim from the flap. It was too difficult to sew this with a straight stitch and get it even, so I zig zagged it instead. I added velcro and voilà: an easy access pocket for knitting projects!

messenger bag refashion

I decided to use the gray fabric from the messenger flap for the inside pockets. There wasn’t a lining in this bag, so I couldn’t sew the pockets directly to the fabric — the outside pockets were in the way. I decided to make the pockets independent of the bag and then just anchor them at different places where the stitches wouldn’t show on the outside.

messenger bag refashion

I saved the zipper for last. I just followed the stitch line on the existing trim when I sewed it in. Instead of anchoring the zipper end to the inside, I finished it off with a fabric tag. It felt a little more sporty that way and was also easier on my sewing machine!

messenger bag refashion

If you’ve been reading my blog for awhile, you know I hate to let anything go to waste. It took a little bit folding and unfolding, but I figured out to make a zipper pouch out of the remaining piece of the flap. Cool!

messenger bag refashion

Here’s the after picture again. I hope this “how to guide” is helpful. If you have any questions, let me know. Carrie loves her bag, by the way. Yay!

mother’s day idea: how to make a photo frame applique in 3 easy steps

photo frame applique tutorial

A few years ago, my mother gave me a little photo frame change purse. I had been using it for knitting bits and bobs, but it’s kind of small. I decided to make a bigger one for myself.

This applique will add a great touch to any Mother’s Day gift. I love mine!

Materials
photo: 2 1/2 x 3 1/2 inches
plastic: 3 x 4 inches
bias tape (or make your own)
heavy duty sewing needle

photo frame applique tutorial

I used the packaging from a set of sheets for my plastic. The same kind of packaging is used for blankets, comforters, tablecloths and shower curtains. (Don’t forget to save the zipper, too!)

photo frame applique tutorial

Step 1
Stitch the bias trim to your plastic (A). Here’s a great video on how to miter your corners.

Step 2
You’ll only be stitching three sides of the applique to your fabric because you need an opening to slip in the photo. Top stitch the fourth side so it will match the others when you are finished (B).

Step 3
Position your applique on the fabric and stitch the remaining three sides in place (C). Make sure you don’t pin it through the plastic! Pin through the fabric trim instead.

Obviously it’s easier to add this to a work in progress while your piece is still flat, but you can stitch this to already made items, too.

Try other sizes like a 5×7 on a small bag or even a 8×10 on a large tote. Simply add the width of your bias tape to your photo dimensions to get the size for your plastic. Make sure you adjust the length of your trim and add 1-2 inches for overlap.

photo frame applique tutorial

project details: Zipper, upholstery and lining fabric all thrifted. Sheet packaging from my linen closet. I always save the ones with zippers because they make great storage for yarn and fabric.

how to make a ruffle scarf in 3 easy steps

The other day I saw a woman wearing a cotton scarf that was layered and unfinished in the most beautiful way. She looked like she just walked off a catalog shoot. I’ve never been able to pull off that “I just threw it on and it looks perfectly ruffled” look, so I decided to design one that made it easy.

ruffle scarf tutorial

Step 1
Cut a large triangle of fabric on the bias. I chose a lightweight cotton, but anything with a nice drape would work. (Flannel would be nice for Fall.) My piece measured 80 inches across the base and 32 inches high. Run it through the washer and dryer to fray the edges.

Step 2
Fold the ruffles. I figured a diagram would be easiest to understand. I folded mine 8 times, but you don’t need to see that many steps to get the idea.

ruffle scarf tutorial

Step 3
Stitch the ruffles in place. I didn’t back tack and pulled on the threads to create a little gather before I tied them off.

ruffle scarf tutorial

That’s it! You can wear it with the ruffles hanging down or wrap it around a few times with the ruffles facing out for that perfectly unfinished look.

ruffle scarf tutorial

elephant blanket becomes a pillow

baby gund blanket pillow

When my daughter was born, we received a sweet elephant Baby Gund blanket as a gift. It’s super soft and cuddly. It’s also pretty small.

The other day I asked her what she wanted to do with it. She definitely wasn’t ready to part with it, so I suggested making it into something else. Something else that might get used, like a pillow.

baby gund blanket pillow

She loved the idea! Especially when I told her she could help. If you have one of these and are looking to turn it into something for a big girl or boy, it’s easy.

Step 1
Using a seam ripper, open up about 2-3 inches of stitches on the side.

Step 2
Stuff it with polyfil, starting with the legs first and working your way toward the middle. This is a great step for your child to help. My daughter LOVED doing the stuffing.

Step 3
Close up the side with a blind stitch.

baby gund blanket pillow

reshape: I love it when my daughter gets excited about working on a project with me. She adores the pillow and is proud to say she helped out. I think we just added a few more years to Ellie’s life with us.

tiny four-leaf clover pattern

tiny crochet shamrock

I had this idea. The top of my tiny crochet hearts kind of look like half of a four-leaf clover. What if I added two more leaves and a stem?

tiny crochet shamrock

After a few tries, I finally got it. Hope they bring you some good luck!

Tiny Four-Leaf Clover Pattern
worsted weight yarn
size G/5 (4.25mm) crochet hook
tapestry needle for weaving ends

dc: double crochet
hdc: half double crochet
sc: single crochet
sl st: slip stitch

gauge: not important, but mine are about 1 1/2 inches across

Make a magic ring.
R1: chain 1, sc into loop 5 times, pull loop closed, join with sl st (5 stitches)
R2: It might be easier to take this stitch by stitch:
— chain 1, hdc, 3dc, hdc in first stitch
— sl st into second stitch, hdc, 3dc, hdc in that same stitch
— sl st into third stitch, chain 4, sc in second and third bump from hook,
    sl st into third st again*
— hdc, 3dc, hdc in fourth stitch
— sl st into fifth stitch, hdc, 3dc, hdc in that same stitch
— sl st into first chain 1

*You’re going into the bumps on the back of the chain, not the stitches on the front of the chain.

Some folks were having trouble getting the V shape on the top of the heart, so I hope adding this chain 1 helps. I take the end, weave it in on the back toward the tail and then tie them tightly together.

tiny crochet heart pattern

I wanted to make some really small hearts for Valentine’s Day crafts, but couldn’t find any patterns online that I liked. After a few tries, I came up with these little cuties.

tiny crochet hearts

Tiny Crochet Heart Pattern
worsted weight yarn
size F/5 (3.75mm) crochet hook
tapestry needle for weaving ends

hdc: half double crochet
sc: single crochet
sl st: slip stitch

gauge: not important, but mine are about 1 1/2 – 1 1/4 inches across

“Big” Tiny Heart (the one on the left)
Make a magic ring.
R1: chain 1, sc into loop 7 times, pull loop closed, join with sl st to chain 1
R2: sl st into 1st stitch, 5 hdc into second stitch, hdc in next two stitches, hdc then chain 1 and hdc again in the bottom stitch, hdc in next two stitches, 5 hdc into next stitch, sl st in original sl st.

Give the tail a little tug to help form the heart V at the top, tie knot, weave ends.

Give the bottom stitches a little tug to make the V point at the bottom.

“Small” Tiny Heart (the one on the right)
Repeat pattern, but replace sc for hdc.

how to make microwave crayon shapes in 3 easy steps

microwave heart crayons

Maybe I should call these Really Lazy Crayon Shapes. I’d been thinking of making them for awhile, but all of the tutorials I found online suggested baking in the oven, melting over a double boiler or melting into cups and pouring into molds. Those were just too many steps for me.

I found a silicone mold at the thrift shop for only a few bucks, so I wasn’t too concerned if I ruined it. I threw all caution to the wind and microwaved the crayons directly in the mold. It was simple, fast and easy to clean up.

microwave heart crayons

Materials
crayon bits
silicone mold
knife
toothpick

Step 1
Put your crayon bits directly in the mold. Break up any bits that are too big with a knife.

Step 2
Microwave on high for 1-2 minutes. (I’m sure times will vary based on microwaves. Watch your first batch carefully!) Use a toothpick to stir if your bits aren’t melting evenly.

Step 3
Allow to cool and then pop them out of the mold. I put mine outside because we’re having a frigid winter and it didn’t take long, but you could stick them in the freezer, too.

Clean up: Put some water in the mold, microwave it for about a minute and dump it out. The crayon residue wipes out easily with a paper towel.

*After searching, I found that my mold is actually an ice cube tray and shouldn’t be exposed to heat. It held up just fine, but I wouldn’t use it for ice cubes or food after heating just to be safe.

recycle: This is a great way to use all of those crayon bits that are too small for little hands to hold.