how to: recycled holiday card gift tags

recycled gift tags from holiday cards

Last year I saved a few of my favorite holiday cards for crafting. I planned to reuse the artwork to make new cards, but when I realized I didn’t have any cute gift tags in my stash, I started cutting! I began with 5 cards and ended with almost 30 gift tags in all shapes and sizes.

You’ll need:
-paper cutter
-embossing stylus, crochet hook or knitting needle for scoring
-ruler
-small hole punch

I just started slicing away without thinking too hard about the end result. Then I went back and sorted all of the bits.

  • Large rectangles were scored for fold-over tags. (boy pulling sled)
  • Borders made great matching flat tags. (red and cream stripes)
  • Images were cut in half to make coordinating card sets. (snow scene)
  • Die cuts made really fancy cards. (poinsettia)

Most cards are made out of heavy paper stock and need to be scored before you fold them or they will crack on the fold. If the surface is glittery, cover with a thin piece of paper before scoring.

The final step was to punch holes in the corners so they can easily be tied on to gift packages.

reuse and recycle: This little project didn’t take long and was so much fun. If you sent me a really cute card last year, thanks! You just might be getting it back on a gift this year.

how to add adjustable elastic to kids’ pants in 5 easy steps

adjustable elastic kids pants

My daughter is growing like a weed, except she’s only growing up, not out. She’s got 4-5T legs and a 3T waist. That means that most of the pants we find that are long enough won’t stay up.

I try to only buy pants with an adjustable waist, but sometimes I come across a great deal or something super cute that I just can’t pass up. I decided to try adding elastic myself, and you know what? It’s super easy!

You can even do this without a sewing machine as long as you don’t mind a little hand stitching.

Materials
button hole elastic
small, sharp pair of scissors
two buttons that fit through your elastic
Fray Check
needle and thread

Step 1
Starting on the right inside of the waist, snip two holes to create a casing for the elastic. Make sure your scissors don’t go through to the other side! Apply Fray Check to the raw edges.

adjustable elastic kids pants

Step 2
Cut a piece of elastic that’s about one inch longer than between your holes. Fold one edge over and sew. This is the edge you’ll be using to adjust the pants.

adjustable elastic kids jeans

Step 3
Sew a button in front of the casing you’ve created.

button hole elastic

Step 4
Thread the elastic through the waist casing with the finished edge going through the front. You can tuck the unfinished edge into the back.

adjustable elastic kids jeans

Step 5
Sew a line of stitches to secure the elastic. See arrow.

adjustable elastic kids pants

Here’s what you’ll see on the outside of the pants.

Repeat on left inside of the waist.

refashion: The only thing worse than sizing for women’s pants is sizing for kids’ clothes. At least with this little trick, I can just make sure pants look long enough when I buy them. It’s nice knowing how easy it is to adjust the waist. Maybe I should try this on my jeans!

how to sew a remote control pillow in five easy steps

I’m not sure why I’ve had pillows on my mind. Maybe because the sun has been hiding behind the clouds for too many days to count? Maybe it’s because I’ve been feeling under the weather? Maybe it’s because the holidays are fast approaching and I need some gift ideas for the guys in my life? Whatever the reason, I’ve been having fun. These are really easy. I know you’ll have fun, too.

remote control pillow

Notes

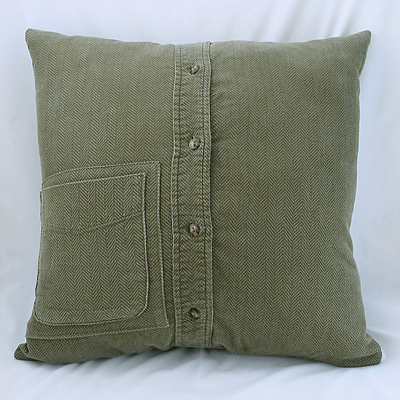
  • Remote Control Pillow v 2.0 is for those who only have one tv remote or are using a universal remote for all of their equipment. If you need a multi-pocket pillow, check out my Remote Control Pillow v 1.0 pattern.
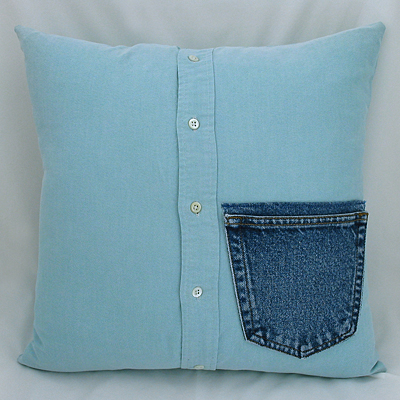
  • Most likely, your pocket will have to be flipped and moved to accommodate a remote control. If your shirt doesn’t have a pocket, you can easily make one out of the sleeve or a contrasting scrap fabric. Be creative! Try a denim pocket from a pair of jeans.
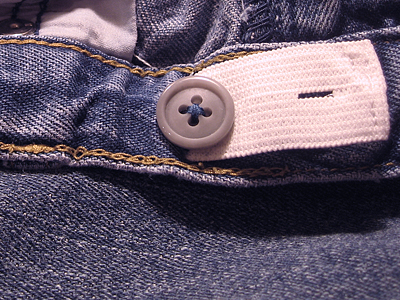
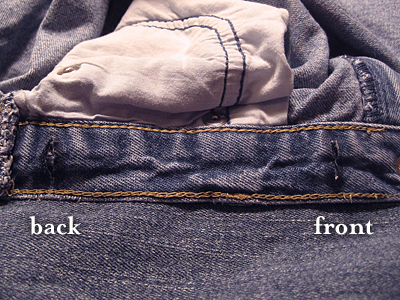
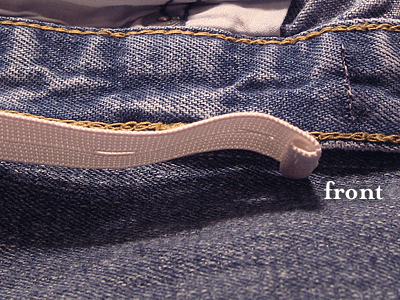
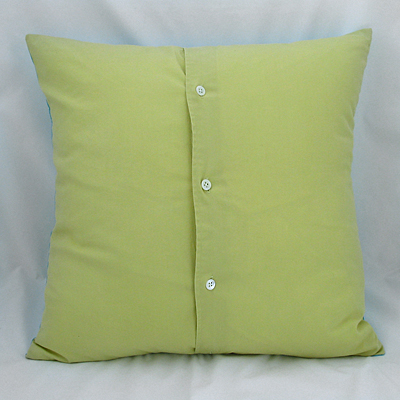
  • Some men’s shirts don’t have buttons past the belt line. You can take one from the collar or cuff and stitch it on the band.
  • If you are using a smaller shirt, simply use a smaller pillow form. I usually sew the cover 1″ smaller than the pillow form size so the final pillow will be nice and firm.

denim pocket men's shirt pillow

Materials
1 – large men’s button shirt with pocket
1 – 18″ pillowform
seam ripper
matching thread

Step 1
With the shirt buttoned, cut a 17 1/2″ square out of the front of the shirt. Cut another 17 1/2″ square out of the back of the shirt.

Step 2
Carefully remove the pocket using a seam ripper. Spritz shirt with water and steam press to close up any holes. Reposition the pocket and topstitch in place.

Optional Step 3
If your holes don’t close, if you accidentally rip your fabric, or you are using a shirt like corduroy and the nap won’t fluff back up, you’ll need a patch. Just cut a square from the sleeve and topstitch it over the original area.

Step 4
Lay the pieces together right sides together and sew around the whole square with a 1/4″ seam allowance. Make sure to undo one or two buttons before sewing so you can turn it right side out afterward.

Step 4
Clip your corners, turn right side out and press.

Step 5
Insert your pillow form and button it up!

affordable decorative pillow button down shirt

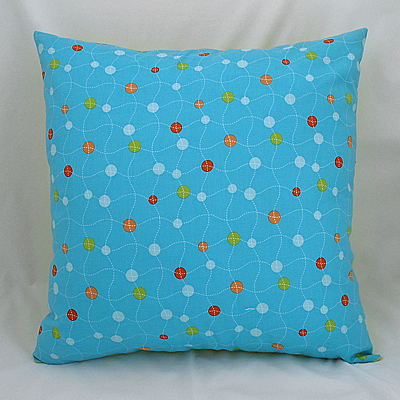
This is an easy way to make decorative pillows, too. If you go to Goodwill on 99 cent day, this becomes a really affordable project. Plus, they organize their clothes by color, which makes it easy to find shirts that match your fabric. I used a little less than a fat quarter of fabric for the decorative pillow.

home decor pillow on a budget

recycle: Before you head out to the thrift store, check your own closet. All three of these shirts came from my husband. In fact, I have him trained now to ask me first before donating any of his clothes!

how to sew a baby quilt in five easy steps

snoopy baby quilt

So you’d like to make a quilt, but you’re intimidated by all of those little pieces, right? I am, too. But you can make a quilt without blocks. It’s easy and looks just as nice! Here’s how I did it:

Materials
1 – 36×36″ piece of top fabric
1 – 36×36″ piece of bottom fabric
1 – 36×36″ piece of batting
1 – 38×8″ piece for making the trim*
matching thread
bias tape tool
rotary cutter and ruler
walking foot (optional)

*even easier: use 4 yards (plus a few inches) of pre-made bias tape

Step 1
Lay your fabric on the floor wrong sides together with the batting in the middle. Pin baste from the center outward.

Step 2
Starting from the center and working your way outward, draw parallel lines every four inches with sewing chalk, water soluble pen or light pencil.

Step 3
Starting from the center, sew along these lines working your way outward, taking out the basting pins as you go. Here’s where a walking foot is helpful, but if your batting isn’t too thick, you should be fine without it. Square up your edges with a rotary cutter and ruler.

Step 4
Cut your trim fabric according to the measurements for your bias tape tool and make the trim. Even easier: open the package of pre-made bias tape.

Step 5
Fold the trim over the edge and attach with a zig zag stitch. Fold the ends over at the corners to enclose the raw edges.

snoopy baby quilt

I hope I didn’t oversimplify this, but it’s really easy. The zig zag trim takes a little practice. This was my first time, and I’m sure it will get a lot neater the more I do it.

resource: I was inspired by Soule Mama’s Beach Blanket To-go for this blanket. One day I hope to make something as beautiful as her daughter’s quilt, but for now, I’m going to stick with single pieces of fabric until I’ve got more free time.

easy backpack with bias tape straps

My daughter starts preschool next week and she needed a backpack. I asked her if she’d like me to make one for her and she said YES!

I let her choose fabric from my stash and helped her with coordinating the colors. I really like how it turned out and she loves it. My only problem is getting her to wear it. Right now, she just wants to carry it by the straps.

martha stewart easy beach bag

I used Martha’s Easy Beach Bag pattern with a few modifications:
• inside is canvas instead of nylon
• inside has two pockets
• used fabric instead of cord for the straps
• serged the raw edges inside

drawstring back pack with lining

Drawstring Strap How-to:
Feed strips of denim through a 1-inch bias tape maker, fold the tape in half and stitch it together. Once threaded through the loops, sew the ends together because they’ll be too thick to knot.

drawstring back pack with lining

stash: This is one of those occasions that I love having a stash of fabric. It’s so easy to dive right into a project when the motivation strikes! Plus, using a thrifty stash is so affordable. I’m guessing this cost less than $2 to make. Sweet!

how to refashion a dress into a skirt
in five easy steps

Even though I wrote this tutorial for a kid’s size dress, you can do this with adult sizes, too. This is the same way I turned a shirt into a skirt.

My daughter and I both love this dress. She only wore it a few times last season because it was too big. This year it is too small. It probably would have fit her best when it was 20 degrees outside.

easy kids skirt tutorial

The other day she insisted on wearing it. (Yes, it was still hanging in her closet even though it was too small.) I let her try it on so she would see that the buttons could no longer be buttoned. While she had it on, I realized that it was just the top that was too small. The bottom fit just fine. Hmmm… what if I turned it into a skirt?

easy kids skirt pattern

Step 1
Cut off the bottom of the dress. If your daughter is as tall as mine, use a seam ripper. It takes longer, but she needs every bit of length I can save.

Step 2
Measure your daughter’s waist. Add an inch and then cut a piece of elastic. I used 3/8″ wide elastic.

Step 3
Fold the top edge down 1/4″ and press. Then fold 5/8″ and press.

easy kids skirt tutorial

Step 4
Sew the waist leaving an opening for the elastic. Edge stitch the top to help the elastic stay in place.

Step 5
Thread the elastic through the waist casing, sew elastic ends together with a 1/2″ seam allowance, and close up the waist.

easy kids skirt pattern

My daughter was so excited to see her new skirt. She especially loves the bow. The original dress had a two inch hem. If she’s still in love with it next season, I guess I’ll be letting the hem down, too.

refashion: Sewing clothes is sometimes easier if you don’t start from scratch. Refashioning a favorite piece of clothing can make you happy, your budget happy and the earth happy.

Thanks to whipup.net for linking to my tutorial and welcome new readers! For more crafty updates, visit my Facebook page!

surprise for our recycling guy

bags of shredded junk mail

Our recycling is mostly made up of glass, aluminum and plastic. Since I’ve canceled most of our catalogs, our weekly paper bin consists of some boxes, a few days of newspaper and junk mail. Not tomorrow, though!

Believe it or not, the biggest project I worked on while my parents were visiting was non-craft related. I tried to regain some control over our filing. There are lots of reasons excuses as to why it was in such a state. I won’t go into them here. Let’s just say there will be a lot of paper at the curb tomorrow morning.

I’m still not finished. Most everything has been sorted into files. The next step is to go through each file and figure out what we need to keep. I’m going to work on that at a much slower pace, though. I need to get back to my sewing!

resource: The IRS has a guide for what kind of records you should keep posted on its website.

handmade student emergency kit

virginia tech birthday gift

My brother is very smart. He’s got one of those jobs where he can’t tell you what he does. I have a feeling I probably wouldn’t understand a lot of it if he could. He’s also working on his PhD. Both involve a lot of hard work and math. Two things that he can always use: pencils and caffeine.

virginia tech birthday gift

If you’ve been reading my personal blog for awhile, you know that he went/goes to Virginia Tech. He never tires of Hokie-themed gifts. (I asked.) I figured what he needed these days was something for all of those pencils and caffeine. I made him a pencil case and tucked some extra mechanical pencils, lead and erasers inside. I also made him an adjustable coffee sleeve and sent him a big bag of his favorite tea.

recycle: I can’t believe I am still using up VT fabric scraps from a yard I purchased over a year ago. Denim was from a pair of jeans. (Freecycle is a great source for denim!) Fabric and button were from my stash. Elastic was a colored pony tail holder.

handmade wedding and anniversary gifts

tea towels

You may have noticed a theme around here. I love to give gifts that will get used. I have a set of mixing bowls we received as a wedding gift that I use all the time. Whenever I get them out, I always think about our special day. So, when I was brainstorming ideas for wedding and anniversary gifts, I thought tea towels get used everyday! I made these with linen and they feel wonderful. I also added some details to match both couples’ kitchen colors.

satin stitch

I had planned to embroider their last initial on the towels, but everything I tried just didn’t work: cross stitch, back stitch, running stitch. I decided that maybe less was more, so I left the initials off.

tea towels

inspiration: The pattern for these is in one of my new favorite books, Linen, Wool, Cotton. The linen fabric is a blend and the review on Joann’s website sounded perfect for tea towels. Thread was from my stash.

that’s how i roll

Another little Mother’s Day gift for me: a rolled hem foot. The other night I sat down to make some tea towels and expected to have a whole stack to show you. I didn’t realize there would be such a learning curve! It was like learning to use my machine all over again. I think I’ve got the sides down, but the corners are still giving me a little bit of trouble. So, here’s my one tea towel.

tea towel

I found this fabric in my stash while I was hunting for something else. It was originally for a sewing machine cover, but when I washed it, it got super soft. It feels like a linen/cotton blend, but I’m pretty sure it’s just cotton. The colors match my kitchen perfectly. Check out those beautiful hems!

tea towel

I couldn’t have gotten this far without this awesome tutorial from the Sewing Divas. I think once I get the hang of it, this little foot is going to be a big time saver for me!

stash: Having the right tool for the job can make life so much easier. It will pay for itself in productivity.