wardrobe refashion: t-shirt to little girl’s beach cover-up

I’ve talked about our vacation, but have I mentioned where we’re going?

t shirt to toddler dress

Yep! Can you believe I found this t-shirt? I thought it might make a really cool beach cover-up for my daughter. I just used one of her currently fitting dresses as a pattern.

t-shirt to beach coverup

This should have been such an easy project. The t-shirt was twisted and I had a hard time making the vertical lines look even. Also, the material is really thin and kept getting sucked into my machine. But I loved how it turned out!

t-shirt to beach coverup

So does my daughter. It would be nice if this fits next summer as a dress, but they way she’s growing, it will probably fit in the middle of January.

thrifted and refashioned: 99 cent sale t-shirt.

how to: messenger bag refashion

messenger bag refashion

It’s taken me awhile to write about this project because it’s not just a set of simple instructions. It’s more of a guide to what is possible. Before you rip one seam or sew one stitch, I recommend you sit down in a quiet place with pen and paper to plan. I know this is hard for some — it’s hard for me! I don’t even really like following patterns. When you are working with an existing bag, once you cut you can’t go back. You can’t buy more fabric and start over.

So that’s how I started this project — with paper and pen. Below are before and after pics with my thoughts and ideas. I hope you give this a try. There are so many “almost perfect” bags out there. Visit your local thrift store or garage sale and give them an “absolutely perfect” life outside of the landfill.

Materials
seam ripper
good scissors
heavy duty needle
matching thread

messenger bag refashion

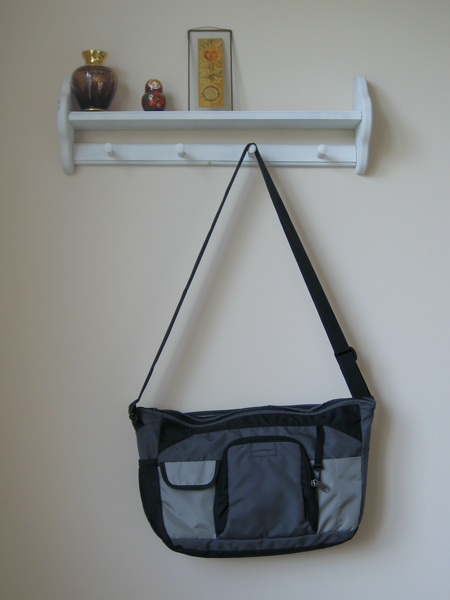
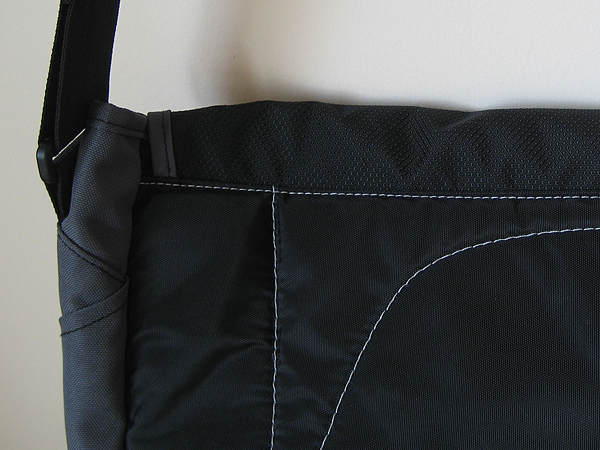
Here is the original bag. Carrie didn’t want the fold over flap. She asked me to replace it with a zipper.

messenger bag refashion

Because she didn’t want the flap, she didn’t need the big plastic clips either. I carefully removed them with a seam ripper. The ones on the flap were easy.

messenger bag refashion

The ones on the bottom were sewn into the seams of the bag so I had to carefully pick them out and resew the bottom seam.

messenger bag refashion

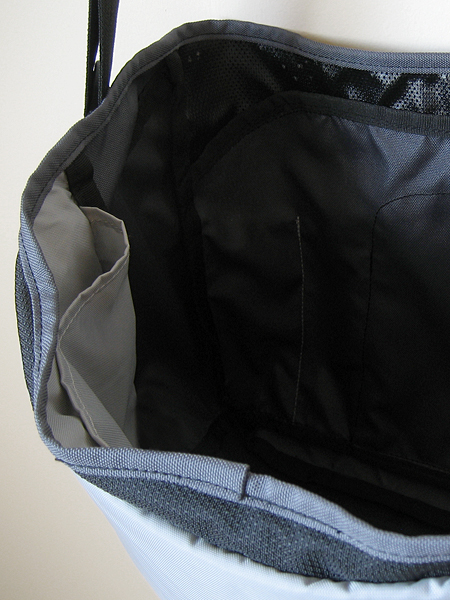
She was happy with the pockets on the outside, but she wanted more pockets on the inside. Most important was having a big pocket to keep her knitting projects safe.

messenger bag refashion

When I opened up the seam to take out the flap I got a nice surprise: another pocket! The only issue was the unfinished edges. I decided I could cover them with the trim from the flap.

messenger bag refashion

Here is the new pocket finished with the trim from the flap. It was too difficult to sew this with a straight stitch and get it even, so I zig zagged it instead. I added velcro and voilà: an easy access pocket for knitting projects!

messenger bag refashion

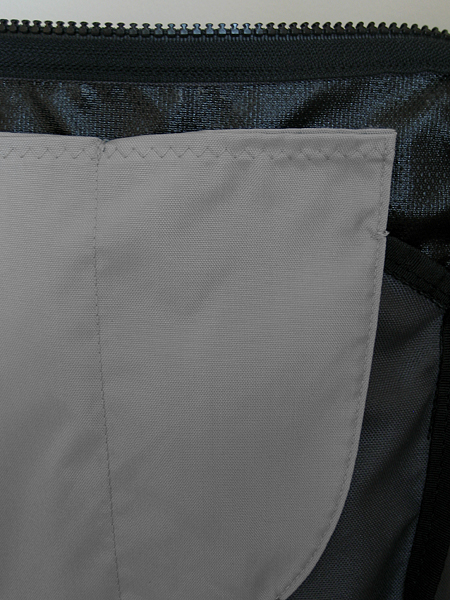
I decided to use the gray fabric from the messenger flap for the inside pockets. There wasn’t a lining in this bag, so I couldn’t sew the pockets directly to the fabric — the outside pockets were in the way. I decided to make the pockets independent of the bag and then just anchor them at different places where the stitches wouldn’t show on the outside.

messenger bag refashion

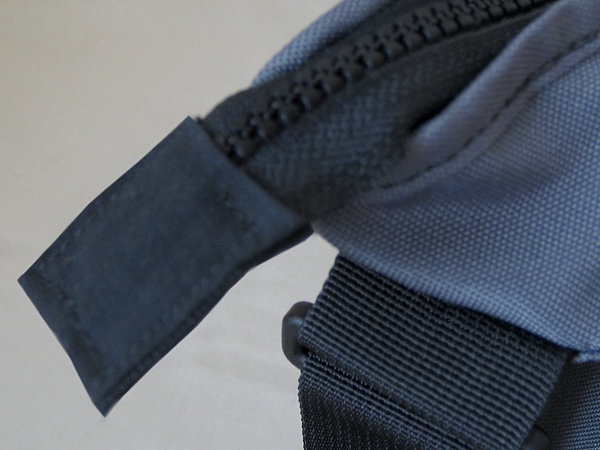
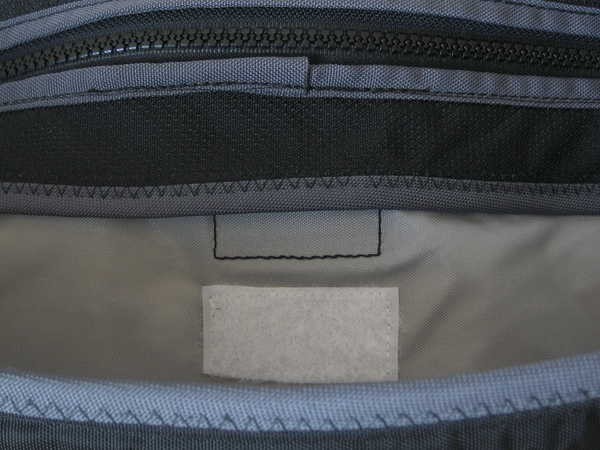
I saved the zipper for last. I just followed the stitch line on the existing trim when I sewed it in. Instead of anchoring the zipper end to the inside, I finished it off with a fabric tag. It felt a little more sporty that way and was also easier on my sewing machine!

messenger bag refashion

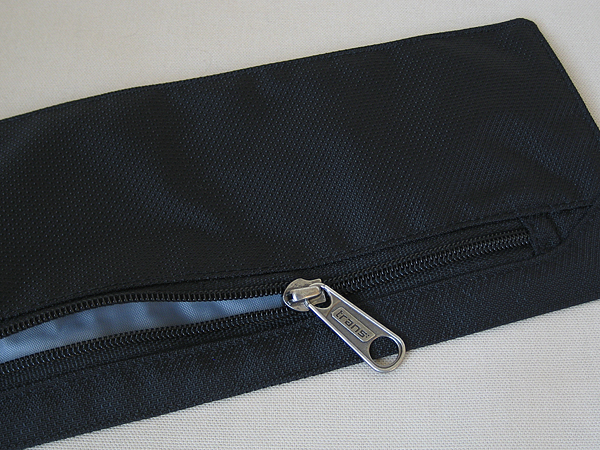
If you’ve been reading my blog for awhile, you know I hate to let anything go to waste. It took a little bit folding and unfolding, but I figured out to make a zipper pouch out of the remaining piece of the flap. Cool!

messenger bag refashion

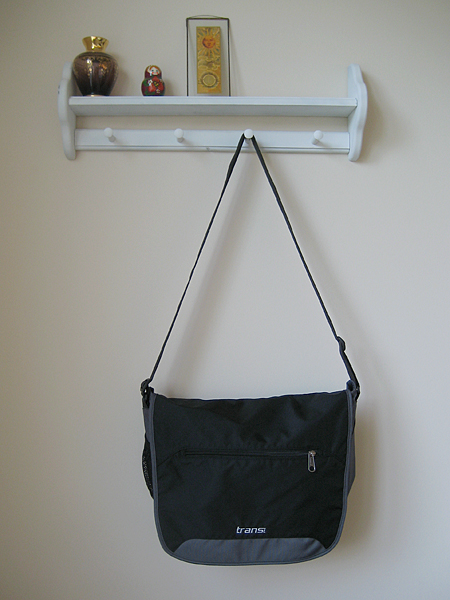
Here’s the after picture again. I hope this “how to guide” is helpful. If you have any questions, let me know. Carrie loves her bag, by the way. Yay!

wardrobe refashion: white cotton skirt

Three skirts down! I really wish I would have taken a before picture of this one. When I cut off the waist and flattened out the fabric, there was so much!

refashioned white cotton skirt

I used an a-line pattern I drafted for myself from Sew What! Skirts. I took about 5/8 inch off of each side after trying it on and will be adjusting my pattern for the next one. Aside from that, this was super easy. I cut it out a few weeks ago and sewed it up today in about an hour.

Usually I shy away from white of any kind on my lower half, but I fell in love with the detail at the bottom. Isn’t it lovely? (Yep, I kept the original bottom hem, which made this project go really fast.)

refashioned white cotton skirt

The skirt is a little sheer, but I’m thinking slip instead of lining. Any suggestions for fabric type? I worry that a traditional polyester slip might be too hot in the summer.

thrifted: I think this might be my last skirt from the Goodwill 99 sale. I can’t remember! Time to dive back into the stash.

wardrobe refashion: lollipop shirt

applique t-shirt

My daughter was absolutely devastated that her lollipop shirt had gotten too small. (Yes, devastated—three-year-old drama is so… dramatic!) So I did what any sewing mama would do: appliqué.

applique t-shirt

I used heat-n-bond and reinforced it with a zig zag stitch. My only mistake was leaving the extra heavy duty needle in the machine. I hope these holes don’t get any bigger!

applique t-shirt

refashion: Appliqué is a great way to give an old shirt new life. I can’t believe the new shirt is a size 5/6. My baby is getting so big!

wardrobe refasion: adding long sleeves to a t-shirt

long sleeves on t shirt

I was putting away laundry in my daughter’s dresser and found her preschool t-shirt. I can’t remember the last time it was warm enough to wear short sleeves. I don’t think it’s even been worn once. I decided to add some long sleeves so she can wear it before she outgrows it.

(I know what you are thinking. Why not just layer it over a long sleeve shirt and save yourself the trouble? Well, not only does my daughter dislike wearing sweaters, she doesn’t like to layer shirts, either.)

I used a size 4-5 T sleeve to make the pattern and figured I’ll just roll them up for now. Maybe next fall, I can use them on a different shirt. Look at that beautifully serged seam. Don’t you just love it?

long sleeves on t shirt

recycle: I used the body of one of my old t-shirts to make the sleeves. I was going to post a tutorial, but this seems easy enough. What do you think?

valentine’s day heart bunting

Last year I made a paper heart bunting for our kitchen window. When I went to hang it this year, it was gone. Maybe I stored it in a safe place? Maybe I recycled it? I wish I could remember. Anyway, it was a good excuse to make a new one. I forgot to take a before picture of the tea towel I used, but you can see part of it in this creative space.

valentine heart garland

It was basically a grid of small and big hearts. I cut along the small hearts and then serged the side and bottom raw edges, trimming the small hearts off as I went along. I folded over some bias tape and stitched in the top edges.

valentine heart garland

I managed to create this from start to finish during my daughter’s “quiet time.” I don’t remember the last time I completed a sewing project so fast. Plus, I think I’m finally figuring out how to master the tension on my serger!

recycle: Garage sale tea towel: 25 cents. Bias tape part of a Goodwill grab bag.

wardrobe refashion: denim skirt makeover

denim skirt refashion

This is the original skirt I was going to wear last weekend. It turned out a little too casual for the event. I was planning on wearing it with black tights and boots. Now I’m wondering if it might look better with a t-shirt and sandals.

I really hacked this poor thing up. I cut off the bottom two ruffles and took it in on either side, trying to make it more a-line and less Holly Hobby. (Not that there is anything wrong with HH. It’s just not a good look on me.)

denim skirt refashion

It’s been a long time since I’ve refashioned something. I can’t wait to dive into the stack of clothes that have been waiting patiently by my sewing machine.

refashion: This was an impulse buy at a garage sale last summer. I think it cost 75 cents. I’m hoping to use the leftover ruffles to lengthen some of my daughter’s jeans.

how to add adjustable elastic to kids’ pants in 5 easy steps

adjustable elastic kids pants

My daughter is growing like a weed, except she’s only growing up, not out. She’s got 4-5T legs and a 3T waist. That means that most of the pants we find that are long enough won’t stay up.

I try to only buy pants with an adjustable waist, but sometimes I come across a great deal or something super cute that I just can’t pass up. I decided to try adding elastic myself, and you know what? It’s super easy!

You can even do this without a sewing machine as long as you don’t mind a little hand stitching.

Materials
button hole elastic
small, sharp pair of scissors
two buttons that fit through your elastic
Fray Check
needle and thread

Step 1
Starting on the right inside of the waist, snip two holes to create a casing for the elastic. Make sure your scissors don’t go through to the other side! Apply Fray Check to the raw edges.

adjustable elastic kids pants

Step 2
Cut a piece of elastic that’s about one inch longer than between your holes. Fold one edge over and sew. This is the edge you’ll be using to adjust the pants.

adjustable elastic kids jeans

Step 3
Sew a button in front of the casing you’ve created.

button hole elastic

Step 4
Thread the elastic through the waist casing with the finished edge going through the front. You can tuck the unfinished edge into the back.

adjustable elastic kids jeans

Step 5
Sew a line of stitches to secure the elastic. See arrow.

adjustable elastic kids pants

Here’s what you’ll see on the outside of the pants.

Repeat on left inside of the waist.

refashion: The only thing worse than sizing for women’s pants is sizing for kids’ clothes. At least with this little trick, I can just make sure pants look long enough when I buy them. It’s nice knowing how easy it is to adjust the waist. Maybe I should try this on my jeans!

how to sew a remote control pillow in five easy steps

I’m not sure why I’ve had pillows on my mind. Maybe because the sun has been hiding behind the clouds for too many days to count? Maybe it’s because I’ve been feeling under the weather? Maybe it’s because the holidays are fast approaching and I need some gift ideas for the guys in my life? Whatever the reason, I’ve been having fun. These are really easy. I know you’ll have fun, too.

remote control pillow

Notes

  • Remote Control Pillow v 2.0 is for those who only have one tv remote or are using a universal remote for all of their equipment. If you need a multi-pocket pillow, check out my Remote Control Pillow v 1.0 pattern.
  • Most likely, your pocket will have to be flipped and moved to accommodate a remote control. If your shirt doesn’t have a pocket, you can easily make one out of the sleeve or a contrasting scrap fabric. Be creative! Try a denim pocket from a pair of jeans.
  • Some men’s shirts don’t have buttons past the belt line. You can take one from the collar or cuff and stitch it on the band.
  • If you are using a smaller shirt, simply use a smaller pillow form. I usually sew the cover 1″ smaller than the pillow form size so the final pillow will be nice and firm.

denim pocket men's shirt pillow

Materials
1 – large men’s button shirt with pocket
1 – 18″ pillowform
seam ripper
matching thread

Step 1
With the shirt buttoned, cut a 17 1/2″ square out of the front of the shirt. Cut another 17 1/2″ square out of the back of the shirt.

Step 2
Carefully remove the pocket using a seam ripper. Spritz shirt with water and steam press to close up any holes. Reposition the pocket and topstitch in place.

Optional Step 3
If your holes don’t close, if you accidentally rip your fabric, or you are using a shirt like corduroy and the nap won’t fluff back up, you’ll need a patch. Just cut a square from the sleeve and topstitch it over the original area.

Step 4
Lay the pieces together right sides together and sew around the whole square with a 1/4″ seam allowance. Make sure to undo one or two buttons before sewing so you can turn it right side out afterward.

Step 4
Clip your corners, turn right side out and press.

Step 5
Insert your pillow form and button it up!

affordable decorative pillow button down shirt

This is an easy way to make decorative pillows, too. If you go to Goodwill on 99 cent day, this becomes a really affordable project. Plus, they organize their clothes by color, which makes it easy to find shirts that match your fabric. I used a little less than a fat quarter of fabric for the decorative pillow.

home decor pillow on a budget

recycle: Before you head out to the thrift store, check your own closet. All three of these shirts came from my husband. In fact, I have him trained now to ask me first before donating any of his clothes!

a little bit of pillow talk

This weekend I spent some time refashioning shirts into pillows. I had planned for this post to be an easy tutorial for Remote Control Pillow v 2.0. Then I got sick. I’m actually supposed to be resting, but I’ve been resting all day and feel the need to do something productive. So, here’s a glimpse of one of the pillows.

wardrobe refashion pillows

Now it’s back to the couch for me. Hopefully, I can muster up enough energy to knit a few rounds.