UPDATE: Thanks to the Craft Magazine blog for their link to my tutorial!
March is Mending Month over at Craftzine. I’ve been doing a lot of mending lately. I keep a bag next to my desk for whenever I have a little time for sewing a button or fixing a hem. Mending is good for the soul, at least mine anyway.
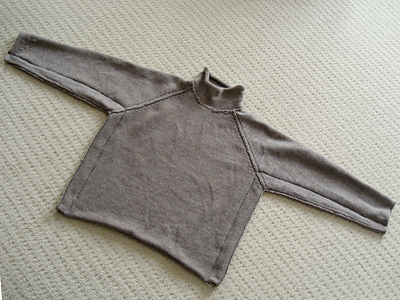
Last week I posted a scarf I made out of sweater scraps from resizing my brother-in-law’s ’80s style sweaters. It was super easy. I probably wouldn’t try this with an heirloom sweater, but it’s great for all those oversized sweaters you may have collecting dust in the back of your closet.
Step 1
Try on the sweater inside out and pin along the sides and under the arms for a more fitted shape. (I used safety pins for this step.)
Step 2
Lay the sweater flat and adjust the pins make sure your seams are straight and equal in size. (I changed to straight pins at this point.)
Step 3
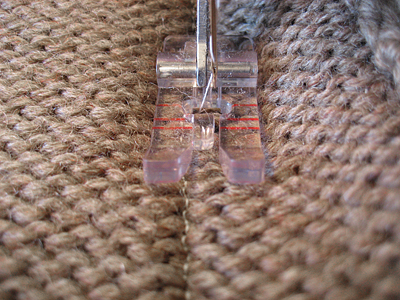
Machine stitch the new side seams with a straight stitch. Then repeat with zigzag stitch to catch the frayed ends. (A serger would be perfect for this.)
Step 4
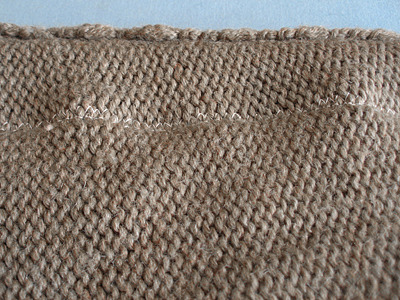
Your seams might be a little wobbly after stitching. Press with a warm steam iron. Use a press cloth if your sweater isn’t 100% wool. Trim excess.
Step 5
Turn sweater right side out and press open the seams. That’s it!
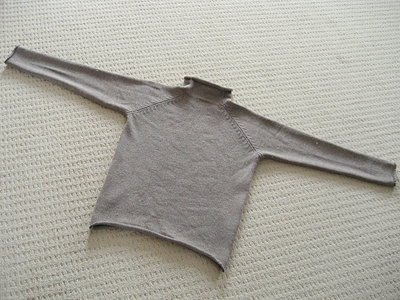
refashion: Extend the life of your clothes by resizing baggy pieces with a more modern fit.