how to fix a stuffed animal’s nose in 4 easy steps

stuffed animal new nose tutorial

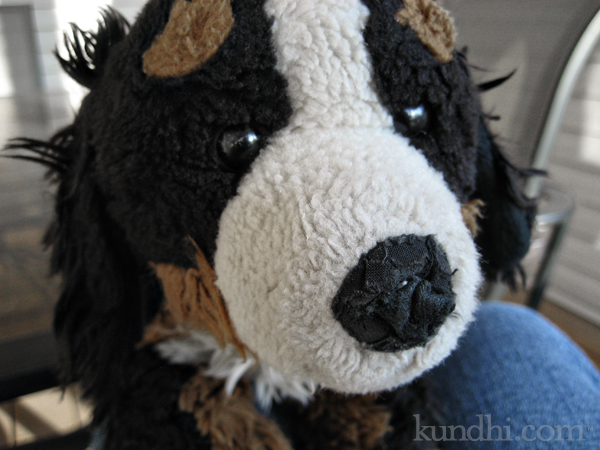
What is it with the noses on stuffed animals? I know my daughter isn’t chewing on them, so how does something like this happen? If you look closely, you can see the original torn nose and the remains of my first patch. I’m becoming an expert on fixing these, so I’m sharing my little trick with you.

Materials
fabric that matches the original nose (I doubled up for extra durability)
thin cardboard (check your recycle bin for a cereal box or similar)
iron
aluminum foil
sewing notions

Step 1
Measure the nose (I used one of these circle templates) and cut a piece of cardboard the same size and shape. Cut your fabric a little bit larger than the cardboard.

Step 2
Lay down your aluminum foil, then the fabric and finally the cardboard. Fold the foil around the cardboard so the fabric is sandwiched nicely in between.
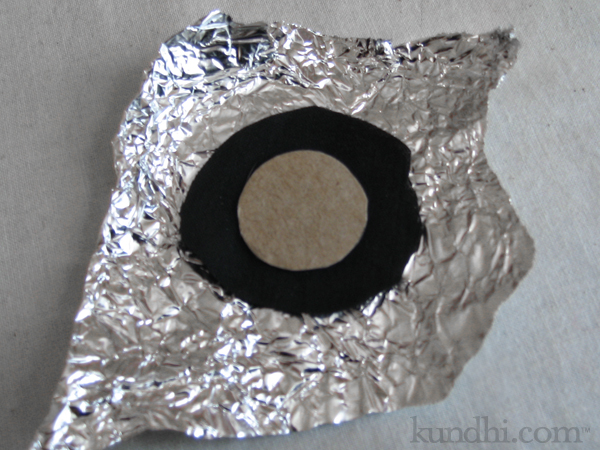
stuffed animal new nose tutorial

Step 3
Iron the foil on the top and bottom. Press really well around the edges. Let it cool before opening it up. It will be hot!
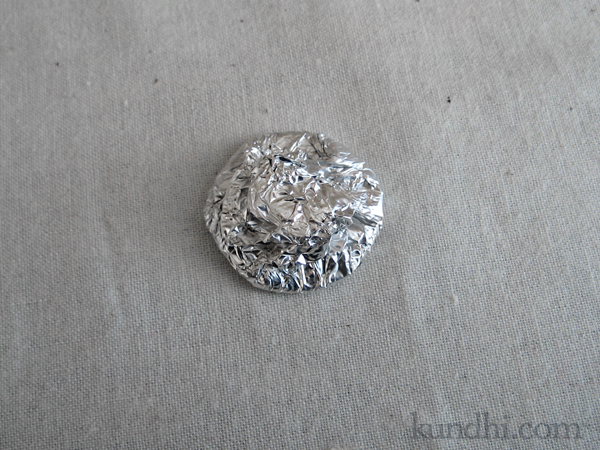
stuffed animal new nose tutorial

Step 4
Remove your perfectly pressed nose and hand stitch it in place.
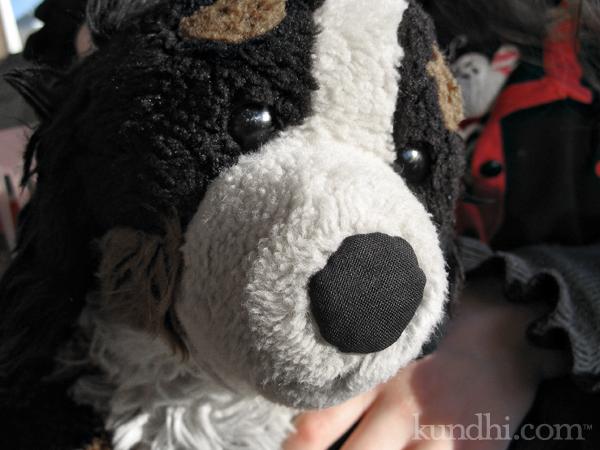
stuffed animal new nose tutorial

He looks much happier now, doesn’t he? Hopefully the two layers of fabric will hold up a little longer this time.
almost finished: “friend” mending

I’m a crafty slacker. I didn’t get to my Finished on Friday project until Sunday. Not only that, but I’m not completely finished! Even worse, I don’t have any pictures!!

Yesterday I tackled the growing number of stuffed “friends” that needed mending. Bears and bunnies were losing their hearts. Easter Bunny and Polar Bear both had holes under their arms. The only one I didn’t get to was poor old Puppy Dog, who is losing his nose again. I’m not sure why his nose wears through so much. Maybe I can get a before and after shot of him this week.

Other than sewing up the stuffed critters, not much crafting has been going on around here. We had a crazy snow storm last week and my daughter has been busy squeezing in every last bit of snow fun before it all melts. Thank goodness the temps will be warming up this week. I’ve got to back to my fused plastic bag project.

I’m surprised how many of you have not heard of fusing plastic grocery bags. Here’s a video from Etsy Labs to tide you over until our snow melts and I can get back to my project.

finished: red comfy shorts

wardrobe refashion comfy sweat shorts

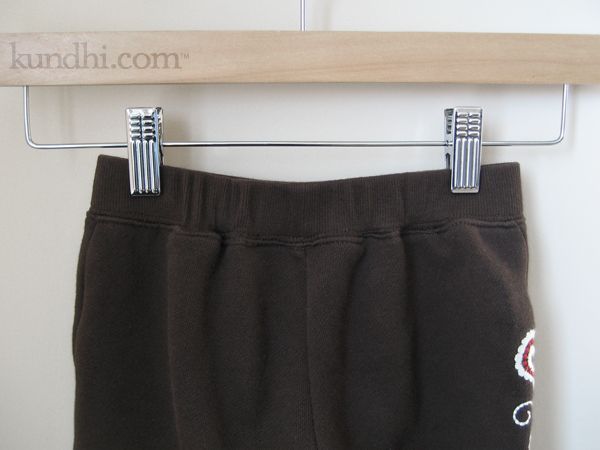
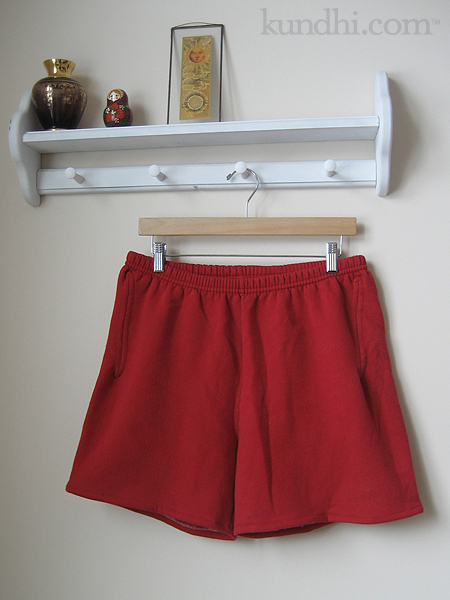
These poor shorts have been sitting in my pile for a long time (note the wrinkles). I made these just like the first pair,* but this time I tried to add pockets. It didn’t go so well. I figured they were ready for the donate bag, but my husband said they fit great. It was just the pockets that were goofy. So I stitched them closed and cut the pockets out.

This was my only project out of the The Big To-do Pile this week. I’ve been working on a few gifts that I’ll be posting next week.

What did you finish this week?

*I just re-read my first comfy shorts post. This had me laughing: “I think with the small amount of sewing with knits that I do, I really don’t need a serger.”

finished: twirly skirt

twirly skirt mending

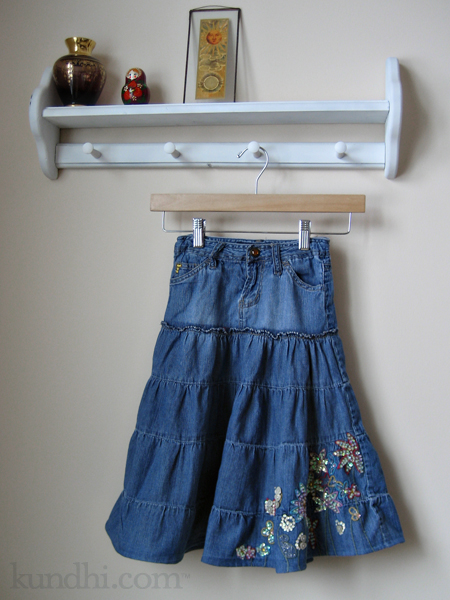
This week’s Finished on Friday project was just a little bit of mending. I received this skirt from a friend. It didn’t need that much work: just hem the raw edge and sew a button on for the adjustable elastic. I wish I would have done it sooner, though. My daughter LOVES it. She wore it two days in a row and would have worn it a third if I had let her.

Not much else noteworthy out of The Big To-do Pile, but I’m patting myself on the back for keeping my weekly project goal.

What did you finish this week?

how to adjust the waist of your pants/jeans in 4 easy steps

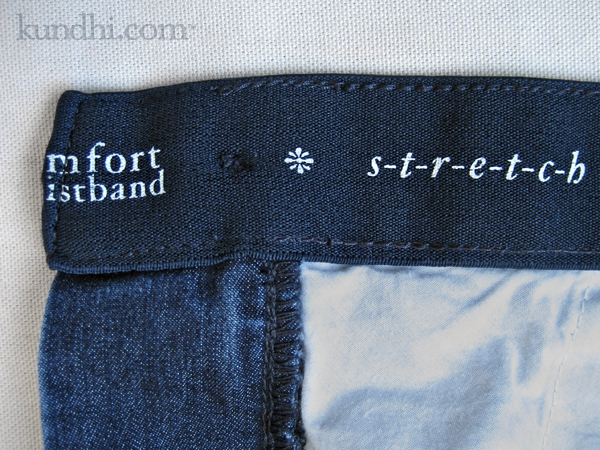
My “Finished on Friday” project this week has turned into a tutorial. I think you are going to love it. I had written a similar tutorial about a month ago complete with pictures. Something just didn’t feel right about it, though. I figured there must be an easier way to tackle this problem. Then I found a great fitting pair of jeans at the thrift store. The secret: a “comfort elastic waistband.” See how the elastic is incorporated around the entire waist?

take in pants jeans at the waist

Then my friend Amy commented on my frustrations taking in the waist on these pants. “When I have encountered that I sometimes just open the side seam in the waistband area and thread new elastic right over the old.”

Aha! Remember my adjustable elastic tutorial? This is kind of the same, but better. The elastic goes around the entire waist, so there’s no bunching up in any one place. The fabric is evenly distributed for a smoother finish.

You can even do this without a sewing machine as long as you don’t mind a little hand stitching.

take in pants jeans at the waist

Materials
3/4″ or 1″ wide elastic
small, sharp pair of scissors
Fray Check
pin, needle and thread

Step 1
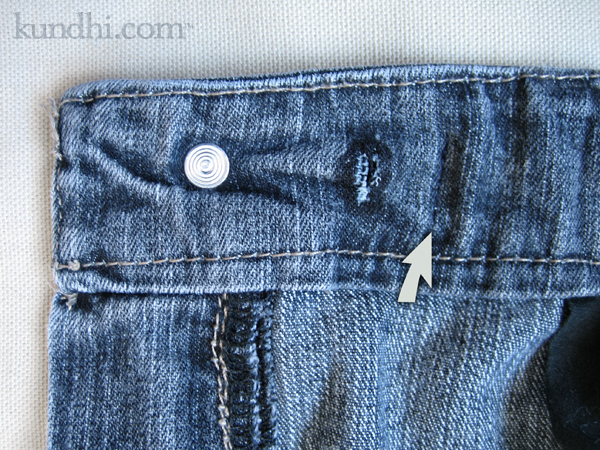
Snip two holes on either side of the waist to create a casing for the elastic — one just inside the buttonhole/snap and the other just inside the button/other snap. Make sure your scissors don’t go through to the other side! Apply Fray Check to the raw edges.

Step 2
Thread the elastic through the casing and secure with stitches on one side. (My thread matched the denim a little too well. The arrow is pointing to the stitches. If you look really close, you’ll see them.)

Step 3
Try on pants and pull on the elastic until you’ve got a good fit.

Step 4
Pin elastic in place, take off pants and secure with stitches on the other side. Trim excess elastic.

That’s it! Totally easy! You can do this to any pants that:

  • fit your hips, but are too big in the waist
  • fit everywhere except that annoying gap in the back
  • are made of denim without that 2% of spandex to make then snap back into shape after one wearing
  • need to tide you over while you lose weight and fit into the next size

finished: elastic waist surprise

altered waist

These pants are from the mending pile. They fit my daughter in length, but were too big in the waist. They looked like an easy fix: open up the waistband, take in the elastic, stitch the casing closed.

As I started with Mr. Seam Ripper, I noticed that there were a lot of stitches. In fact, it looked like a row of regular stitches over a serged row of stitches. What the? Then I realized there was no casing. The elastic was sewn directly into the waistband and pants.

If I took them in the correct amount on only one side, the back would look lopsided. I decided to take them in half the amount on either side, just like darts. (In hindsight, sewing darts over the elastic would have been easier!)

I got things put back together fairly well. On the hanger they look a little bunched up, but when my daughter wears them they look just fine.

Next time, I will pay closer attention to the construction before I start ripping out stitches.

What have you finished this week?

the big to-do pile

big to-do pile

A few things got put on hold over the holidays. Most of them are simple mending projects: fix a hole here, sew a button there. I should mention that the basket isn’t entirely full of clothing. The bottom half is filled with yarn bits for granny squares. The mending just sort of moved in and set up camp on top of them. But in the spirit of full disclosure, there is another pile not pictured that needs the same attention.

I’m making it a goal to finish one project a week. I’ll probably get motivated to do more once I get started, but I want a realistic goal that I can keep. My plan is to highlight each one on a new “Finished on Friday” weekly post. Hopefully, writing it down here will seal my commitment!

I actually completed one project earlier this week. While I was working on the puppy nightshirt, I let the hems down on these and these from last year. Yay for progress!

wardrobe refashion: puppy nightshirt

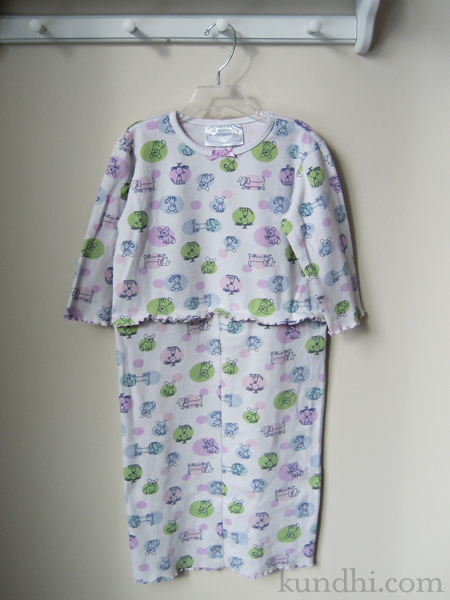
This nightshirt used to be a pair of pajamas. Repeated washings have caused them to shrink, but instead of getting smaller all over, they got shorter and wider. I tried to convince my daughter they were ready for the donate pile, but the “doggie pajamas are her most favorite.” She asked me if I could turn them into a nightshirt like her Mickey pajamas.

pajamas turned nightshirt

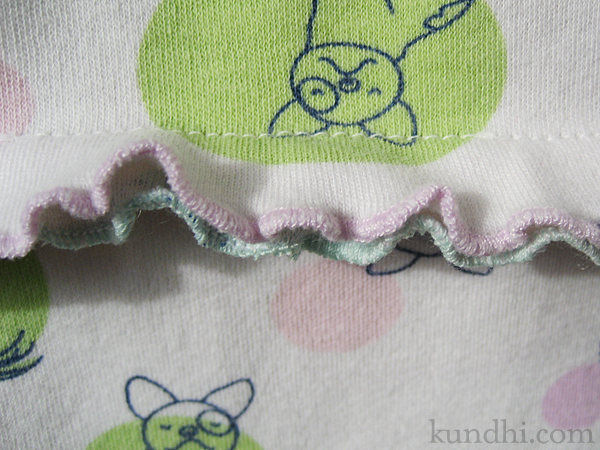
Since they were so wide, all I had to do was remove the elastic waistband, sew the pant legs into a tube, and attach them to the shirt. I added a rolled hem to the raw edge of the waist to match the shirt for a little more ruffle action: pink hem original, green hem mine.

pajamas turned nightshirt

technical note: I had a serious problem with skipping stitches on this project, no matter what my tension, regular or ball point needle, even different thread. When I switched to a muslin scrap the stitches were fine. I figured it must be the fabric so I tried putting a piece of paper tissue under the presser foot. It worked like a charm and the tissue tore away easily. I’m not sure where I first read this idea, but I’m glad I remembered it!

wardrobe refashion: I don’t think the life of these pajamas really need to be extended much longer. We’ve had them awhile and they are well loved. I’m curious how long they’ll last in their new form.

home ec class: hemming jeans

home ec class how to hem a pair of jeans

I haven’t abandoned my home ec class. I keep looking at the projects hoping to steal a bit of time here and there to finish some more up. This one was a necessity. When my daughter tore a hole in her best-fitting pair, I had to face the pile of size six jeans that are too long. It’s a big pile.

I knew I was going to have to hem most of them, but since she’s growing so fast, I decided to only do a few at a time.

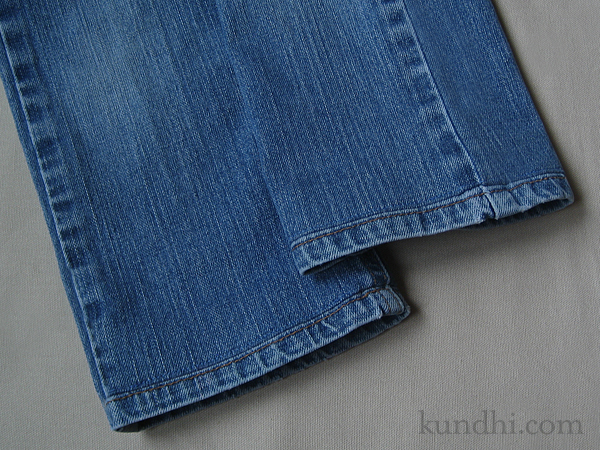
I picked an easy pair to start with: straight leg. I only broke one denim needle — my machine’s motor is definitely not a match for that side seam. I stopped and started on either side and hand stitched that part of the hem.

I’m pretty impressed with how they turned out. The real challenge will be tackling flare and boot cut styles.

refashion: I like how the original hem is retained with this technique. They don’t have that “my mom hemmed these” look to them. I have a feeling that I’ll be using this skill a lot in the coming years.

bee’s knees denim knee patch

denim flower patch applique

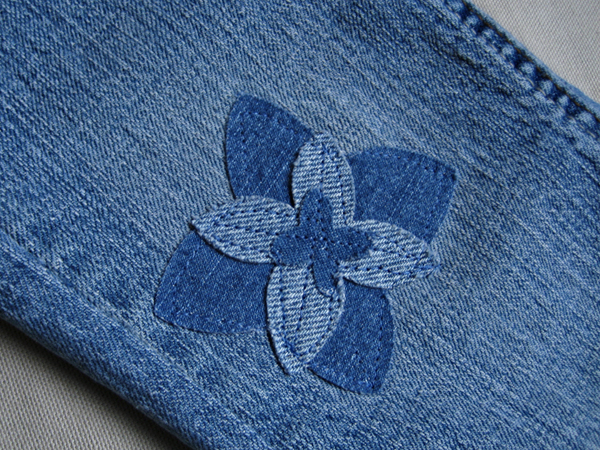
A few weeks ago, my daughter fell and skinned her knee. Her knee healed fine, but her pants not so much. We love these jeans. They fit her really well, which is rare. She asked me to fix them, so I put them in the pile for the craft retreat. I was planning a boring patch, but the collection of creative minds turned it into something special and cute.

me: I’m just going to do a patch with some denim and heat-n-bond.
crafty friend #1: Why not cut some cute shapes with the BIGkick?
me: Hmm… that would be cool.
crafty friend #2: Are you going to stitch around the edges?
me: I don’t think so. How would I get it under the presser foot?
crafty friend #3: Open up the side seam and it will fit easily over your sewing arm. Then re-stitch and re-serge the seam.
me: Y’all are brilliant!

refashion: Mended clothes don’t have to look boring. This patch turned out most excellent! I’ll definitely be saving my denim scraps for future repairs.