wardrobe refashion: skirts

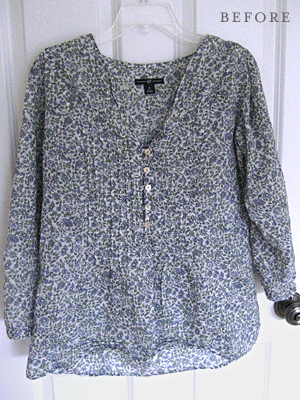
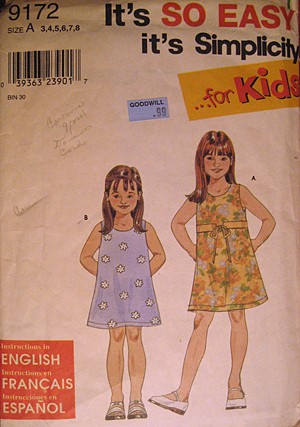
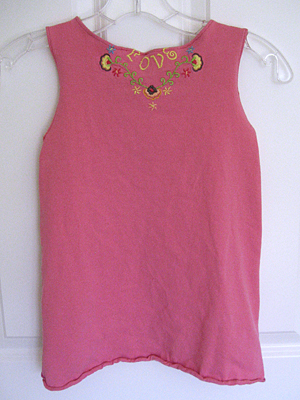
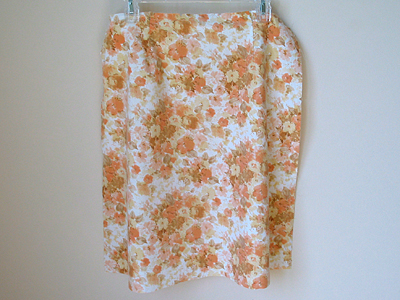
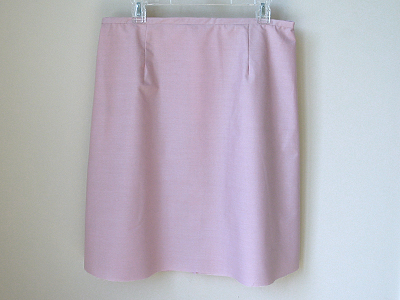
I was all excited to try out my new simplicity skirt pattern with two cute pillowcases I had thrifted, but I forgot to add in the ease to my measurements. Bugger! That’s what I get for cutting fabric too late at night. I’m already ripping out the seams to make something else. Here is the too small front.

fabric for new tote bags

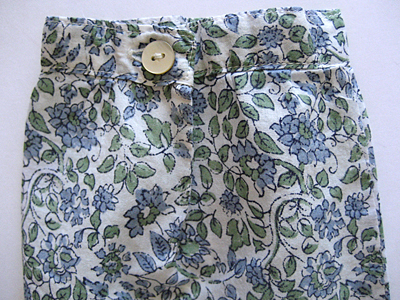
I tried the pattern again with the proper measurements and it fits much better. I didn’t want to sacrifice anymore fabric until I got it right, so I made this version out of a cotton sheet. It’s a little sheer, though. Not sure if I’ll be wearing it outside of the house.

fabric for new tote bags

I’m planning to try the version without darts next. Hopefully the third time will be a charm!

refashion + recycle: pillowcases from church sale, sheet from tote of garage sale fabric, thrifted zippers in both

wardrobe refashion: floral shirt

floral shirt refashion

Not sure if this qualifies as a refashion or if it is more of an alteration. Do I need a new category?

floral shirt refashion

Originally, I thought I’d take it in at the waist, but the front has a bunch of tiny little pleats. I was worried they might look funny if I altered the sides.

floral shirt refashion

Instead, I just cut off the cuffs, which were too tight when buttoned. I used my rolled hemmer foot to finish the new edge. It worked great!

floral shirt refashion

I never thought I’d be a fan of 3/4 sleeves, but I seem to keep making them, don’t I? I love the way this shirt looks and fits now.

refashion: Shirt was $2 a neighbor’s garage sale. I wasn’t planning on buying anything that day, but I couldn’t resist the little blue flowers.

wardrobe refashion: t-shirt toddler dress

I’ve got way too many pictures for this little refashion, especially because it was just a practice project. I bought this shirt because I liked the embroidery on the front and back. You’ve gotta love fabric that comes already embellished!

t shirt toddler dress

It’s loosely based on this Simplicity for Kids pattern. I say loosely because the pattern didn’t really cooperate with the embroidery. Not only that, but the shirt was crooked! There was more pink fabric on one side than the other.

t shirt toddler dress

I used the 3T size, because that’s what Bella is mostly wearing these days. It turned out a little big.

t shirt toddler dress

I’m still trying to work on two skills: sewing knits and using my rolled hemmer foot. My seams are still a little wonky, but they are improving.

t shirt toddler dress

Here’s the awesome thing, though. When I was taking these pictures, Bella asked me what I was doing. When I told her I made her this dress, she grabbed it and said, “Thanks, Mommy! I love this dress! I love it!” Then she rolled it up in a little ball and began to hug it.

t shirt toddler dress

It wasn’t until she tried it on that I realized how big it was. She told me it was fine. I’m hoping she’ll grow into it before the end of the summer. (Please excuse the post-quiet time crazy hair.)

t shirt toddler dress

refashion: I’ve been collecting cute t-shirts to turn into dresses. This one was from a church garage sale. Most of them are from 99 cent days at Goodwill. Pattern was also from Goodwill. It goes up to size 8!

project to do: rugs

We have a sisal rug as a door mat that we bought from Restoration Hardware more than 10 years ago. I love the look of sisal, but it’s a little expensive. I thought it would be easy to reproduce by knitting with sisal. I got a ball of it at the hardware store a few years ago. It’s still sitting in my stash. I’m just not motivated to knit a big rectangle with scratchy twine.

In the meantime, I found a natural colored rag rug at Target a few years ago on clearance for $5. They only had one. We’ve been using it by our garage door and it works fine, but I don’t really like the look of the tassels. I do like that it is softer than the sisal. It feels a little nicer in our kitchen area.

rugs

Then one day at a church sale (have I mentioned how much I love church sales?) I found three more rag rugs that matched ours. The colors are all slightly different, but they are in the same family. I got an idea. What if I cut the tassels off and added fabric trim. I get the look of my favorite rug, but softer and cheaper. (I got all three rugs for $1.)

I’ve washed all of them and I’m just waiting for a little bit of free time to dive into this project. I don’t expect it will take long, but I think there will be some hand sewing involved. I don’t know about putting these under my presser foot, even if they do fit.

refashion: Refashioning isn’t just about making over your clothes. Try refashioning items for your home, too. Sometimes the best way to find the perfect accessory is to make one yourself.

wardrobe refashion: green cardigan

green cardigan refashion

These flowers and buttons make me so happy! I am just in love with this cardigan refashion.

I found this Talbot’s sweater at a church garage sale. It was in really nice condition. The button bands were even backed with grosgrain ribbon! I knew right away this would be be a summer cardigan and I had everything I needed in my stash.

green cardigan refashion

The original sweater looked kind of sad. The buttons were nice, just too heavy for the knit fabric. (I’ve saved them for another project.)

green cardigan refashion

The tabbed sleeves were a bit much. They needed some brightening and lightening up. This is definitely a case of less is more. Here’s what I did:

  1. Removed all of the buttons and threw it in the wash. Let it dry flat.
  2. Cut off the tabbed cuffs and made 3/4 length sleeves. (Note: I sewed two zigzag seams above and below my cut to keep the pieces from unraveling.)
  3. Made some trim with my bias tape maker and stitched it over the raw sleeve edges.
  4. Sewed on new buttons.

green cardigan refashion

This is a fast and easy way to update outdated sweaters. I may even take a look at the sweaters in my closet and see what I can do to brighten them up, too!

refashion: Sweater came from church garage sale. Floral fabric was from my “free” stash. Buttons from a thrift store score.

wardrobe refashion: comfy shorts

Looking for the Sew, Mama, Sew giveaway? Click here!

comfy shorts refashion

Does every guy have a pair of these? These are T’s comfy shorts. He has literally worn them threadbare. My attempts to replace them didn’t really work. They either didn’t fit right or didn’t have pockets. I think he bought these when we were dating. It is past time for letting them go.

comfy shorts refashion

I found this pair of really big sweatpants at a local church sale, and now that I’m refashioning, I figured I can make new comfy shorts! I tried to just trace around them, but the front and back panels were two very different sizes, so I had to deconstruct them. It was a very delicate operation.

comfy shorts refashion

I am really impressed with the results, if I do say so myself. They turned out much more professional looking that I would have thought. (Pat myself on the back!) They also fit well and T approves!

Sewing knits has always frustrated me, so to prepare for this project, I got Wendy Mullin’s Sew U Home Stretch from the library. I used an overlock foot for the inside seams and a walking foot for the hem. Both worked really well.

I think with the small amount of sewing with knits that I do, I really don’t need a serger. It’s not like I’m going to be making t-shirts and comfy shorts for the whole family. I am planning to make some sweats for Bella with the leftover pants legs, but will wait until closer to Fall to measure her.

wardrobe refashion: pants to skirt

I finished the refashion of those denim pants that made me look like I was waiting for a flood. It was much easier than I thought. I have a pair of khakis that are the same style. I think I’m going to to take some pics next time and write up a tutorial.

jeans

jeans

jeans

refashion: sewing a cute skirt is a great way to transform out-dated pants so you can continue to wear and enjoy them.

how to sew a placemat zipper pouch with only four seams

zipper pouch tutorial

I found this cute Orla Kiely placemat at Target a few weeks ago and wanted to make something quick and easy for my knitting. Because the edges are already finished, I only needed to sew four seams. If you want a gusseted pouch, you can sew two more seams. Either way, it’s a very fast and easy project.

zipper pouch tutorial

Materials
a placemat (mine was 14 x 17 inches)
a zipper that’s at least 14 inches
coordinating thread
heavy duty sewing needle
zipper foot

zipper pouch tutorial

Using your zipper foot, stitch each 14 inch side to the zipper, beginning and ending 1/2 inch from each side.

zipper pouch tutorial

With the zipper halfway open, turn the placemat inside out. Sew your side seams while holding the zipper out of the way. (This is why you left 1/2 inch unsewn on each side.)

zipper pouch tutorial

Turn the placemat right side out and you’re done! If your zipper was longer than 14 inches, you can trim the extra.

Optional Gussets

zipper pouch tutorial

Box your corners, but don’t trim. The triangles are small and won’t take up much room. Plus, you’ll have no raw edges that might unravel.

zipper pouch tutorial

Want to see more projects using Orla Kiely placemats? Thimbly Things made a cute purse with hers and linked to a bunch more adorable bags.

refashion: Using finished items like placemats make your projects fast and easy because your edges are already finished.

Thanks to Whip Up, Craft Gossip and One Pretty Thing for linking to my tutorial. Subscribe to my RSS for more crafty goodness!

my faux burberry scarf

flannel

Remember when I mentioned that some of that stash flannel was going to become a faux Burberry scarf? It was a really easy project and great for some instant sewing gratification.

  • The original piece was about 14 x 43 inches. I cut it in half and joined the 7 inch ends with a french seam.
  • I sewed the edges just as you would for a napkin or tea towel: fold all four sides 1/4 inch and press, then fold over again, press and pin.
  • Then I top-stitched the edges down. I mitered my corners, but don’t think it was necessary.

That’s it! Here are some online tutorials for a french seam (via Hoppo Bumpo) and mitered corners (via CraftStylish).

recycle: This would be a great way to save a flannel shirt from the landfill. If you have smaller scraps of flannel, just add a few more french seams.

formula one applique

Usually those words don’t go together. Most Formula One gear isn’t on the crafty side, but when has that ever stopped me? This shirt was a birthday gift for our dear friends’ son Wyatt. I was a little worried about whether or not it looked like a car when I was finished. I asked my daughter if she could tell what it was and she said, “A car! A race car! A Ferrari!” Mission accomplished.

ferrari applique

refashion: The t-shirt was new* from the craft store. The fabric, Heat-n-Bond, and embroidery floss were from my stash. The fabric matched the t-shirt a little too well. Adding the black embroidery floss outline really helped!

*Purchased before my pledge.